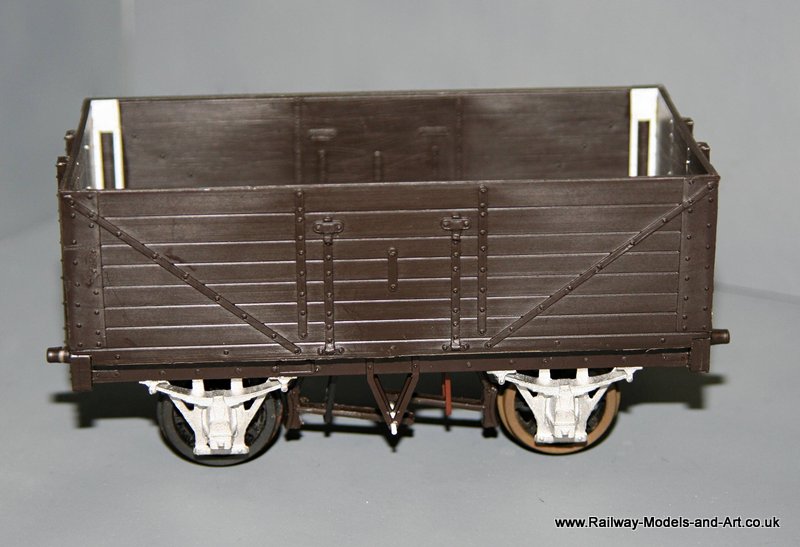
Category Archives: Open Wagons
Even more Brass origami
Turning wagon building into an art form – or is it just the photography…..
Aside from doing some detailing work on another Kirk coach, last weekends task was to add transfers to the various Parkside builds that I have been working on recently.
Starting with the LMS Beer Van.
And finally an arty shot that was created by accident as I was preparing the photos
A bit of Christmas Kit Bashing.
Colin Ashby PO Wagons – not bad for 31 year old kits……
A bit of ancient wagon kit history
At the Guild summer show I collected some kit’s that I had reserved with the E&T service.
In amongst them were some Colin Ashby PO wagon kits in between doing other builds I have slowly been putting them togther.
First a note from Colin that was included with the kits.
This makes the kits quite ancient history but that said the detail is pretty good for the age of them.
I have included some of the missing internal washer plate detail but quite a bit was there to start with on the internal sides.
I did have to scribe the floor detail though – which is a reverse of some Slaters kits which have planks on the floor but no internal side detail.
I also had to raid the spares box for the brake safety loops indeed not having enough I had to cut some from styrene sheet.
The brake levers and guards were one piece mouldings which I will replace with a mixture of Slaters/Parkside and Bill Bedford etched spares.
Overall I am quite impressed with them, the only minor discrepancies are that they seem slightly longer than the equivalent Slaters 7 plank wagon and the moulded buffer bases. The size I can live with but I am undecided about the buffers at the minute – the heads were plastic so either way they will get replaced.
NBR-LNER 4 Plank Open Wagon
Slaters LMS 7 Plank Loco Coal wagon ready for painting.
The final installment of the build of this wagon. The underframe details are a bit Heinz 57
The W Irons and V hangers are Exactoscale
The Axle boxes and Brake levers are Parkside
The brakes, guards and lever guard are from the kit.
The door banger is scrap etch from Parkside couplings
The extension timbers and bottom door levers are MMP detailing kit.
I also added some representations of the bottom doors to the underside to cover the exposed Exactoscale underframe – not that you can see it in the photos or when it’s on it wheels…..
Another Telford swap – Slaters LMS 7 Plank Loco Coal Wagon (Diag 2038)
This kit (Slaters LMS 7 Plank Loco Coal Wagon) was another of my swaps with a gent at Telford. It was one of the older kits in the grey narrow boxes and when I got it home and had a look the brass etches were missing (compensated W Irons/brake levers etc.) By pure chance a meet up with Graham Beare (of this and other parishes) on the Saturday evening saw me presented with an Exactoscale underframe to try under some cattle wagons that I am building (very slowly). It wasn’t suitable for the cattle wagons it being either too deep or not deep enough, I can’t remember now. Graham being the kind soul that he is told me to keep it anyway in case it came in for something else and it did immediately.
Having rather enjoyed the bit’s of details that I added to the brake van I decided to attempt to add the interior details that Slaters don’t include in the the kits. There is only one photo of these wagons in the Essery’s LMS Wagons volume 1 which is photographed at the end of it’s life when condemned. That said the text does refer the reader to wagons of similar diagrams which looked the same externally. One of these is a photo of a wagon involved in an accident which by good fortune gives a view of the strapping inside.
I started by using an Olfa compass cutter to measure and mark out where the planking lines were on the inside. Once marked these were deepened using an Olfa cutter to cut the grooves proper.
Then a few happy hours were spent cutting and drilling various strips of plastikard and gluing them to the wagon sides and ends before assembly. Once they were glued to the insides I drilled through into the wagon side and then inserted short lengths of plastic rod and allowed them to dry thoroughly before sanding them back to stubs.
Flushed with the success of this I then decided to add the steel strip around the top of the wagon using a similar technique but on the top I cut the plastic rod of flush to give the impression of a countersunk screw. To this I then added the capping retaining clips seen on wagons – I again once glued in place I drilled the wagon sides and inserted short lengths of plastic rod before finally assembling the sides and ends.