I haven’t had much time in the workshop for modelling recently as I was doing a little turning job for a friend. I have managed a little on the gun shield though.
I managed to get the mounting lugs made and fitted albeit they need a bit of adjustment in order for the barrel to fit between them.
Emhar 18pdr Gun Shield
I finally managed to find a photo from the rear of the gun that allowed me to work out where the crank handle that goes through the front of the shield at an angle goes to. – The right axle as looking from the rear of the gun.
Over on one of the forums that I frequent, it was suggested that I might add rifling to the barrel. Well not quite rifling in the barrel but perhaps equally mad.
From the photos of the real thing I note that the wheels have brass hubs. Nothing unusual there you might think but unlike most hubs etc which have hexagonal collars for tightening with a spanner these have octagonal heads. Now I have a hex collet block and a pin vice which at a pinch cut be brought into service but they would still only have six sides. Again I could have drawn them up and had them 3D printed then painted them with brass paint and job done.
However on one of my favourite machining YouTube channels the guy who does some amazing things uses a “5C Spin Indexer” For those that are not familiar “5C” is a type of collet. I don’t possess any 5C collets, so although I could make use of the functionality of a spin indexer the likelyhood of my buying one was very slim. Then some time ago I discovered that Arc Euro Trade the machinery omany that I bought my mill from stock a 5C spin indexer that has an ER32 collet adapter. Now I don’t have any ER32 collets either but I could see me getting more use from them as they are much more flexible in use than 5C collets. With 5C collets you pretty much have to have a separate collet for every size whereas ER collets usually have approximately 1mm range so a 10mm ER collet would Hold stock from 10mm diameter down to 9mm diameter so you need less collets to cater for a wide range of stock sizes.
Having said all that the 5C/ER32 spin indexers were still getting on for £200 so I couldn’t justify buying one. Then just after Guildex I got a sales email from Arc reducing them to just over £130 so having not spent up at Stafford I took the plunge. I still didn’t have an ER32 collets but my son bought me a set for my birthday.
To get it to mount on my mill table I had to mill a couple of slots to accommodate the width of the T slots but that done I was able to give it a test run yesterday. – The delay in getting to it was working out how I might hold it to actually cut the slots.
That done I gave it a test run on some 3mm brass rod. Unfortunately I hadn’t noticed the hole in the end which precluded me from using it for one of the hubs.
Since my last post on Saturday I have made a bit more progress. As I mentioned I wasn’t too happy with the way that I had done the ‘hinges’ principally because the gap in them was too large but also because I had an itch to try to make them articulate.
I started on the bottom section because that was where the the gap between the two plates was greatest. I took the plunge and cut off all the lower sections of the hinge leaving just a small overhang behind. Then I cut some 2mm lengths of microbore brass tube and soldered them under the overhangs of the remains of the hinge plates. Then I measured the gaps in between and cut and fitted some more lengths of tube in between these were nominally 10mm but since I didn’t get the 2mm pieces exactly perfect they had to be custom fit in to each gap.
Then I fed a length of 0.4mm wire through all the lengths and tack soldered the longer lengths to the centre section of the shield.
18 Pounder Gun Shield Parts18 Pounder Gun Shield Parts
As reported elsewhere, I have been attempting to catch up with a few unfinished projects, some of which needed painting. When I was getting set up to paint I opened my spray booth door and the 18 pounder was sat there on the turntable awaiting paint.
So in amongst the railway wagons I also made a start on painting the gun.
Emhar 18 Pounder Gun
I confess that it was at this point where I thought sod it and painted the supplied gun shield. Once painted I couldn’t live with the moulded on rope and set to with a diamond ball tool in the Dremel to carve/grind it off.
Emhar 18 Pounder Gun Shield
I blew it over with paint but ultimately I decided that I couldn’t live with that either, so back to plan A and scratch build a replacement.
Those of you who have seen my post on the rivet setting tool, will now know what I need all the riveted strips for.
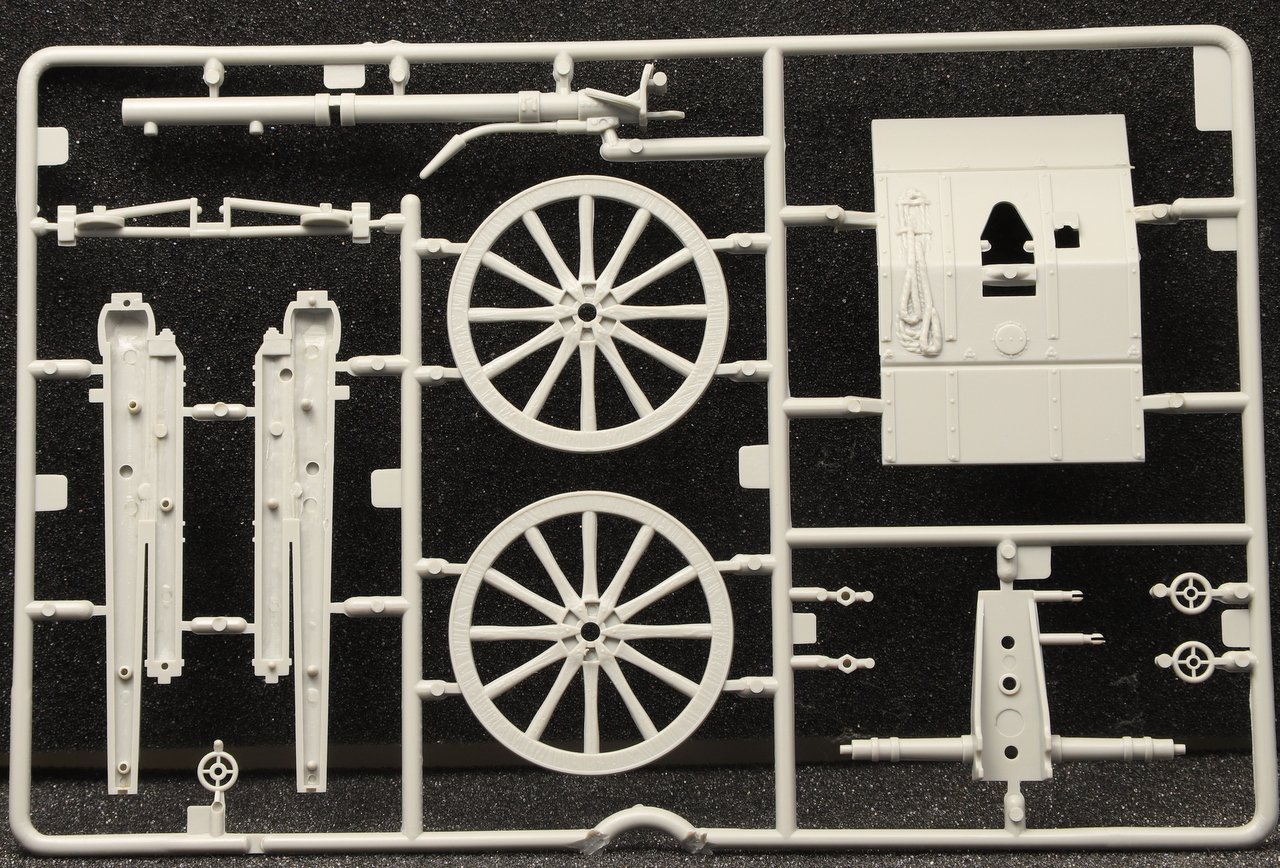
After updating the Princess Firebox my thoughts turned to some actual modelling and I decided to build the next field gun. Another cheapo kit from Emhar (I also found out that Emhar are part of the Bachmann group so not too far away from Railways after all). This one cost a little more at £12 but still good value in my opinion.
There are only 10 parts to the gun itself (there are 3 crew members provided too).
Emhar WWI British QF 18 Pounder Field Gun – Sprue FrontEmhar WWI British QF 18 Pounder Field Gun – Sprue Rear
This one comes with hand wheels so no need to make them.
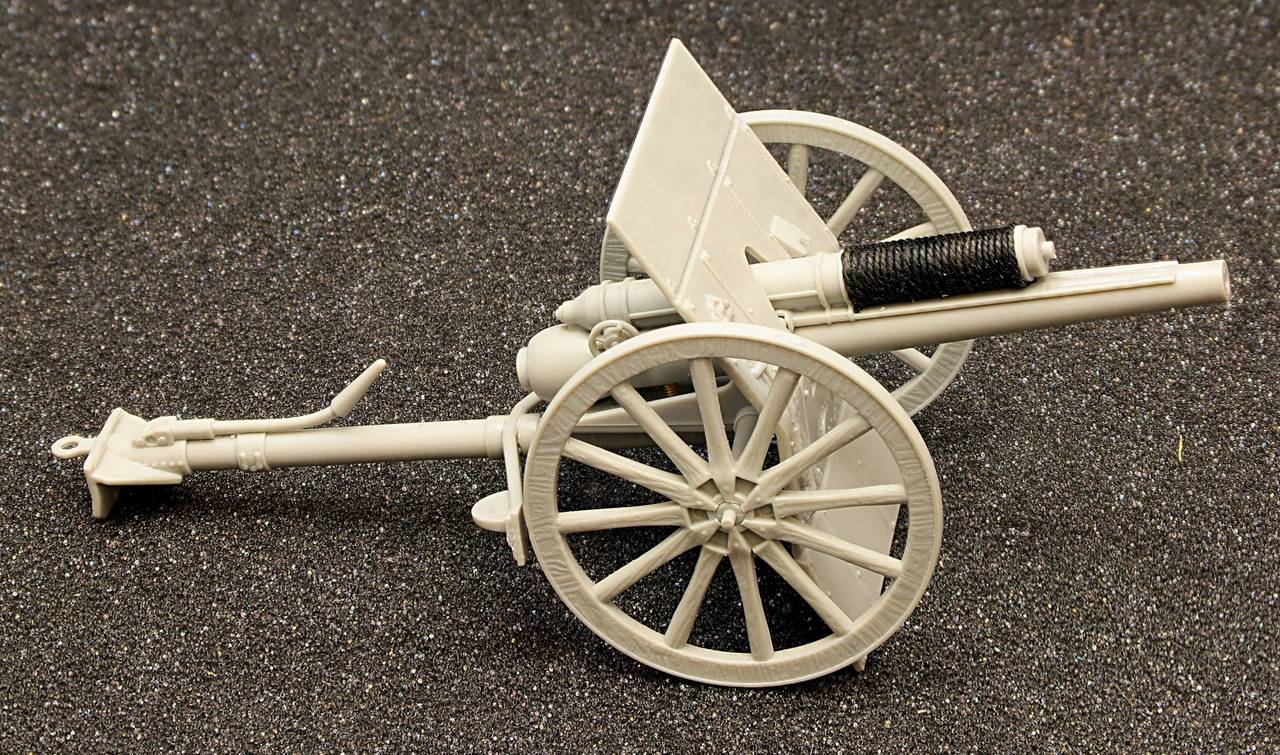
Construction was quite quick and besides cleaning up a bit of flash there weren’t too many improvements that I could make.
I cut off the pin which represents the elevation screw and added short length of 10ba stud an improvement that can barely be seen once assembled but I know it’s there. The only other improvements were adding cord to the recoil tube to represent the rope that is visible on most photos that I have seen and to cut a representation of the recoil slides. these are just moulded as a flat plate.
Emhar WWI British QF 18 Pounder Field Gun – Recoil SlideEmhar WWI British QF 18 Pounder Field GunEmhar WWI British QF 18 Pounder Field GunEmhar WWI British QF 18 Pounder Field Gun
I also drilled out the barrel to scale size.
I did consider trying to remove the moulded rope from the front of the Gun Shield but I wasn’t sure that I could get it off and replace it without making a complete mess. So I will endeavour to improve it with paints.
Emhar WWI British QF 18 Pounder Field GunEmhar WWI British QF 18 Pounder Field GunEmhar WWI British QF 18 Pounder Field Gun
One thing that I am struggling with is the lower plate of the Gun Shield. As supplied it seems to big (Unless you bend it forward as I have in the photos, it stops the barrel from seating on the carriage). All the photos except one, that I could find, show the gun without the bottom plate of the shield. The one that I have is taken from the rear and to one side so although the bottom plate is in place it’s not easy to see it if is indeed a bit shorter than Emhar have portrayed it.
I have done some oil pin washes and I am finally calling this one finished, or at least until I get around to building a limber for it.
Emhar WWI FK96 German Field Gun – FinishedEmhar WWI FK96 German Field Gun – FinishedEmhar WWI FK96 German Field Gun – FinishedEmhar WWI FK96 German Field Gun – FinishedEmhar WWI FK96 German Field Gun – Finished
Next up will be the British WWI equivalent the 18 Pounder QF which is another cheap and cheerful Emhar kit which I hope that I can improve upon.
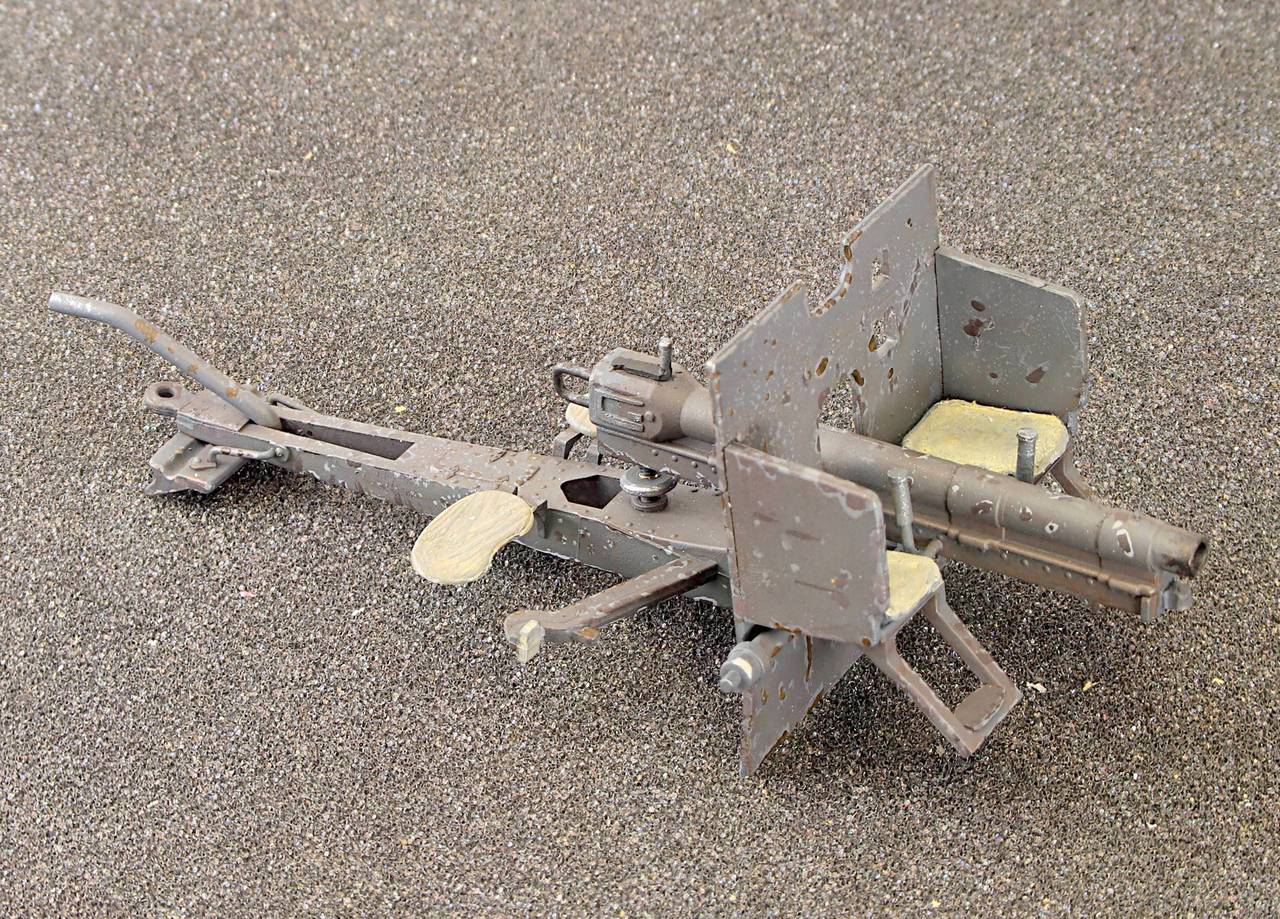
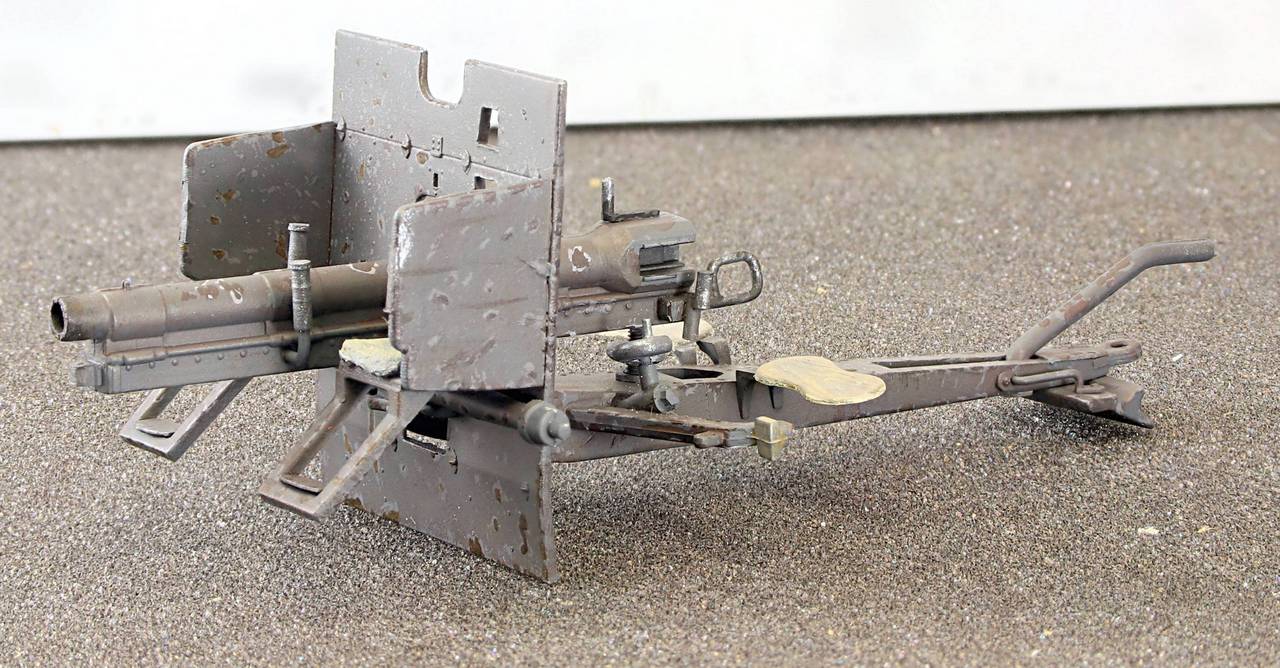
Since my last post I have been adding some chipping effects (another first for me, unless you include some miniature vintage signs that I chipped the edges of some years ago for railway diorama).
I still need to add pin washes with oils and some mud on the carriage and wheels.
Emhar WWI FK96 German Field Gun Chipped and DirtiedEmhar WWI FK96 German Field Gun Chipped and DirtiedEmhar WWI FK96 German Field Gun Chipped and DirtiedEmhar WWI FK96 German Field Gun Chipped and DirtiedEmhar WWI FK96 German Field Gun Chipped and Dirtied
Emhar FK96 Field GunEmhar FK96 Field Gun
Still some way to go but I am happy with progress so far.
Last thing last night I managed to get a coat of home brewed Field Grey on it. I didn’t have any proprietary Green Grey (although I do have Vallejo Grey Green it looks far too dark being almost black) so I used Vallejo Air Dark Sea Grey with a few drops of Vallejo Air Olive green to add the green tint to it.
The wheels are just push fitted for now.
Emhar WWW! FK96 German Field Gun – Field GreyEmhar WWW! FK96 German Field Gun – Field GreyEmhar WWW! FK96 German Field Gun – Field GreyEmhar WWW! FK96 German Field Gun – Field Grey
A bit more done at the field gun and it’s ready for paint now I think.
Photos of the real thing show a couple of levers at the front. so I added those from small brass turnings and rod. The one on the right (left as you look from the front) isn’t strictly accurate as it had a more complicated mechanism that it was attached to but I can’t make it out clear enough to models it.
FK96 Field Gun ready for paint
Next I made what I think is the trigger. Emhar had a representation visible in earlier photos but it was again placed on the centre line and a bit undernourished. It was also curiously hollow with an open side which I have represented from filed down microbore tube.
FK96 Field Gun trigger mechanism.
Last but not least on the left of the carriage behind the shield was a hand wheel, presumably somehting to do with adjusting the sighting.
I turned one up on the lathe and I was so pleased with it I decided to replace the ring of plastic that I had added to the elevation screw with a proper turned wheel tapped 10ba.
Hand wheels and mountings
Shown with my giant sized 5 pence piece for scale…
Hand wheels and mountingsHand wheels and mountingsFK96 Field Gun ready for paintFK96 Field Gun Ready for Paint
Since taking the photos I have added some brass chains to the rear of the gun shield.