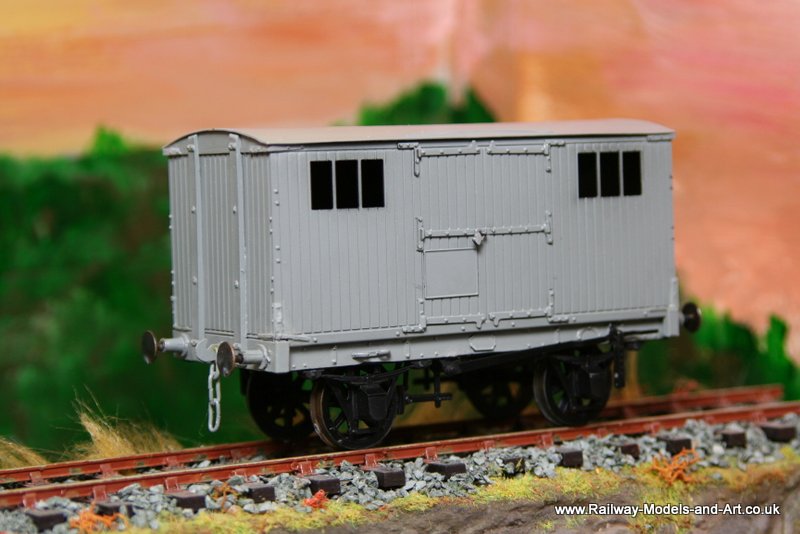
Another one of the weathering bench – the NBR Avery Tool van from Dragon Models.
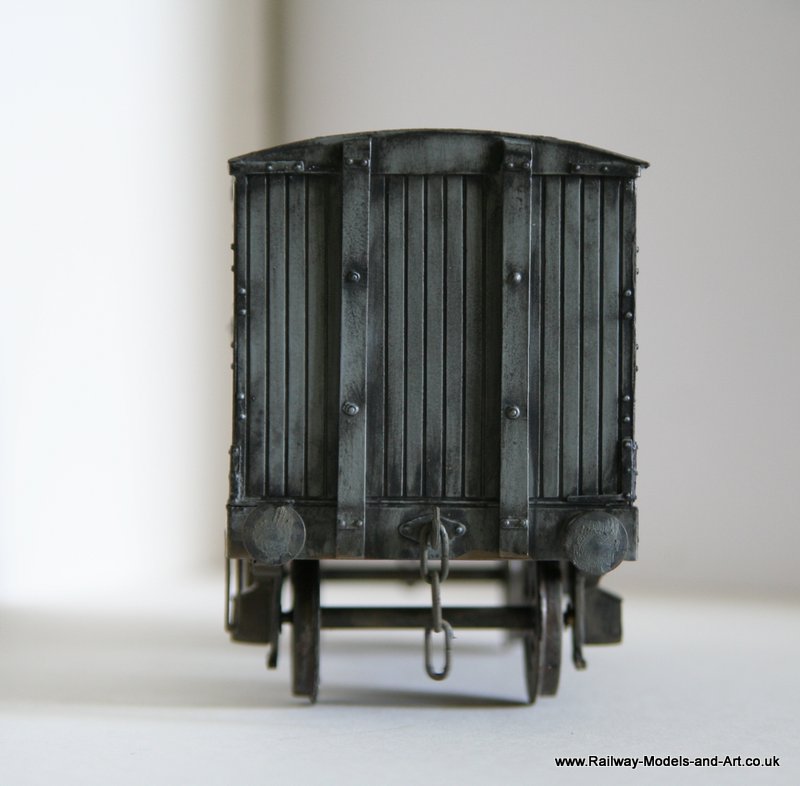


Another one of the weathering bench – the NBR Avery Tool van from Dragon Models.
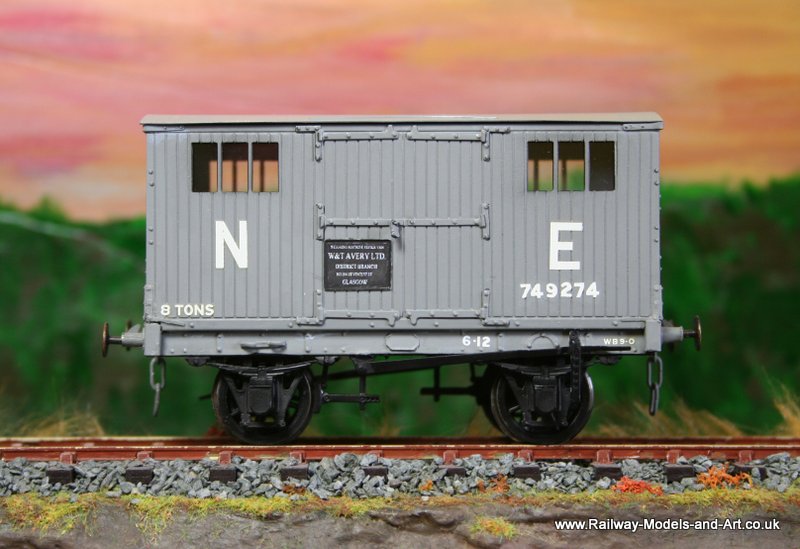
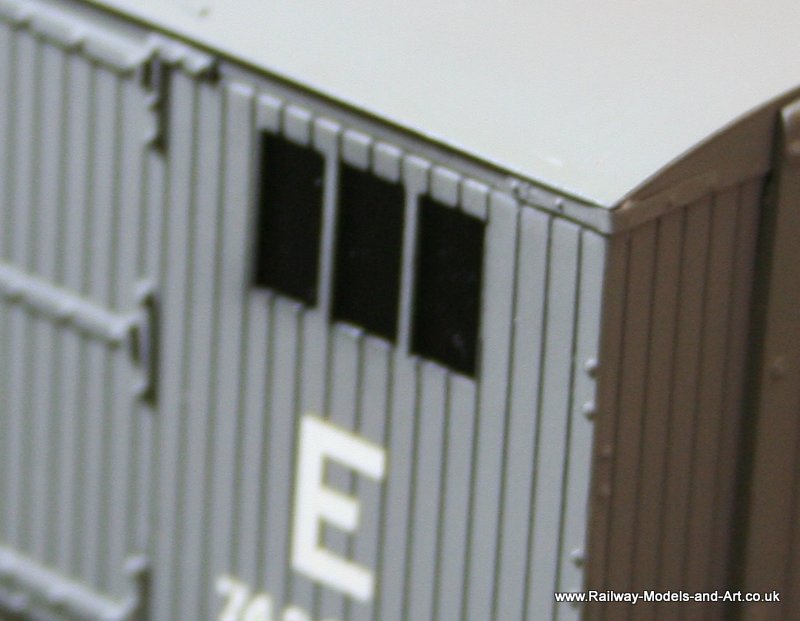
A session yesterday morning saw the last of the transfers on the Avery Tool van and some glazing installed – I used microscope slides for this – one slide cut in half did one side.


Lastly a not very successful attempt to show the glazing in place.
In between work on the fish truck the Avery tool van has been progressing through the paint shop.


The CCT has also had some paint too, but it isn’t quite as advanced due to one of the pipes dropping off and needing to be resoldered……..
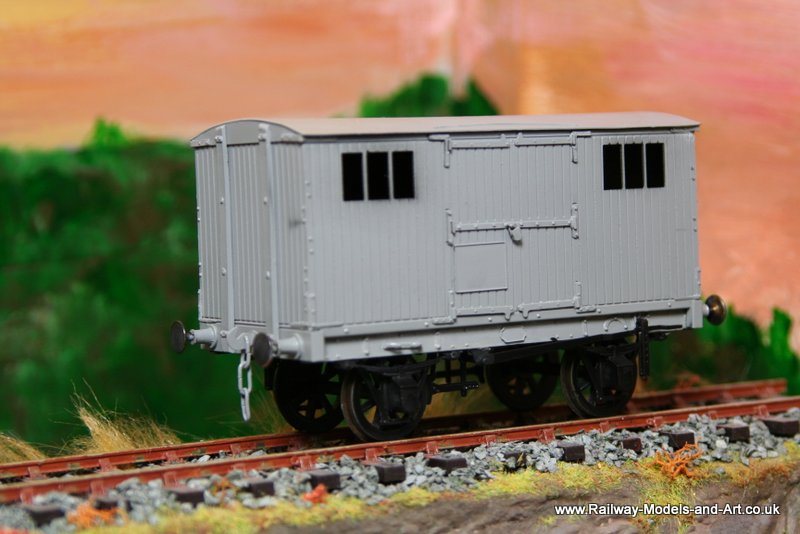
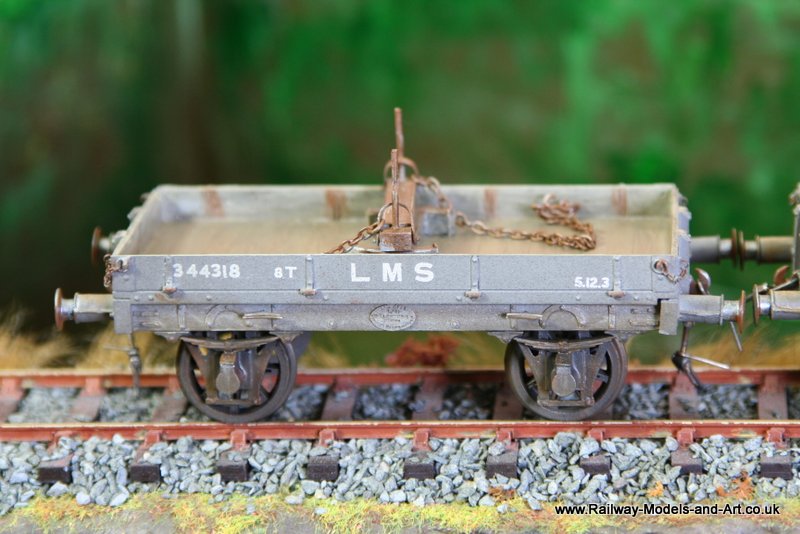
A session last night saw the tool van finished. Strictly speaking I think that it should have screw couplings rather than three links but I didn’t have any in and I can always change them later.


In the instructions George makes mention of a chain and peg to hold the doors shut. I reasoned that a tool van might have something a bit more secure so I decided to make a couple of padlocks. This proved easier to say than to do – I had just nicely filed them to shape when one flew off into space so I put the other on one side in disgust. A couple of days later after turning the workbench and floor upside down I noticed the missing lock caught in the hem of my apron….. I then had a couple of unsuccessful attempts at soldering a loop on
the top.
But when I had finished adding the last bit’s and pieces last night I decided to have one last attempt before abandoning the idea and to my surprise and delight each one soldered without problem.

Just to offer a little more background on these vans, as I understand it four of these vans were converted from the standard 8ton Jubilee Van for use by Avery’s in order to service and maintain the many weighing scales in use at stations on the NBR. According to the information supplied with the kit they had workbenches, store cupboards and even a rivet stove installed – I am a little intrigued by the latter because there is no chimney. Back when I was a butcher we used Avery scales and they were maintained by Avery – sadly the guys came in an Escort van rather than an NBR Jubilee:) Here’s where I got to on Thursday night.


I was away on holiday for most of October so the bench has been a bit quiet. It was my birthday while I was away and Chris bought me some wagon kits. This meant (and I am sure it wont come as any surprise to some) that when I got back instead of finishing the CCT I started one of the birthday wagons – This is another from Dragon models Celtic connection range (former Majestic models). in the form of an Avery Tool Van
I haven’t taken any photos until now as the construction was similar to the CCT. The one change that I have made is that I tried to make the roof removable using the same method as the CCT but I couldn’t get it to sit down properly and after trying re-rolling it a couple of times I gave up and soldered it on.
This is the state of play and I hope to have it on it’s wheels and pretty much finished with a fair wind tonight.


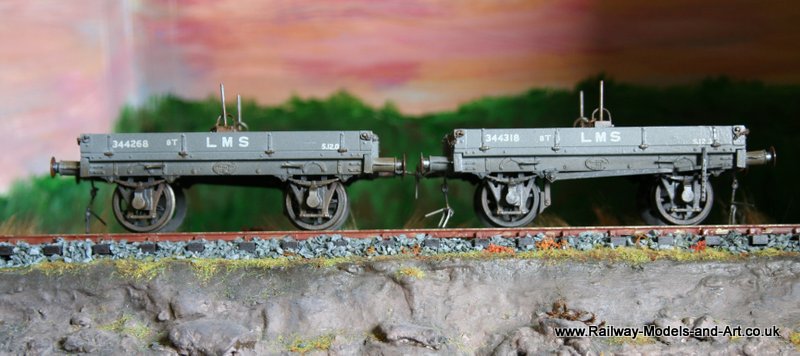
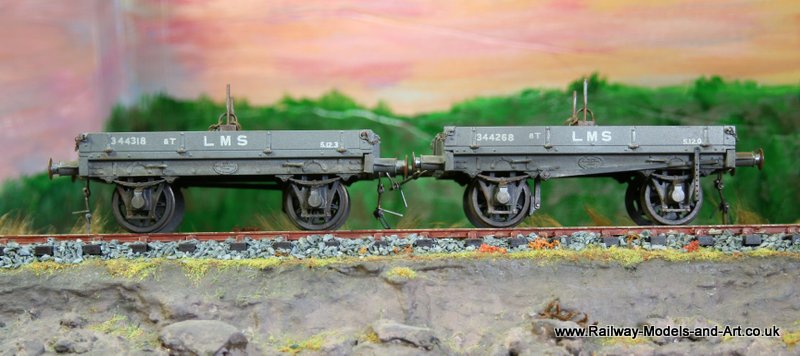
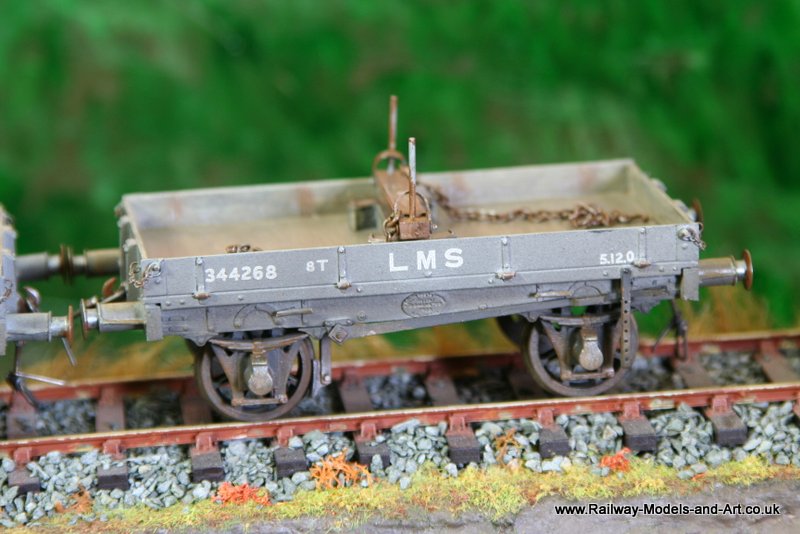
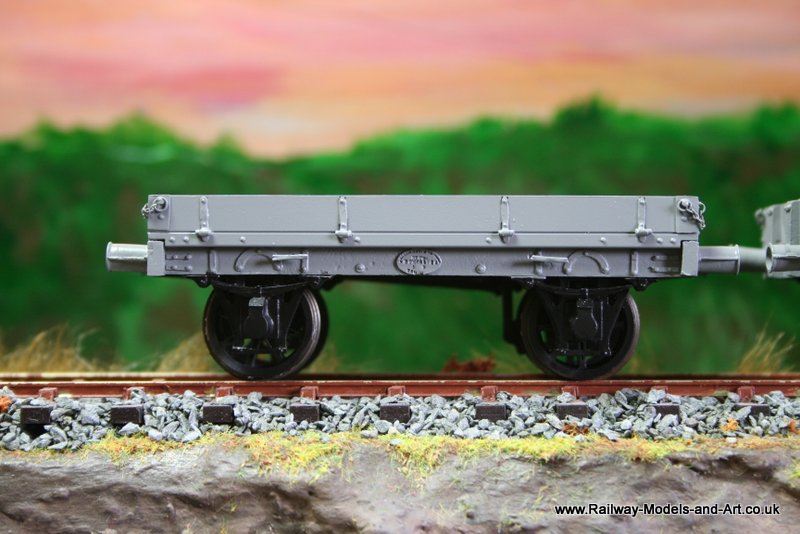
I had a small break from the CCT yesterday/this morning and did a bit more weathering on the Timber and Ore wagons. I then assembled them and took a few photos.


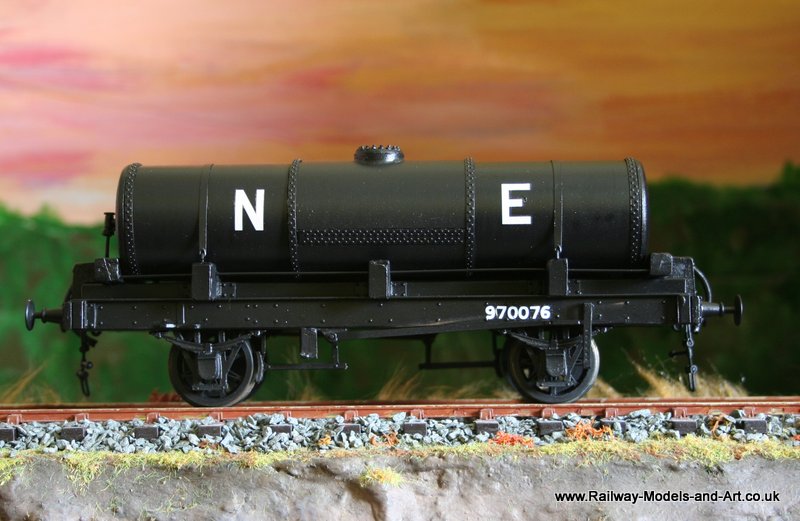
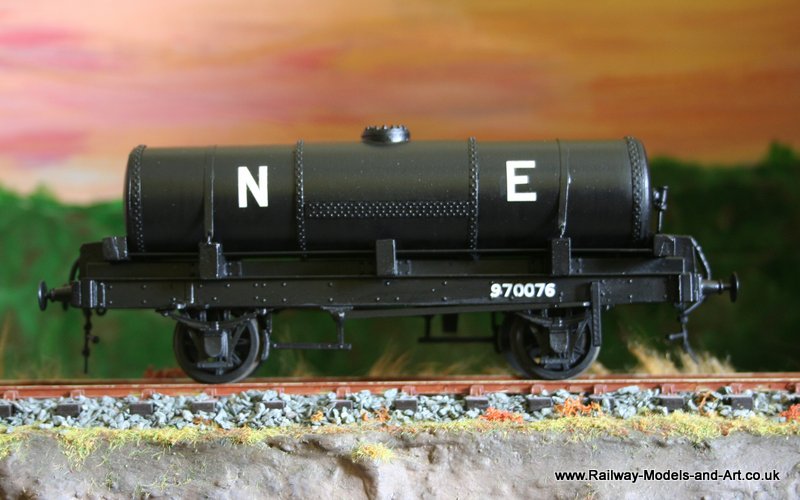
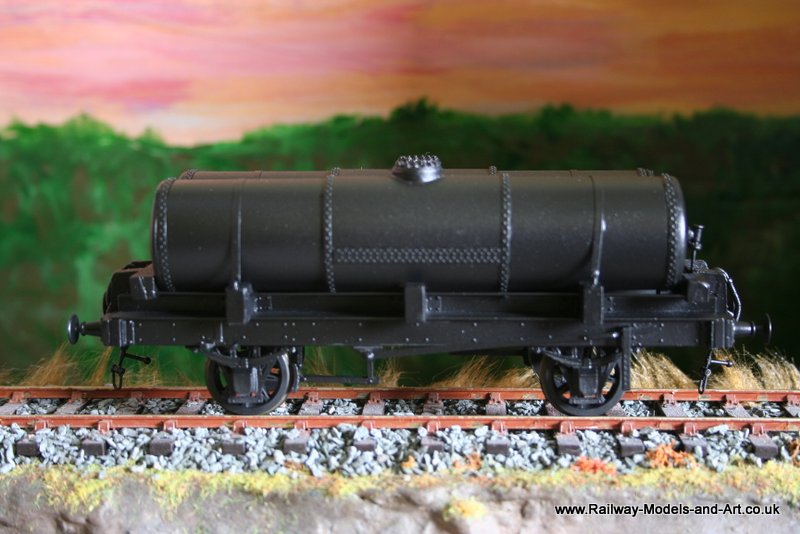
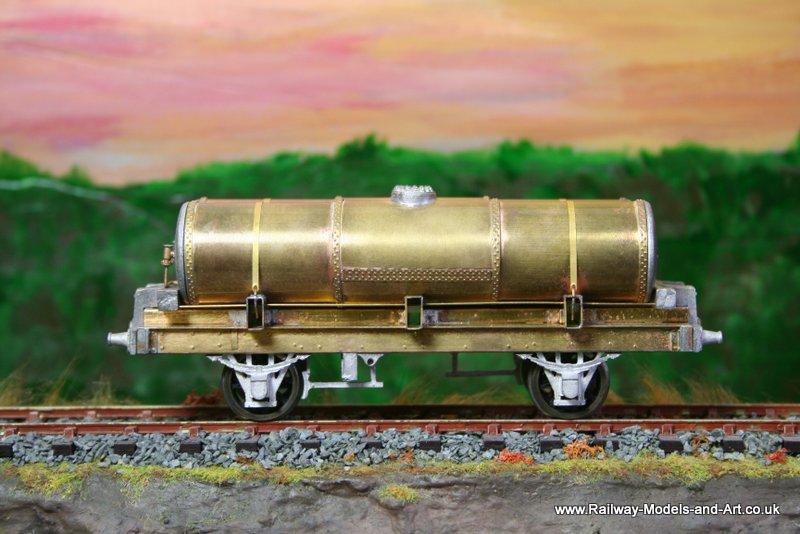
Here is the gas tank wagon after weathering – I have really struggled to get some decent photos that show the colours on this. Daylight seems to have washed it out to a grey colour when in reality it very much has an uneven brown cast to it.
All the photos I have in my LNER books show that gas tank wagons got very dirty but without exception (in the photos I have) the lettering is clearly visible.
My weathering mix was made up of the following Vallejo Model colour range, all diluted for spraying with Tamiya acrylic thinners.
Flat Earth
Leather Brown
Blue Grey
Black Grey
I started with a base of a more brownish colour and spraying from 8-10″ away so their was a bit of splatter giving texture as well as colour. Then I added more of the greys to the mix and went over it again. I used a small brush and meths to uncover the lettering before adding another light coat with the greyish mix to blend it in. I used some antique brass to paint the handwheels before the weathering, again easing back the gunge with a small brush and meths.


Still catching up on the week’s progress on various things another thing that I managed on Thursday evening before going out to start on the building was putting the transfers on the Gas Tank Wagon.
That’s another one ready for weathering – indeed it’s now weathered (last night’s endeavours!) but I need to have a look at it in daylight to see if am happy with it and to take some photos.
Stepping back to the Timber and Ore Wagons, I managed to get the transfers on them a bit at a time this week.


Next stop some weathering.
The thunder storms haven’t deterred me from getting the tank wagon primed, painted and varnished ready for it’s transfers. Thank heavens for an indoor vented spray booth.
I apologise for the quality of the photo, I carried it to my office in a cloth and it seems to have left some specks of lint on the tank sides that have caught the light in the photos but are not in visible to the naked eye in reality.


In hindsight perhaps I should have taken the photos while it had a flat matt finish……but you get the idea.
Yesterday saw the build of the gas tank wagon complete.
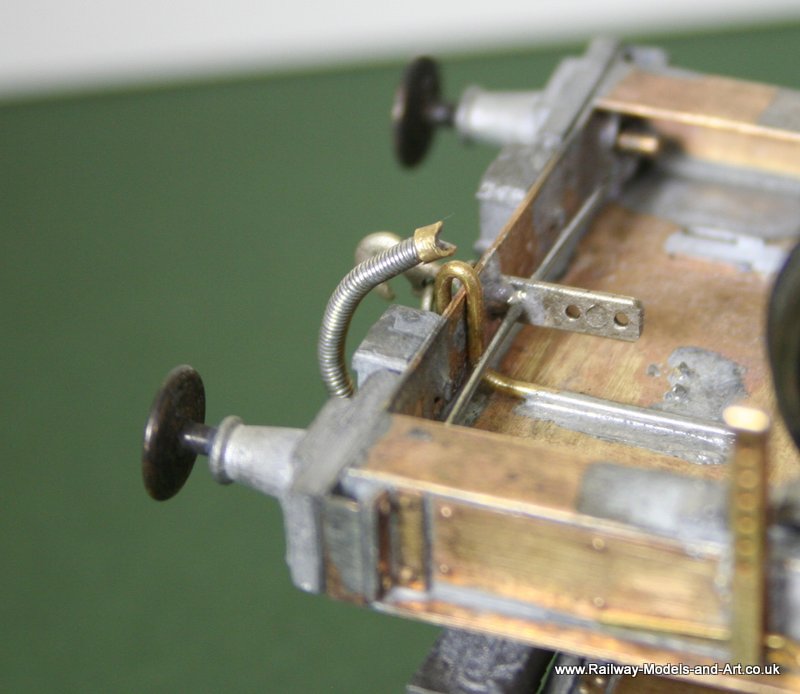
My clumsiness when fitting the finely cast horse hooks saw one of them break in half in my hand so I fabricated some more from scrap etch they don’t look as good as the cast ones but once under the paint and grime they will be almost unnoticeable.

I also made up some more vacuum pipes from 1mm brass rod bound with 28 gauge brass beading wire and some rings of scrap etch. this gives the advantage of being able to secure them firmly to the bottom of the wagon floor as well as making them a bit more robust when being handled.

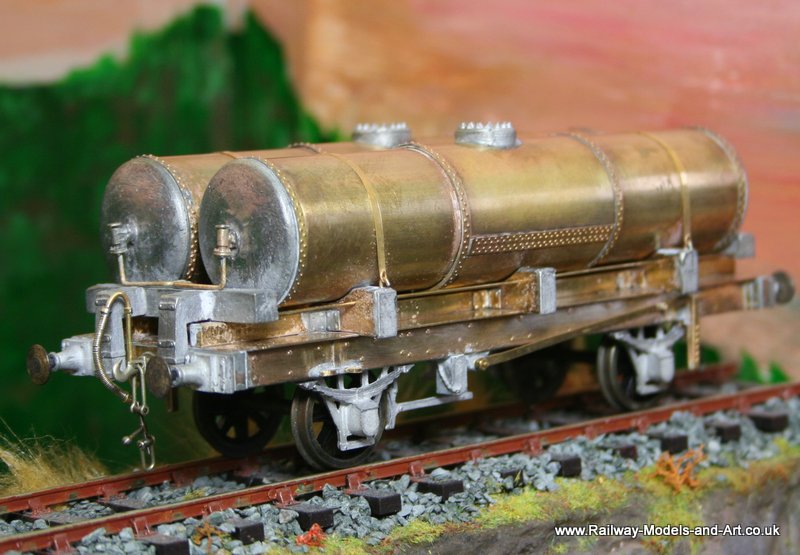
The following are both sides and ends as they stand.


A complete lack of any energy this week (as opposed to lack of mojo) has meant that I didn’t do anything further on the tank wagon until last night. This is where I had to do the first major deviation from the instructions. In the photo below the slots that you see in the bottom of the solebars hold the W Irons. The problem being that the flanges at the top of them are not deep enough to touch the underside of the floor and as they are, they don’t sit flush with the back of the sole bars either. This means that if you were to solder them to the underside of the solebars then the thin strip on the inside would make them very prone to being bent out of position with very little to anchor them to.
How I got around this was to solder four strips of scrap etch to the back of the sole bar and then solder the W Iron flange to that giving a nice solid fixing. I also found that I needed to file to points of the axle ends in order to make the W Irons sit upright without bowing outwards. 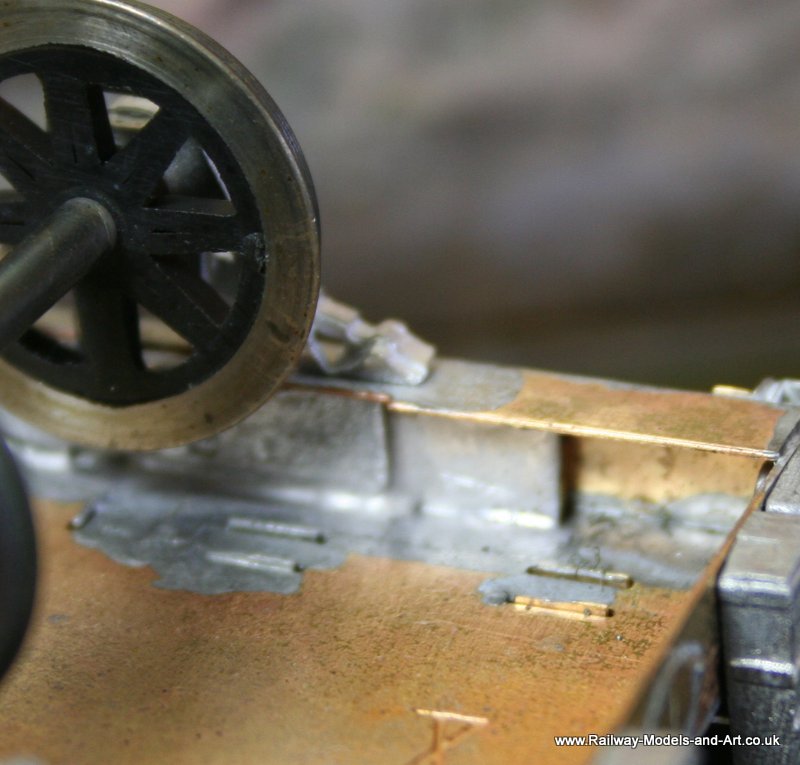 Once I had this sorted getting the other wheels on was straightforward. Lastly I added the brakes. Which unless I have missed something, just leaves the brake levers/guards, the ends of the cradles and the vacuum pipes before a good clean up.
Good progress has been made on the tank wagon over the weekend.
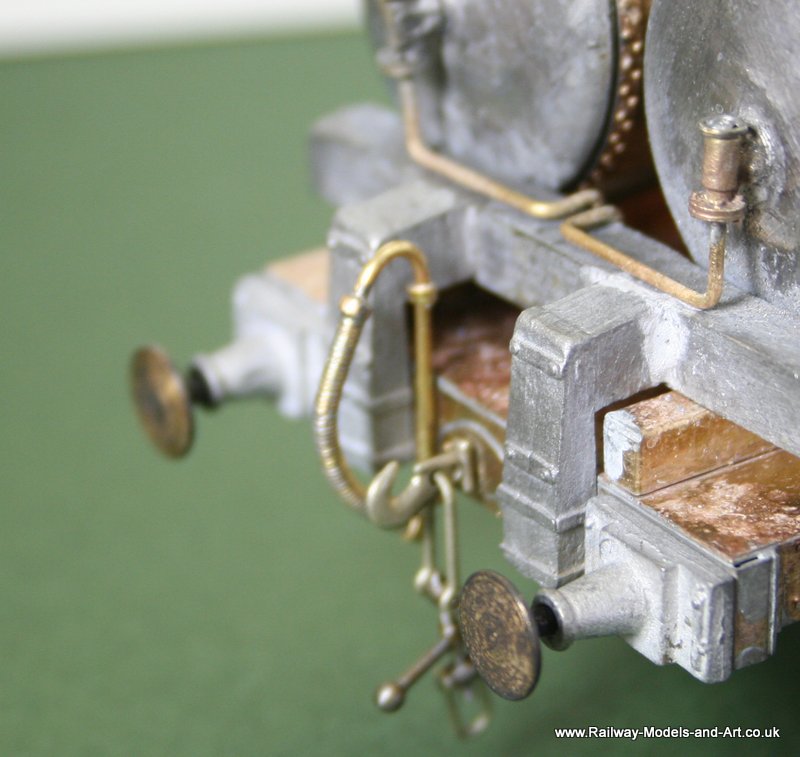
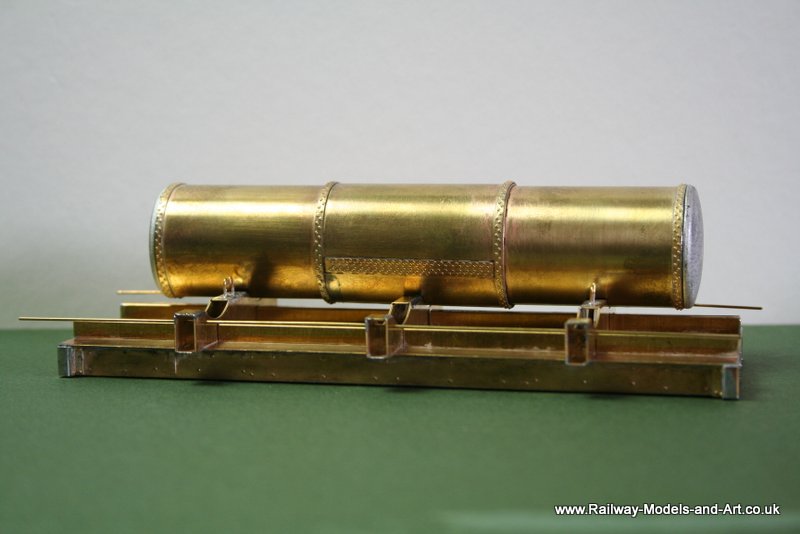
Everything went together nicely with the tanks held on in prototypical fashion via the strapping. The only bit I changed was the pipe fittings that come out of the ends of the tanks. There are nice castings supplied but I doubted that I could solder in a piece of rod for the pipes without melting the fine whitemetal tube so I modified a pair of Connoisseur clack valves – Once lost under paint and weathering they should suffice adn stand a bit more handling.
With a bit of luck I should have it on it’s wheels tonight.
Here are a couple of shots of where we are to date – it still needs some cleaning up though.


The last couple of evenings have seen a bit more progress on the gas tank wagon (so has this afternoon but I haven’t taken pictures yet).

The timber and ore wagons have been through the paint shop and are now at the transfer stage.
I had a little hiccup with the painting in so much as a large section of the pain on one side of one wagon came back of when I removed the masking. This is the first time that this has happened and I can only assume that I didn’t do something right….
Instead of being dismayed I got stuck in and repaired it. This was achieved very quickly with the use of a hairdryer to dry off the paint in between coats – it took longer to clean the air brush between coats than it took to redo the painting….


A busy week hasn’t allowed much time to progress this but I managed a little last night.
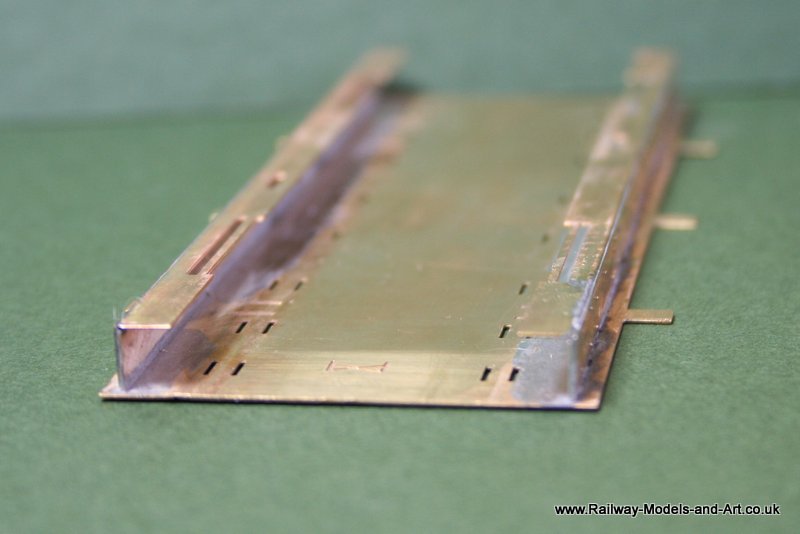
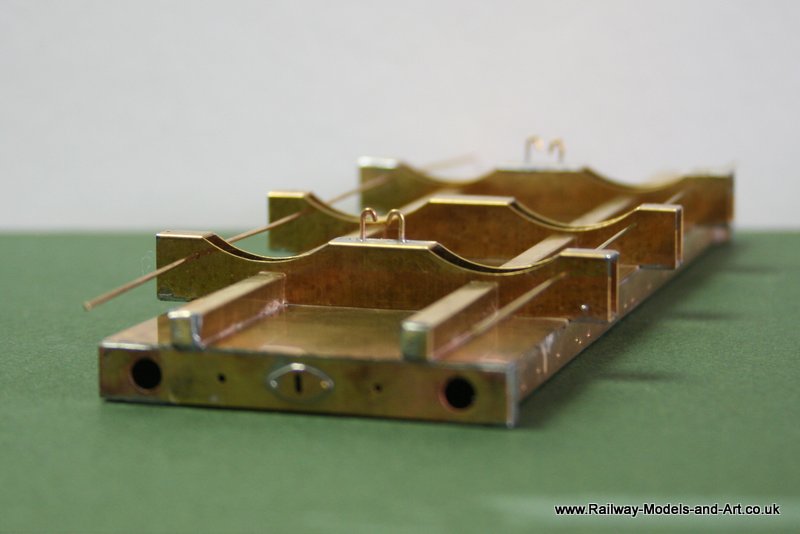
The solebar overlays went on like a dream.
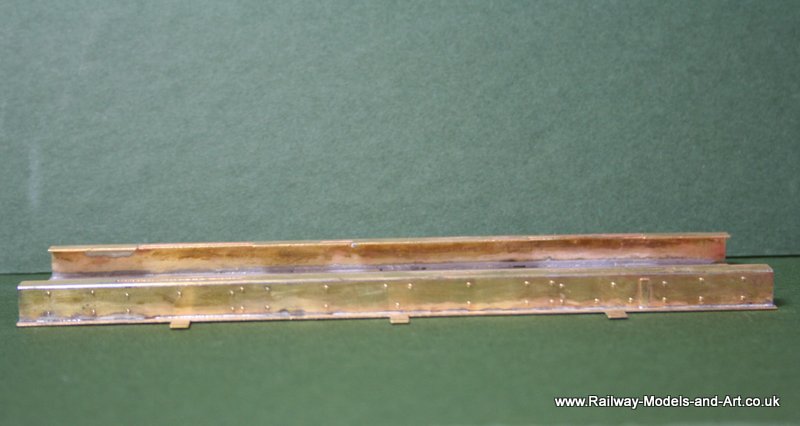
The challenge came when I got to soldering the solebars to the underframe. The underframe has a broken half etched line to show where it’s located but getting it to solder in an upright position tested my ingenuity. In the end a piece of rectangular tube backed up with a strip of scrap etch under the lip brought it vertical so I placed it under one end while I tacked in and then repeated at the other end before completing the seam.
A quiet day at home resulted in my getting the timber wagons into primer – two colours no less. I have read a few posts about people using black primer for underframes so I gave it a go along with grey for the bodywork.
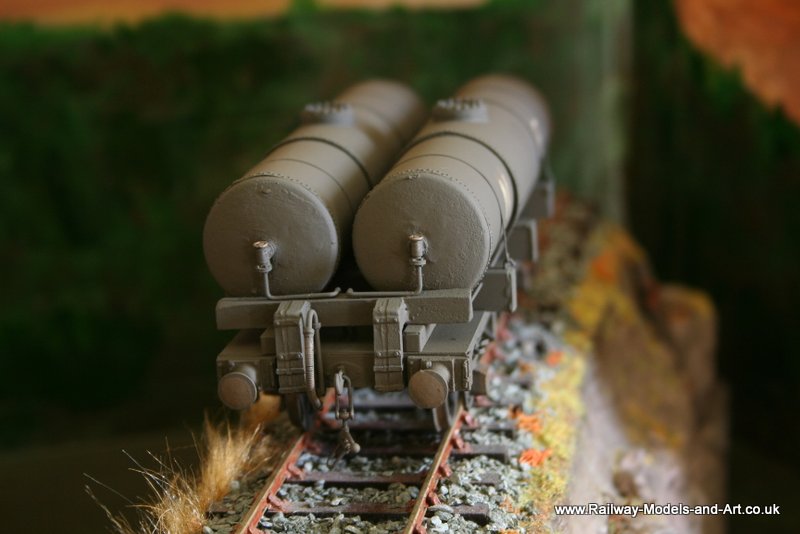
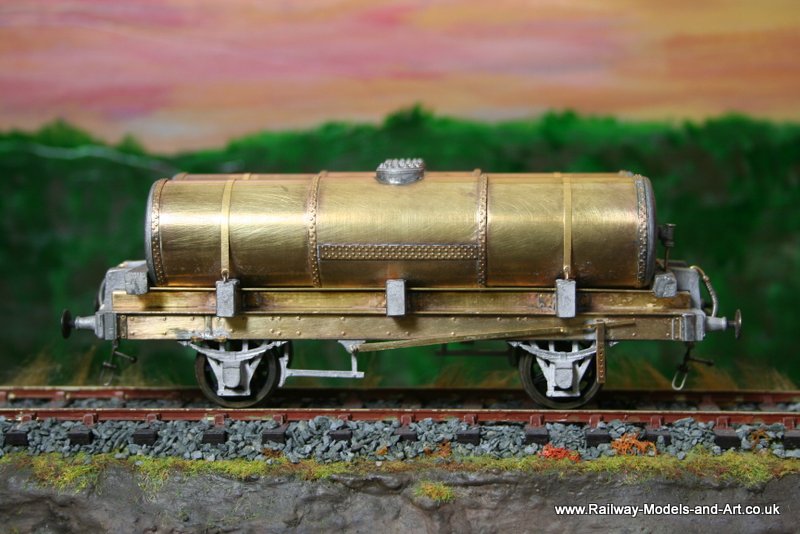
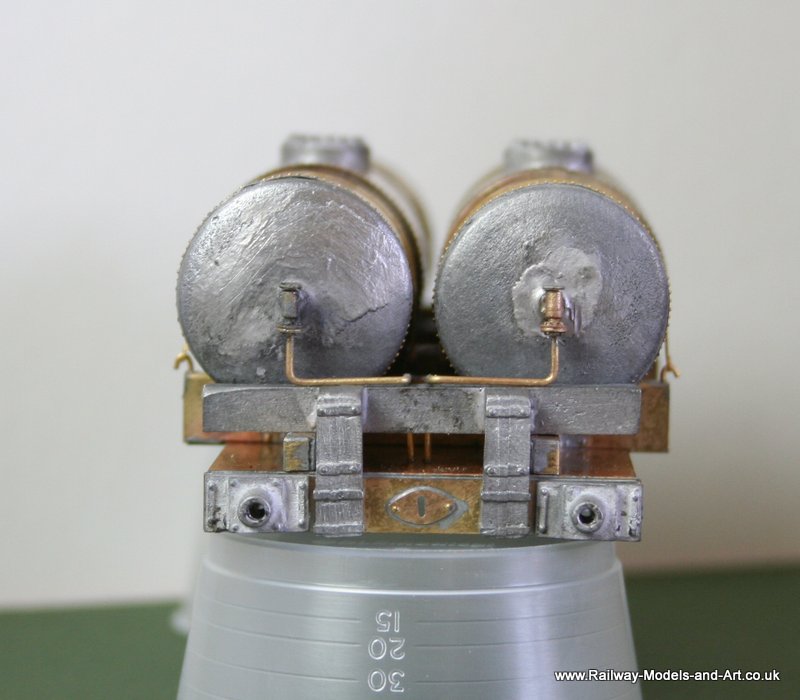
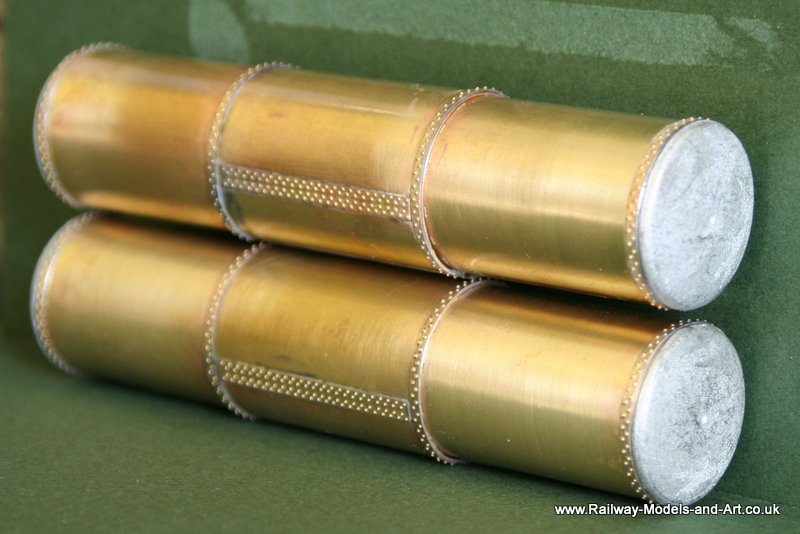
Then I made a start on the next one which is another Dragon kit. This one is the NBR/LNER ‘twin’ tank travelling gas wagon. I emphasise the twin because I have asked Chris Basten if he can supply another kit with an extra tank so that I can do a triple tanked version too.
This is another one that originated in the Majestic models stable and so far the tanks have made up very nicely. The only adjustment that I needed to make was on the outer tank wrapper which has two half etched edges to make a smooth seam. When I tried them the left too much of a gap between the wrapper and the cylinder so I cut of one of the half etches plus an extra 0.5mm this allowed for a much better fit and the slight overlap from the remaining half etched section is hidden under the tank.
What has come as a bit of a surprise based on the other former Majestic kits that I have built is that the bulk of it is etched (I had in my mind that the chassis was cast much like the 4mm SE Finecast versions that I built previously – perhaps that’s where the false idea came from….).

All the rivet strips are separate items giving a nicely reinforced appearance.