Another Telford swap – Slaters LMS 7 Plank Loco Coal Wagon (Diag 2038)

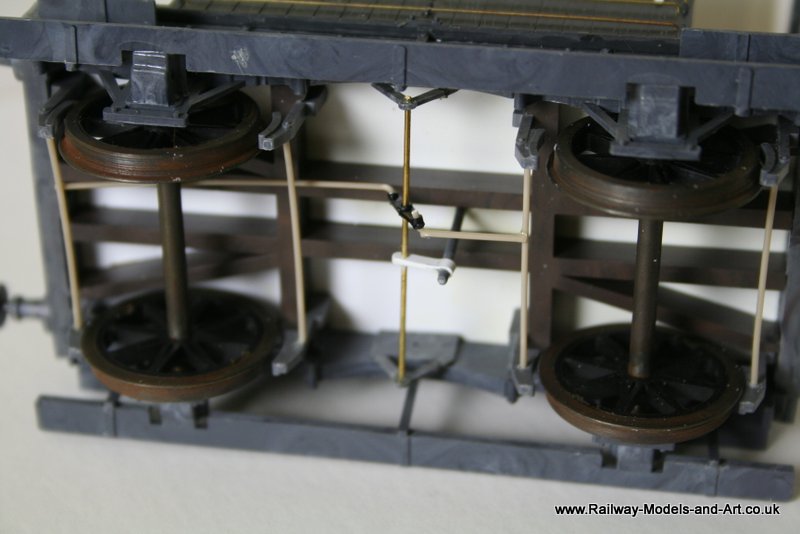
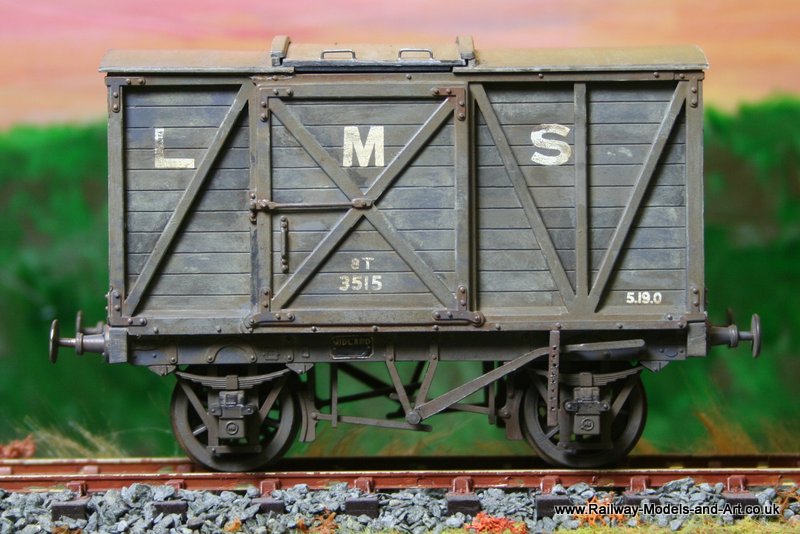
This kit (Slaters LMS 7 Plank Loco Coal Wagon) was another of my swaps with a gent at Telford. It was one of the older kits in the grey narrow boxes and when I got it home and had a look the brass etches were missing (compensated W Irons/brake levers etc.) By pure chance a meet up with Graham Beare (of this and other parishes) on the Saturday evening saw me presented with an Exactoscale underframe to try under some cattle wagons that I am building (very slowly). It wasn’t suitable for the cattle wagons it being either too deep or not deep enough, I can’t remember now. Graham being the kind soul that he is told me to keep it anyway in case it came in for something else and it did immediately.

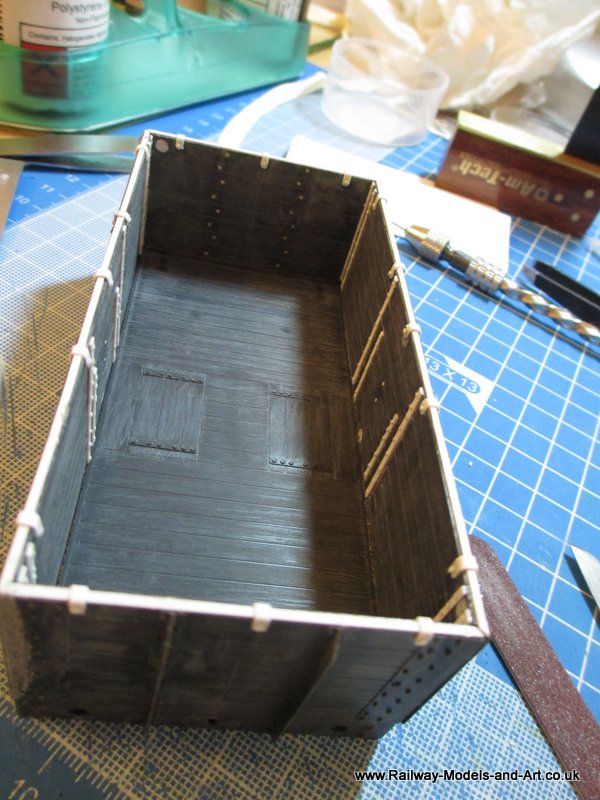
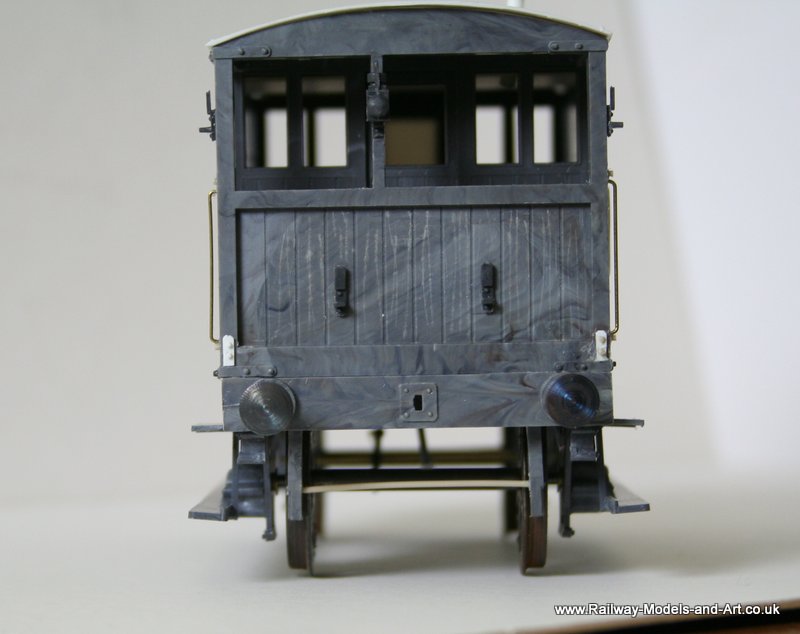
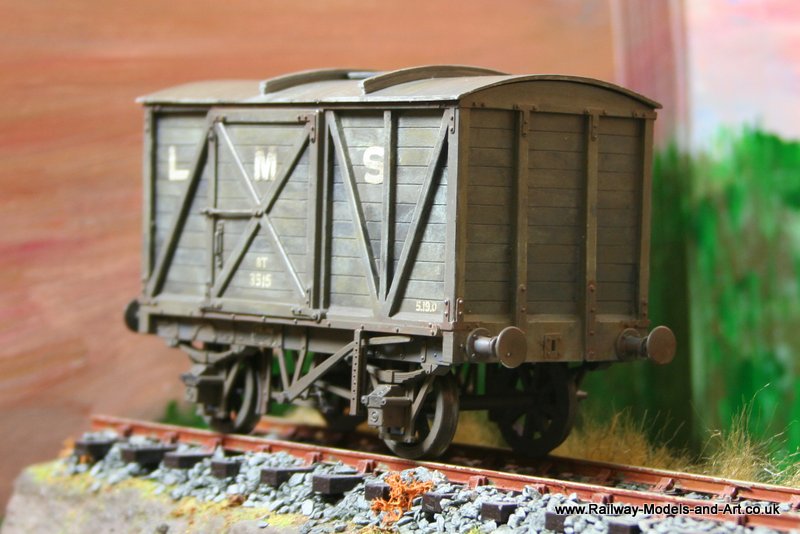
Having rather enjoyed the bit’s of details that I added to the brake van I decided to attempt to add the interior details that Slaters don’t include in the the kits. There is only one photo of these wagons in the Essery’s LMS Wagons volume 1 which is photographed at the end of it’s life when condemned. That said the text does refer the reader to wagons of similar diagrams which looked the same externally. One of these is a photo of a wagon involved in an accident which by good fortune gives a view of the strapping inside.

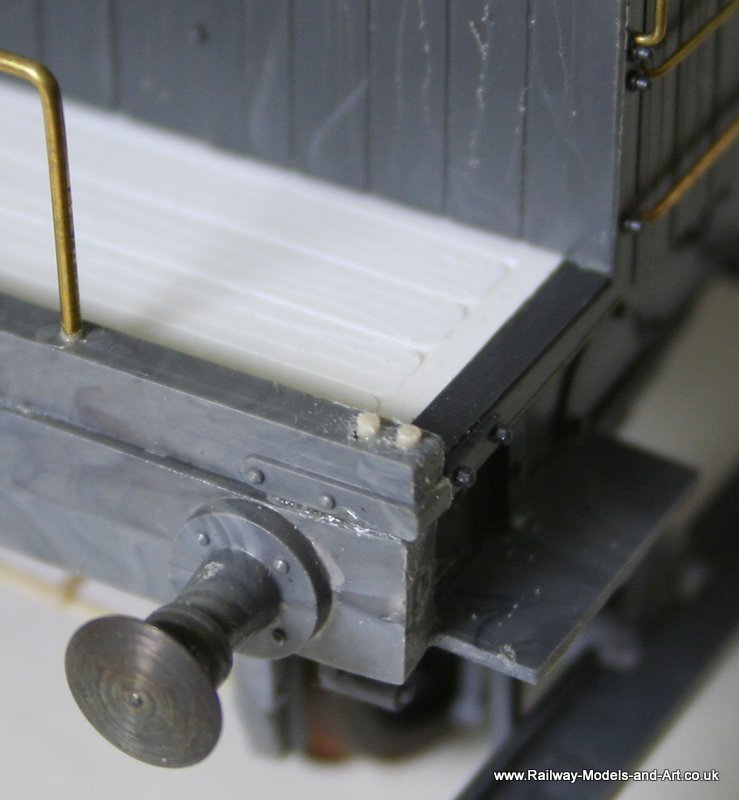
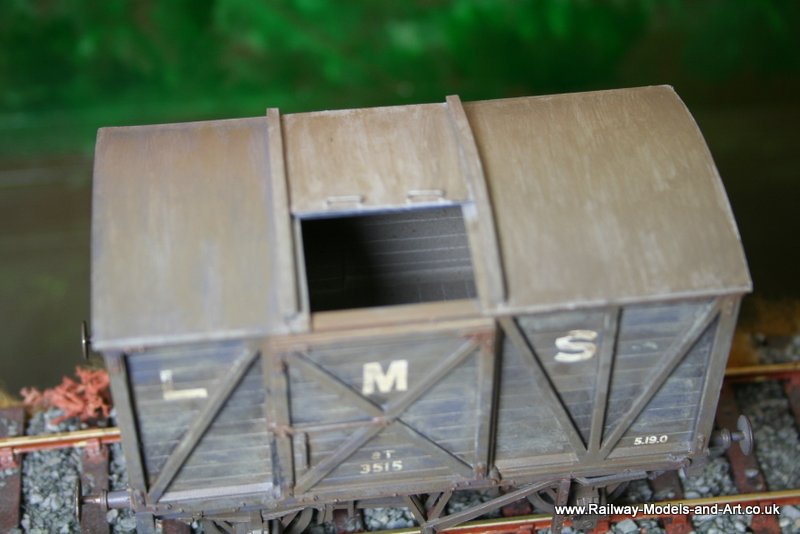
I started by using an Olfa compass cutter to measure and mark out where the planking lines were on the inside. Once marked these were deepened using an Olfa cutter to cut the grooves proper.

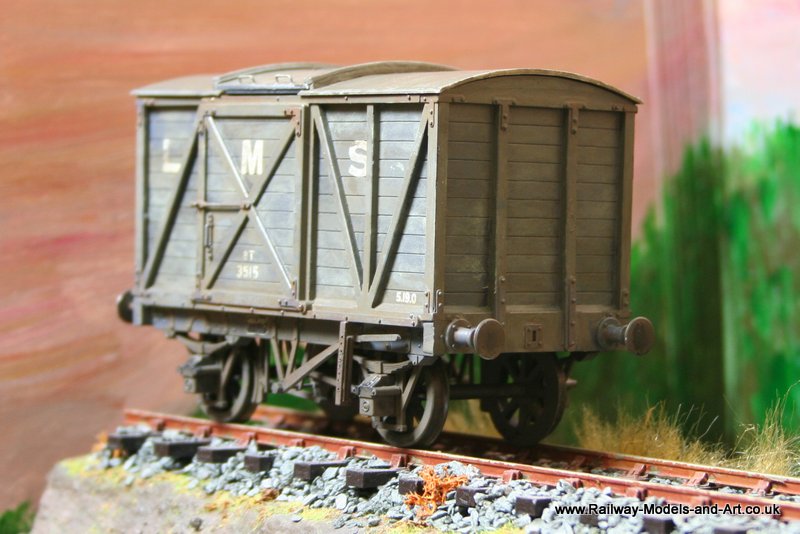
Then a few happy hours were spent cutting and drilling various strips of plastikard and gluing them to the wagon sides and ends before assembly. Once they were glued to the insides I drilled through into the wagon side and then inserted short lengths of plastic rod and allowed them to dry thoroughly before sanding them back to stubs.

IMG_0004 Slaters LMS 7 Plank Open Wagon Slaters LMS 7 Plank Open Wagon

Flushed with the success of this I then decided to add the steel strip around the top of the wagon using a similar technique but on the top I cut the plastic rod of flush to give the impression of a countersunk screw. To this I then added the capping retaining clips seen on wagons – I again once glued in place I drilled the wagon sides and inserted short lengths of plastic rod before finally assembling the sides and ends.

Slaters LMS 7 Plank Open Wagon Slaters LMS 7 Plank Open Wagon Slaters LMS 7 Plank Open Wagon

Slaters Midland/LMS 10 Ton Brake van

A pleasant surprise when checking my remaining leave – 10 days left when I thought that I had only 2 meant that I took three days leave this week. We took a chance and went up to Bishop Auckland for a few days and having had a nice trip out on Wednesday morning we got back at lunchtime and within 10 minutes of getting in the house a blizzard started that left us with upwards of 4″ of snow by Thursday morning. It was very pleasant to sit at the bech and do some modelling while the weather did it’s worst outside.

First up I put the transfers on the Midland 10 ton Brake van using one of the two photo’s in Essery’s Midland wagons tomes.

Slaters MR 10 Ton Brake Van Slaters MR 10 Ton Brake Van

Next up is glazing and then weathering – this will be another that is well towards the end of it’s life…..

Skytrex Wagon Loads

Having been pleased with the look of the Skytrex barrels that I did earlier ver Christmas I took advantage of a Skytrex special offer and bought some wagon loads. These consisted of two different loads of barrels – from a choice of three or four, a load of sacks and a couple of loads of carboy’s (demi-john type jars) packed in straw.

In between other jobs I have painted a couple of them.

Skytrex Wagon Loads Skytrex Wagon Loads Skytrex Wagon Loads Skytrex Wagon Loads

Slaters MR 10 Ton Brake Van – with a few added details

On and off I have been putting together another one of my Telford swaps – a Midland Railway 4 wheeled brake van. The basics have been together for a few weeks until I had the patience to tackle the handrails. Along with the handrails I added a few more details from plasticard –

Slaters MR 10 Ton Brake Van

A panelled window on the open end.

Slaters MR 10 Ton Brake Van

Some small brackets at the veranda end.

Slaters MR 10 Ton Brake Van


A representation of the very visible screw brake adjuster and the tablet racks.

Slaters MR 10 Ton Brake Van

Along with a representation of the brake linkages – once it’s all black and grubby little of this will be visble but it’s enough to give and impression.

Slaters MR 10 Ton Brake Van

Some missing bolt heads on top of the buffer plank.

Slaters MR 10 Ton Brake Van Slaters MR 10 Ton Brake Van

Slaters Midland 8 Ton Van – Sliding Roof Door Conversion

I have been inspired by some of the conversions of Parkside kits to other diagrams being carried out by Jim Snowdon on RMweb and the Guild forum. At Telford this year I swapped some Parkside GWR kits for some Slaters MR kits. Two of them being for the 8 ton van. While up north over the New Year I had a look through the Essery book on Midland Wagons and although there isn’t a photo to go on I decided to have a go at a conversion to a sliding roof door version. By good fortune the spares box yielded a couple of spare roof struts for LNER cattle wagons which saved me having to mess about curving the guides for the door although I did have to curve a piece of sheet for the door itself – this I did by rubbing the curved end of a Swan Morton knife handle across it. The kit itself is one of the quite old (in small grey box) versions that had buffer shanks moulded into the ends. This actually means that the mouldings themselves are very crisp when compared to the second kit which is in a new red box. The ‘castings’ for the door furniture are moulded plastic too but to be honest they are equal to the brass castings that I have for the second kit. I managed to get a coat of primer on it this morning so here it is.

Slaters MR 8 Ton Van with Sliding Roof DoorS Slaters MR 8 Ton Van with Sliding Roof Door Slaters MR 8 Ton Van with Sliding Roof Door

I have left the roof loose until I finish painting the inside.