More on the D114

While I haven’t posted much with my laptop dying I have made further progress.

I have taken the D114 as far as I wanted to without the other bits from Kemilway. They duly arrived last week (all apart from some wire and some bolts).

Here’s where I got to. I also started the second coach and I have the floor pan folded up and the sides ready for the tumble home forming – I haven’t taken pictures because it’s more of the same.

The roof is just resting on at the moment because it’s the long roof bolts that I am still waiting for.
IMG_5511 (800x533) IMG_5513 (800x533) IMG_5514 (800x533)

I soldered some tabs on the back of the gangway board so that it’s removable if I want to have the coach in the middle of a rake.

IMG_5515 (800x454) IMG_5516 (800x534) IMG_5517 (800x800)

Update on the Cab for the A3

Yesterday I decided to take the cab back out of the paint stripper – I have been checking it and to be honest I could have taken it out some time ago but I was distracted by coaches.

First let me share with you what I used to strip it – Cheapo local Coop Dettol substitute. I got the idea from fellow Gauge O Guild member George T, I would have used proper Dettol like George does but when I went they only had their own brand. In the end it too worked fine, nice smell, easy on your hands win/win with the household authorities!

IMG_5493 (533x800)

So here are a few shots of the state of play now that I have taken the roof off.

IMG_5494 (800x743) IMG_5496 (800x683) IMG_5495 (800x509) IMG_5497 (800x717)

The cast roof vent came out and one of the round castings in the cab side came adrift too so I will need to remove the false floor which shouldn’t present too many problems. Now having seen the detail that Nick has added to the princesses cabs I am on the lookout for cab detail before I put it all back together.


Regards Rob

GNR D114 Interiors

The next items on the agenda are the interiors. This coach is a little different in that there is a unit that makes up into twin first class compartments, a second unit that makes up into a twin open third bay and a third unit that makes up into a two and half third bay. The generic instructions cover the make-up of the compartments but not the semi open bays so I had to do a bit of head scratching to see what was what and where it went.

This is another area where you get a few spares this time in the form of open partitions without luggage racks. I elected to use those with luggage racks and once I had worked out which went where I had to think about the fact that luggage racks are etched flat so they needed to be twisted into position. I almost did one of them wrong in the single seat bay – I was planning on bending them over the wood panelled area but then I remembered Chris saying that Peter Dawson had told her that the luggage racks screwed on after painting. As I was thinking about it I noticed that at the out end of the full height partitions there are two holes – light bulb moment, to screw the luggage racks to. Once I realised this it was easy to work out which partition went where and which way to twist the low luggage racks to orientate them.


GNR D114 006 GNR D114 005 GNR D114 004 GNR D114 003 GNR D114 001

I also found an etch containing some small latches for the sliding doors to the compartments so I added them.

The rest of the luggage racks and the nets for these are to follow with the rest of the bits that are missing.


More on the GNR D114

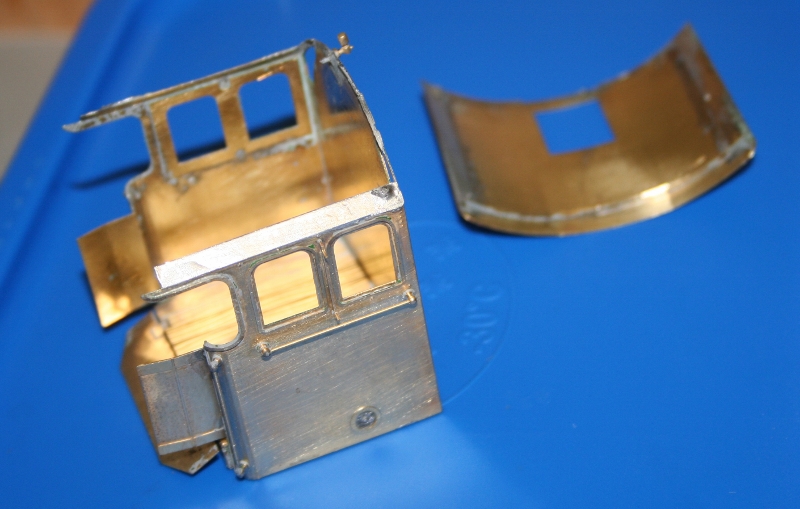
Things are coming together nicely but up to yesterday there wasn’t much to show.

First I folded down the inside section of the top half on the sides and soldered it in place to and bottom.

Then I drilled out all the holes for the door handles, bump stops etc.

Next was the task that many dread, creating the tumble home or turn under. My method for doing this makes it quite simple (or I think so).

I get a strip of 2″ masking tape a bit longer than the coach side and stick it to the outside of the coach, level with the bottom of the windows. I have a length of 28mm diameter tube that is about 18″ long (a left over from fitting a curtain rail).

I placed the coach side outside face down on the sheet of plate glass that covers most of my work bench top with the remainder of the sticky side of the masking tape facing upwards.

Next I placed the tube on the sticky tape adjacent to the bottom edge of the coach side. I wrapped the rest of the tape around the tube.

Then grasp the tube at each end where there was no tape I rolled the tube towards the centre of the coach gently but firmly. The masking tape pulls the coach edge around the tube and the tumblehome is formed.

On the first side I went a little too far and had to bring some of the curve back out by laying the back of the side on the glass and gently pressing along it. The second side came out perfectly first time. If there is interest in the method I will do a step by step as I do the next one.

Next I soldered in the bump stops. These are not provided in the kit – the instructions suggest that you solder in 0.45mm wire. These are I believe from Laurie Griffin but I got them in with a lot of other spares and I think that I have enough to do another couple of coaches after this one. I have made them from scrap etch and rod before but to be honest having seen how nice these are I will buy some more in the future when I need them.

The T handles are very nicely cast and are included in the kit. There are also some nicely etched grab handles that I was a bit dubious about initially – initially went to the trouble of soldering a piece of 0.5mm wire to the back of one to beef it up but it was the very devil to bend. So I went back to trying the etch as supplied and they are more substantial than I first guessed. What I do like about this kit is that there are loads of spares of a lot of the pieces. So far I have spare T handles/grab handles/hinges and drop lights.

The hinges are a really nice touch, they come as three fingers that go through the coach side which once you have soldered them solid there is a half etched line which allows them to be snapped off leaving behind differing hinges for the various points on the coach side – some care is needed to get them all the right way up before soldering them in. The etched slits for these needed opening out a little with a .5mm drill.

Once all these were in place you need to snip off the ends that protrude inside and clean/file back so that the drop lights can be fitted. I did this with a diamond coated ball bit in my Dremell.

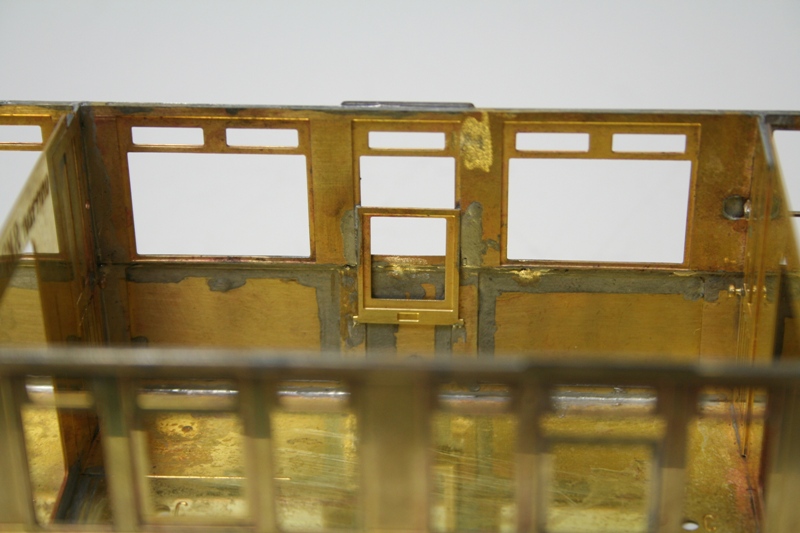
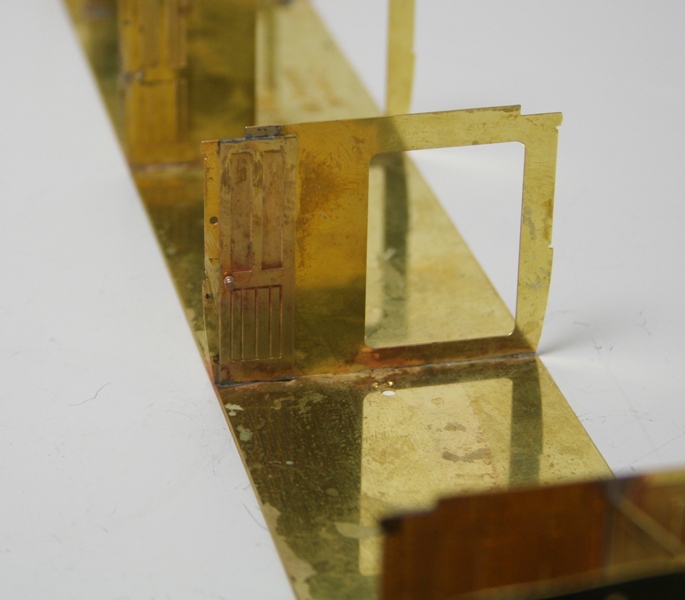
Next up is fitting the drop lights and then the cornice strip. The cornice strips are handed so once again double check to make that you have the right one with the rain strips above the doors.

Once all this was done I gave everything a good clean up and made sure that all the stubs on the inside face were ground/filed off (I had missed a few earlier).

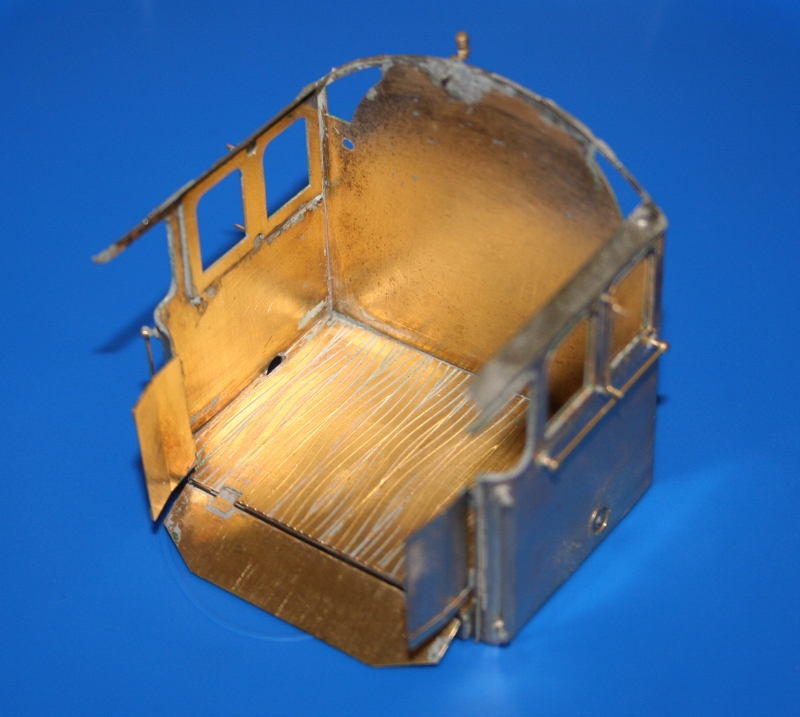
I had decided that on this coach I would represent the end windows as having been filled in with a solid panel – blanks are provided for this so I bent them to shape and soldered them in before starting to add the sides

Then came soldering the first side on, I started with the compartment side – this being the one that the tumble home had gone perfectly. I initially sat the floor pan on my sheet of glass and placed the side up to it. When I was satisfied that it was all sat level, I tacked the top of the bulkheads leaving the ends free. Once I was happy that it was all going into position where it should I tacked the bottoms of the bulkheads, then I worked my way down the sides of the bulkheads and across the bottom seams finally ding the ends last.

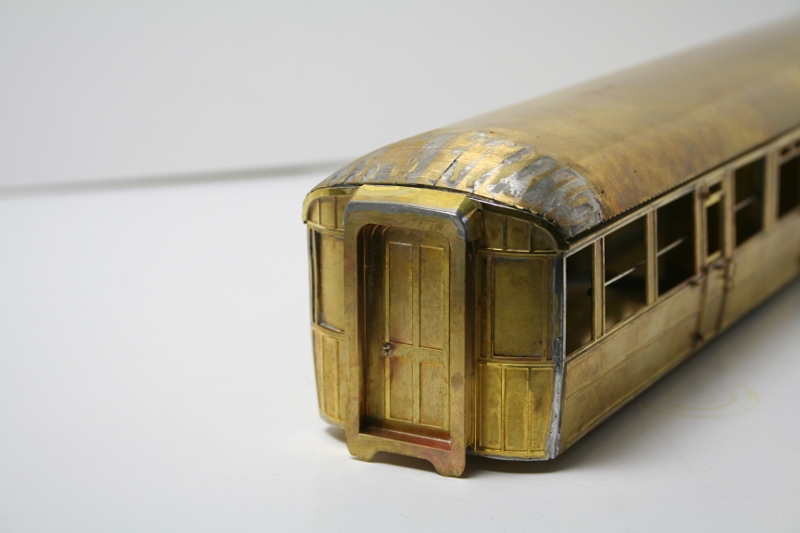
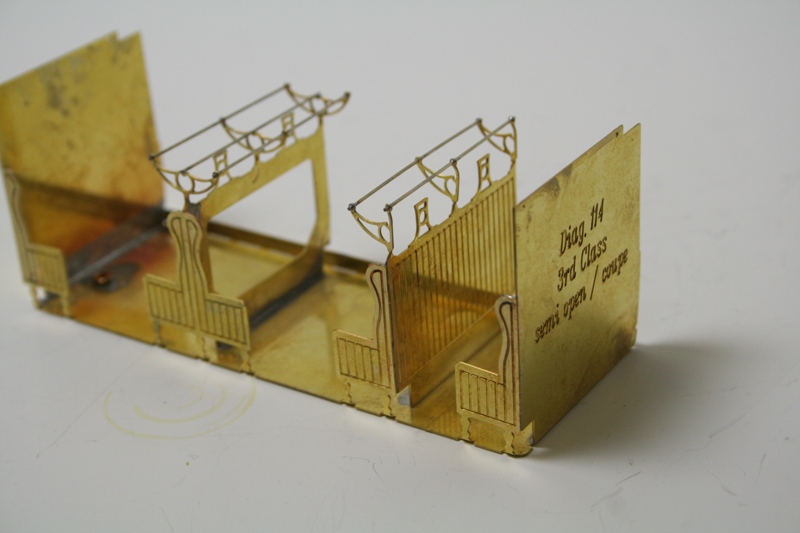
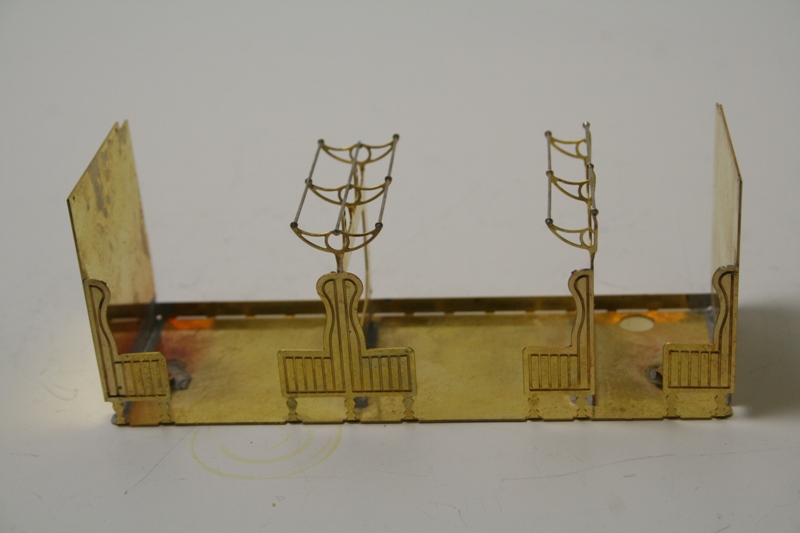
Here are a few shots of what it looks like at this point.

GNR D114 001 GNR D114 002 GNR D114 003 GNR D114 004 GNR D114 006

I couldn’t resist a glimpse through the window….

GNR D114 007 GNR D114 008 GNR D114 009


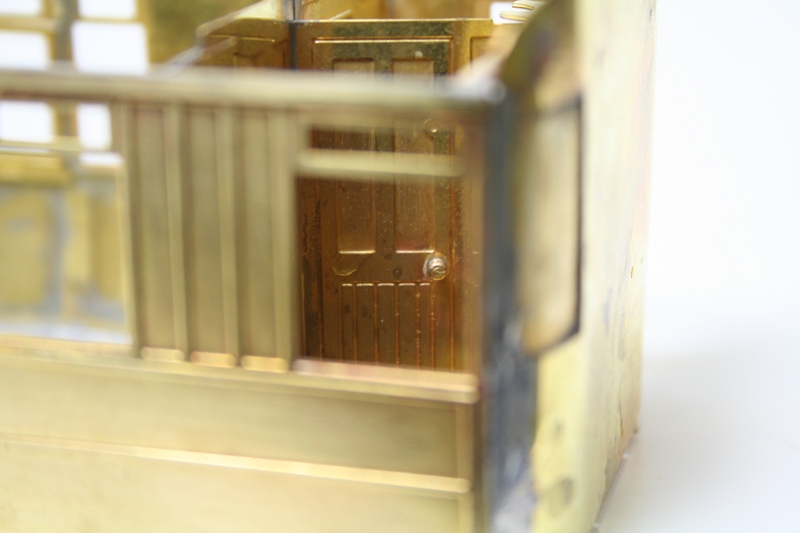
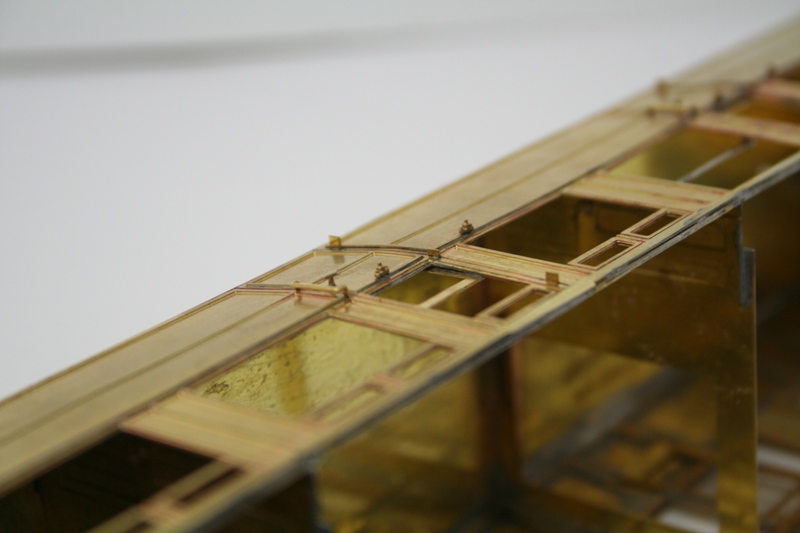
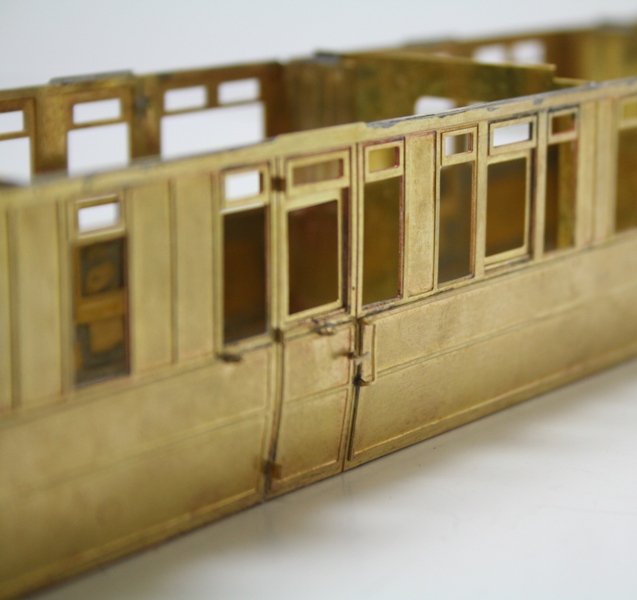
A couple of shots of the drop lights and the “chrome” handrail – this wasn’t supplied I just reasoned that nickel would represent the handrail better and I have just restocked various sizes.
GNR D114 010 GNR D114 011


GNR D114 Composite

I moved on a little with this last night.

The next step or rather the previous step (it should have been done before fitting the panels to the sides) was to fit the bulkheads/toilet partitions. This is where reading all the instructions first pays off. The instructions for the body would have you fit the bulkheads/toilet partitions while building the body but then when you get to the interior the instructions have you fitting doors and the very nice cast door knobs. This would have been a much bigger and messier job to have done when the coach body was assembled so I chose to add the doors and door knobs in the flat.

The detail on the inside of the toilet compartment its quite something – the only thing missing is that there isn’t quite enough door knobs provided to add them on the inside of the toilet door.

GNR D114 001

Above is the inside of the toilet compartment at one end – I didn’t get the last partition in last night.

GNR D114 002

The inside of the vestibule showing the door knobs on both sides of the door.

GNR D114 006

GNR D114 003

One side of the door – the additional etch.

GNR D114 005

And the other side which is etched as part of the bulkhead.

GNR D114 008

Lastly a close up of the other toilet partition show the door knob in all it’s glory!


Kemilway Great Northern Railway D114 Composite coach kit in 7mm scale

Having taken the plunge in stripping the cab of the A3 prior to making the roof removable did I continue with the F8?

Nah! I am sure that it will come as no surprise that it didn’t take much encouragement from Chris for me to start on one of the coach kits that she bought me for my birthday.

This is some of what’s in the box – for this particular coach I am still waiting for the underframe and bogie etches.

GNR D114 001 GNR D114 005


GNR D114 008

Having had a read of the quite comprehensive instructions available for download from the kemilway site it reckons about a hundred and fifty hours to build a coach depending on experience. Having had some of these kits in 4mm some years ago I had an idea what to expect and this is where I got to after 4 hours yesterday.

GNR D114 011

The floor pan folded up and the inner ends curved with the formers soldered in.

GNR D114 012

Both sides have their separate bottom panels soldered in.

Even though I had filed of the etching cusps I struggled with the first side to get the panels in flat etc. with a couple needing to be dropped out and repositioned. On the second side I made doubly sure that I had removed the cusps and I put a slight chamfer on the edges of each panel. This meant that they snapped into place with ease and I soldered up the second side in half the time it took for the first – a lesson learned for the next one.


The A3 see’s the light of day

In between working on other project I have been doing a bit more towrds finishing the A3. I have fixed a few bits on the chassis – a loose spring hanger, one of the slide bar supports and added the front sand pipes.

I have also done quite a bit at the backhead. Getting it finished and ready to fit into the cab

A3 001

A3 002


The steam hose on the pictures above I scratch built to replace the cast offering that came with the kit below. I made it from a Connoisseur Models Clack valve casting that I cross drilled to fit a cast hand wheel from Hobbyhorse and the hose itself is a length  of 24 gauge soft brass beading wire bound with 32 gauge brass beading wire and soldered.

A3 003


What I hadn’t reckoned on was the fact that there is no way that I can get it into the cab without taking the roof off – which is soldered on.

Now you might think that this is a bit drastic but having slept on it I think that it’s for the better – I had a go at lining one side of the cab and I wasn’t entirely happy with it so into the paint stripper it has gone.

To be continued when the paint has come off.