It’s the details that matter…..

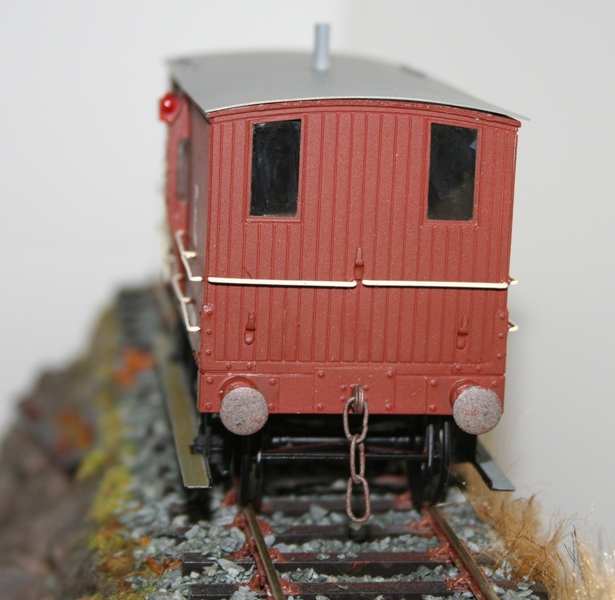
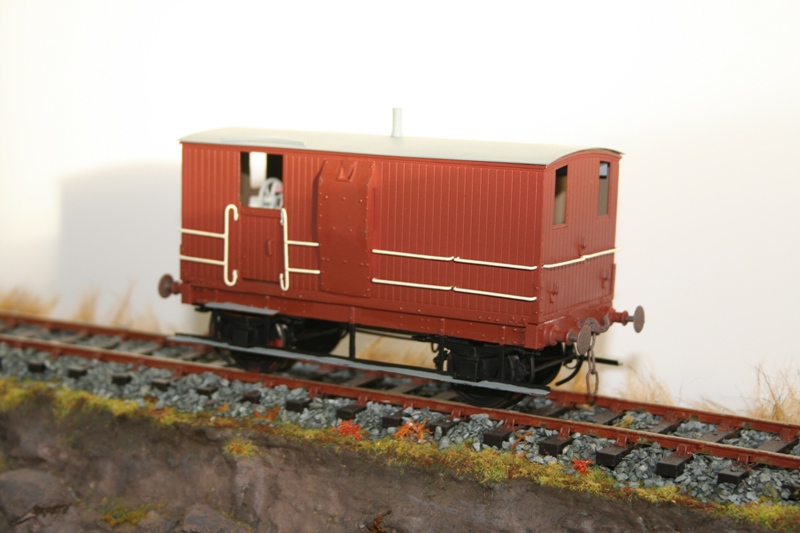
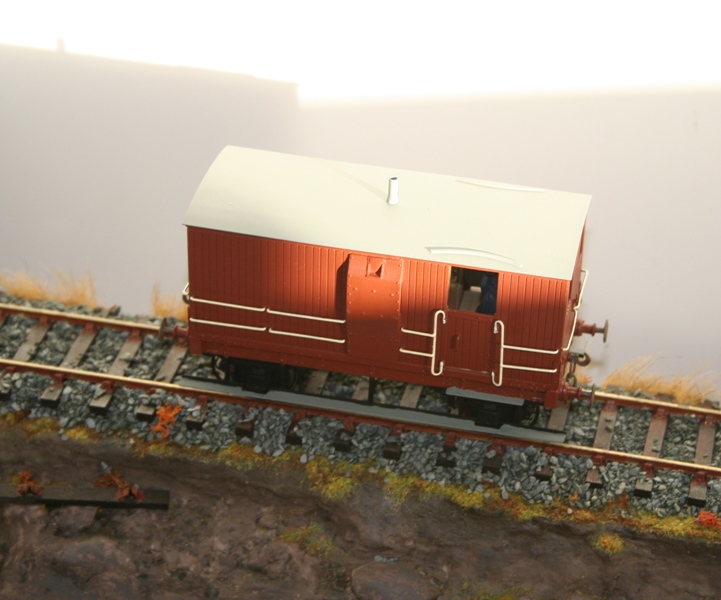
Meanwhile I managed to finish painting, weathering and adding the details to the tender truck.

IMG_6678

IMG_6679

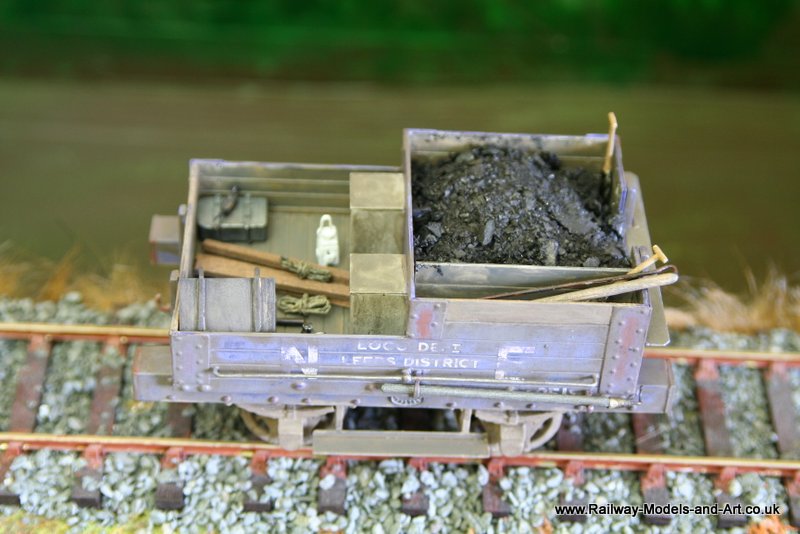
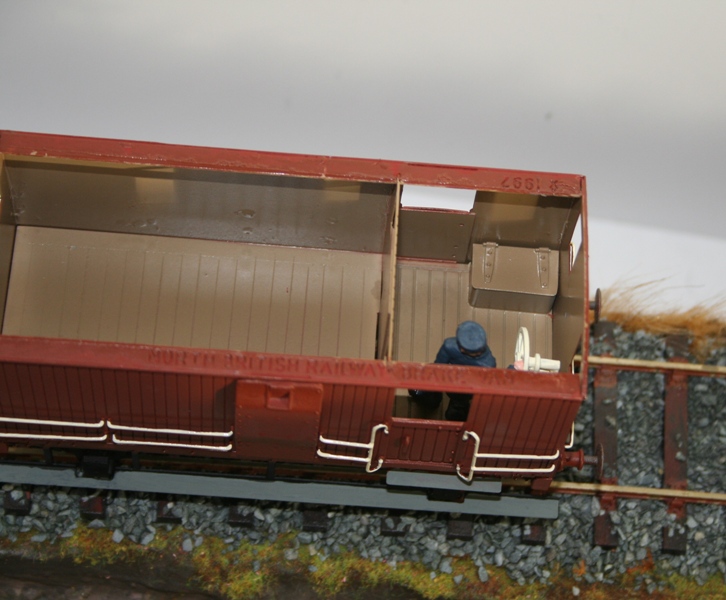
The pieces of timber are coffee stirrers cut lengthways, and I am particularly pleased with the bundles of rope which are made from 4 strands of 32 gauge brass beading wire, twisted together in a couple of pin vices. This was them wound around a lolly type stick to get the length of coil and further wound around itself then it was blackened and dipped in the mix of paint that I used for weathering the inside of the cattle wagons featured earlier.

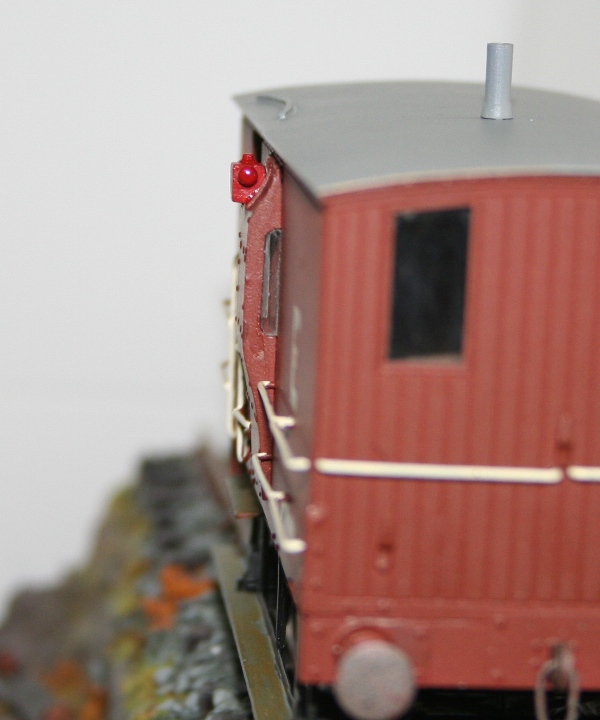
The lamp is by Slaters and the hammer another one of the Peter Roles castings.

IMG_6680 IMG_6682 IMG_6681

I have also taken a few pictures of the various stages of the weathering process on this and a couple more vans that I am on with and will post then to my weathering thread later.

NBR Brake Van Lettered and Glazed.

Wow another 2 post day!

Another that has had it’s finishing touches is the NBR Brake van. This too presented a few challenges on the transfer front but it came out all right in the end.

NBR Brake Van 016

I even managed to glaze the duckets without too much difficulty despite them being a solid casting and no way in from the inside of the van. I have tried and failed to show with the photo below that you can actually see through them and out each end of the ducket. I used some 1mm perpex which I cut in to a 12mm strip from which I cut further strips 2.5mm wide. I filed the ends round and kept filing top and bottom until they were a tight fit. Once they were wedged in I ran some Johnsons clear over them to help them to stick.

NBR Brake Van 015 NBR Brake Van 014 NBR Brake Van 013 NBR Brake Van 012 NBR Brake Van 011

The rest of the windows are glazed with microscope cover slips from CPL stuck in with PVA. What I like about using PVA to stick them in is that any you get on the windows themselves can be cleaned off once dry with a bit of water on a cotton bud. But if you don’t do too good a job it looks like dirty windows.

A couple of hours yesterday saw the brake van complete (or as complete as I plan to make it). I deviated from Jim’s build methods by using some WEP compensation units, although I have fitted other vehicles exactly as Jim suggests without issue before.

I rolled some microbore tube in my rolling bars to ensure that all four sand pipes were to the same profile and then made the distinctive safety loops for the brake yokes from fine scrap etch. Besides painting the only things to complete are the springing of the coupling hooks/buffers.

NBR Brake Van 001 NBR Brake Van 002 NBR Brake Van 003 NBR Brake Van 004 NBR Brake Van 005 NBR Brake Van 006

As with the other Connoisseur wagons that I have built, this was a joy to put together even if you don’t want to add any additional details.

Sand Boxes and no beach in sight

What an interesting and enjoyable build this is turning out to be.

While researching in Tatlow and reviewing a drawing supplied by a friend, I picked up that up to 1931 these vans had quite prominent sanding gear. Having resized the drawing to 7mm scale and taken dimensions for the sand boxes from it I deduced that the ones in the veranda compartment would be visible when viewed from normal model railway viewing angles – above and to either side.

So I gathered some bit’s of scrap etch from the turntable and made a couple. I made the hinges and soldered them onto the lid using the microflame. I had just nicely got to soldering the lid onto the box using sprung tweezers as clamps, when it all sprung apart and one of the hinges dissapeared into thin air….

An hour later when I had made up a new one and the boxes were fitted to the floor, my good lady found the one lost in space.

NBR Brake Van 012


NBR Brake Van 004


NBR Brake Van 006


NBR Brake Van 011


NBR Brake Van 007


NBR Brake Van 002

I also beefed up the brake yokes. The photo’s that I am working from show the main cross bar of the yoke to be quite substantial so once again scrap etch to the rescue. That was done after this set of photos was taken so they will probably be on when I show pictures of them.

Proper Grab Rails And Some Extra’s To Boot!

A busy couple of days ultimately meant that I didn’t get the handrails fitted on Thursday night, despite my best intentions.

Today has seen them and the additional lower handrails added.

NBR Brake Van 002 NBR Brake Van 003

Although I haven’t taken a photo yet, Thursday did see the rain strips fitted to the roof.

Jim’s instructions have you using 0.7mm round brass rod. However I found a short length of 0.8mm square nickel rod in my stash which was just long enough to do the two rainstrips.

I ran them through my rolling bars to get the curves even while matching the dimensions quoted by Jim.


Connoissuer NBR/LNER 20 Ton Brake Van

Work on the turntable has come to a temporary halt. It’s almost ready for painting but I need to change the filters on my spray booth extractor.

So to keep my hand in, I started this kit on Saturday. It’s one that my good lady bought me for Christmas last year – a Connoisseur North British 20 ton brake van.

NBR Brake Van 004 NBR Brake Van 003 NBR Brake Van 012

Jim only provides a floor for the veranda section (not really a veranda on this one but you get the idea). So I made one up from some brass sheet. To bring it to the same level as the other floor I used some spare angle bracket from the turntable. Waste nowt!

NBR Brake Van 006 NBR Brake Van 007

And inside the van

NBR Brake Van 011 NBR Brake Van 010 NBR Brake Van 005

I reinforced the roof with some square section nickel bar to make it clip into the roof. I will also add some longer springy bits down the sides to help the middle sit down properly.

NBR Brake Van 014

I also added some scrap etch strip to the back of the step supports and the brake brackets.

NBR Brake Van 013

This is where I got to last night.

Today while sitting in the smallest room in the house, I had the thought. [i]”I wonder if I have any photo’s in my Tatlow LNER Wagons volumes that might give me any missing details.”[/i] Have you ever wished that you’d had that thought earlier……?

Tatlow revealed a second set of handrails below those on the non veranda end. Not too difficult to add thought I. Then I noticed the very distinctive curved ends to the vertical handrails and the fact that they don’t sit at 90% to the side of the van.

NBR Brake van

Oh Bovver!!! Says I.

So the next job tonight is to see if I can make a jig to bend 4 of those – before I take the ones I made earlier off.