DJH Streamlined Coronation Front Bogie

With the trailing truck behind me (see what I did there), I started on the bogie.
Sadly having rescued the and fitted the springs where they should go you don’t see much of them once it’s assembled.
Now you see them….

DJH Streamlined Coronation – Bogie

Now you don’t….

DJH Streamlined Coronation – Bogie

DJH Streamlined Coronation – Bogie

DJH Streamlined Coronation – Bogie

I also made a start on the valve gear but more on that later.

DJH Streamlined Coronation Trailing Truck

After doing battle with the cylinders and struggling with a drill bit broken off in one of the valve guides which I have yet to resolve (but I do have a fall back position should I need it) I decided that for a bit of light relief I would make up the bogie and trailing truck.
I started with the trailing truck for now other reason than I had some of the bit’s already removed from the fret during the course of removing other bits.

DJH Streamlined Coronation – Trailing Truck

DJH Streamlined Coronation – Trailing Truck

DJH Streamlined Coronation – Trailing Truck

DJH Streamlined Coronation – Trailing Truck

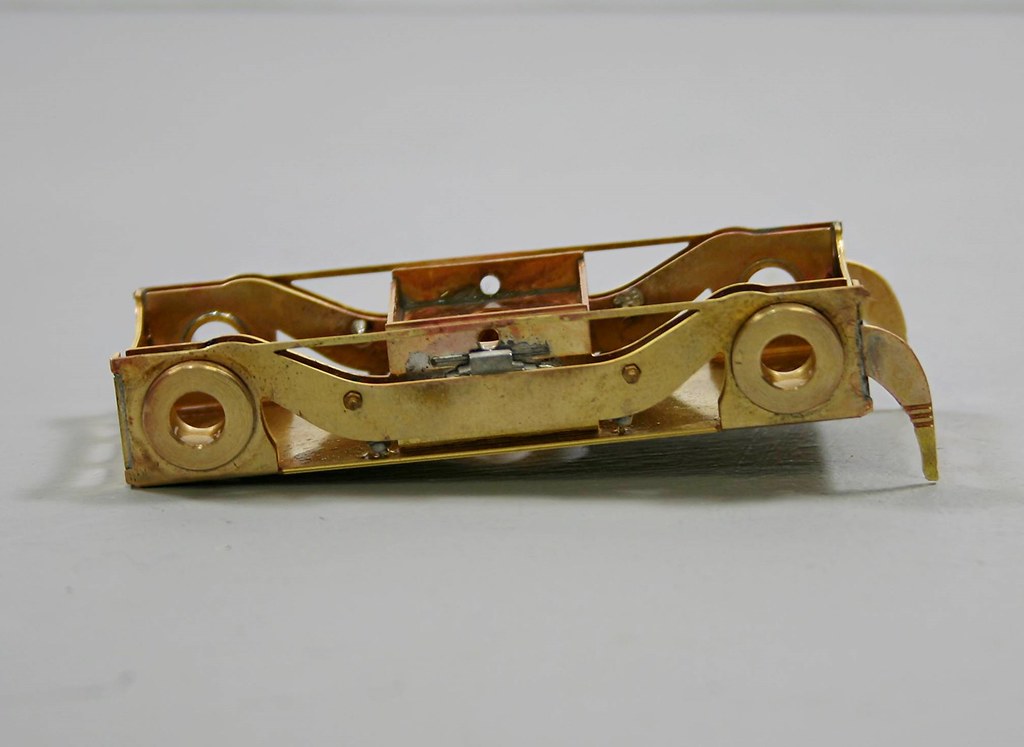
Sadly I had got to this bit when I realised that I had made an error in my interpretation of the instructions. You get two options of spring/axle box for the trailing truck. You get an axle box and full thickness spring combined and an etched spring separate axle box and some hanger castings. There are also a pair of thinner springs which I had attached as in the photos above.
The idea being that you use the full thickness castings for loco where they are to be used on track radius of greater than 7 feet or use the etched ones for less than 7 feet radius. It was only when looking at the bogie that I realised the the thinner cast springs were in fact for the bogie rather than the trailing truck and it all made sense. thankfully it was the work of a few minutes to swap them over and put the etched ones where they belong. There were some castings provided for the spring hangers as I mentioned but 2 of them were missing so I cut some off the thicker castings to make up the set.

DJH Streamlined Coronation – Trailing Truck

DJH Streamlined Coronation – Coupling Rods

Following on my my note on the coupling rods I managed to get a couple of photos of them now that they are soldered up.

DJH Streamlined Coronation – Coupling Rods

DJH Streamlined Coronation – Coupling Rods

And then a couple that will hopefully show how much I had to file out of the cylinder castings….

DJH Streamlined Coronation – Cylinders

DJH Streamlined Coronation – Cylinders

Essentially the slots bottom left and top right were almost full of whitemetal so I used an older square file to remove the material. Now that I have the lathe with the milling attachment I suspect that I might have used a burr to mill out the material much more efficiently. Something to remember should I encounter anything similar in the future.

DJH Streamlined Coronation – a Bit of Improvisation

I was cracking on quite nicely with the chassis but when I got to the next phase of the instructions I found one of the castings missing.
This is the offending article, there should be one at each side.

DJH Streamlined Coronation – Motion Bracket

After umming and ahhing as to what to do I decided it would be simpler to scratch another than to wait for the owner to source one from Tower/DJH.
Poor photo  but this is it made from scrap etch and some wire filed half round.

DJH Streamlined Coronation – Motion Bracket

DJH Streamlined Coronation – Motion Bracket

DJH Streamlined Coronation – Motion Bracket

Last night saw me make up the coupling rods which all went swimmingly until I got to pinning them together at the joint. The instructions have you tapping one side 12ba to screw a cast threaded pin into. Having done the first side I quickly realised that the thread on the pin is way smaller than 12 ba Bah!! :headbanger:
The other side I tapped 14ba and I ran a 14ba die down the cast thread,  I screwed it into the tapped hole and the threaded section promptly broke off in the hole:hammer: Tonights task is to solder the pins into the back of the hole as I would have done with a rivet of Premier Rods. Onwards and Upwards…..

DJH Streamlined Coronation – on with the Chassis

So it’s onto the loco chassis,
I made a start on Saturday afternoon and up to last night I had made it to

DJH Streamlined Coronation Tender – Basic Loco Chassis

DJH Streamlined Coronation Tender – Basic Loco Chassis

DJH Streamlined Coronation Tender – Loco Chassis Brakes and minor details fitted

DJH Streamlined Coronation Tender – Loco Chassis Brakes and minor details fitted

DJH Streamlined Coronation Tender – Loco Chassis Brakes and minor details fitted

DJH Streamlined Coronation Tender – Loco Chassis Brakes and minor details fitted

DJH Streamlined Coronation Tender – Loco Chassis Brakes and minor details fitted

Which brought me to the end of drawing number 2 of the chassis instructions.
I made one minor error in that I got one of the chassis spacers/supports the wrong way up which meant that the hole for the brake cylinder was in the wrong place. Rather than take the chassis apart again I just redrilled the hole at the other end of the spacer and filed the tabs of a couple of brackets that should have fit into some slots. Job done and brakes fitted as they should be.

DJH Streamlined Coronation – It’s getting busy back there

Once the rear bulkhead was soldered in, next up I concentrated on getting the many details on the rear of the tender added.

DJH Streamlined Coronation Tender – Side farings and rear bulkhead attached

DJH Streamlined Coronation Tender – Side farings and rear bulkhead attached

DJH Streamlined Coronation Tender – Side farings and rear bulkhead attached

It’s quite busy back there…

More DJH Streamlined Coronation Tender Moments

Where had we got to?
Once I had the sides to the right shape and soldered to the bunker rear I set about detailing the front and rear bulkheads. As I mentioned in York Paul’s thread I fitted all the whitemetal castings to the rear bulkhead prior to fitting it. Those on the front bulkhead await fitting.
in true perverse DJH fashion, although the front bulk head and many of it’s constituent parts are half etched the rear bulkhead is full thickness.
Front Bulkhead

DJH Streamlined Coronation Tender – Bulk heads and other sub assemblies

Rear Bulkhead

DJH Streamlined Coronation Tender – Bulk heads and other sub assemblies

Streamlined Cover and Ladder for the rear of the Tender.

DJH Streamlined Coronation Tender – Bulk heads and other sub assemblies

Dealing with the thickness of the metal has been a real learning curve on this one because my 80 Watt Ersa solder station won’t touch it with 145 degree solder at my usual 340 degree setting.
I have had to whack it up to 400 to get the solder to run. This has meant that much of the soldering has been done with the microflame including (and this may want some of you to lay in a darkened room…:facepalm:) the whitemetal bits.