While I was in the mood I got stuck in and masked up the bolster wagons ready for spraying the underframes. I had already sprayed the top coat on the upper bodies on Friday but didn’t take any photos as they looked no different from when they were in primer.
With the solebars being black on these Steel bodied wagons, it made masking up so much easier that wooden bodied vehicles where the sole-bars are body colour and you have to work around brake levers and lever guards etc. when masking.
Speaking of which that’s the next job, as I am also on with painting some NER vehicles for a friend at the same time.
Needing to make a number of hooks for the shackles and the ends of tie down chains I decided to make another jig. Initially I made up a couple of hooks to gauge the length between the bends then I drilled a couple of holes in yet another plug pin and added some piano wire. i confess that I was very sceptical about how well the piano wire would hold up being quite thin at 0.8mm but in practice it’s been more than fine.
Hook Bending Jig
Once I had made a few I cut some lengths of copper coated chain that I had left over from a Connoisseur kit and fitted hooks to each end
Finally I started adding a hook to each end of the shackles. like making up the D links it was another steady but quite therapeutic job.
Now that my Bolster wagons are nearing completion my thoughts turned to loading it and by good fortune my good lady had recently trimmed out apple trees. So I found a couple of stout branches amongst the offcuts which looked like they might make suitable timber loads.
The next thing was how to tie them down and I decided to have a go to see if I could make some screw shackles – think screw couplings without the hook for the vehicle body.
I started by making what I call the trunnions and centre pins lots of small turnings. Some of them were cross drilled using my Proxxon mini pillar drill. The major diameter of the rod is 2mm and to centre the drill on the part, I popped a 2mm drill bit in the chuck upside down and dropped that in between the vice jaws.
I made the bob weights from 1.6mm rod which was turned down to 1mm nominal for the shaft but in hindsight I should have made them a little bit thinner.
I drilled and them cross drilled more 2mm rod to make the bob weight collars but since making these I experimented with making the collar and centre pin as one piece and in future when I make more I shall do that as soldering the bob weight in, and then soldering it central on the shaft was a bit of a pain.
The final piece was a small washer to retain the other trunnion.
And with the obligatory 5p piece for scale. magnified so much the solder looks a bit messy but it’s barely visible at normal viewing distances.
Finally I had to make up the D shackles so I made a bending jog to ensure that they were all pretty much the same size.
D Shackle Bending Jig
The jig is made from another redundant plug pin with holes drilled in to determine the length between bends with short lengths of 0.8mm piano wire loctited in to create the pivot points. The observant amongst you will note that initially I drilled a third hole to insert a tail to start the initial bend but after doing the first one I realised that it was much more efficient to make the first bend with a fine pair of round nosed pliers then placed the formed eye on the jig to bend the other end.
D Shackle
I made four pairs in this session of making them. All that remain are hooks to attach to the chains.
This post is a bit in reverse order of what I’ve been up to in the last week with the latest first because it follows the previous post better.
The chance discovery of a part can of Halfords grey primer in the shed and yesterday’s cold, but dry and windless conditions, had me dig out my outdoor spray booth (aka a big cardboard box that sits on the dustbin) and prime the bolster wagons.
Now the replacement spring has all but disappeared into the background and I suspect if I don’t mention it casual observers will be none the wiser.
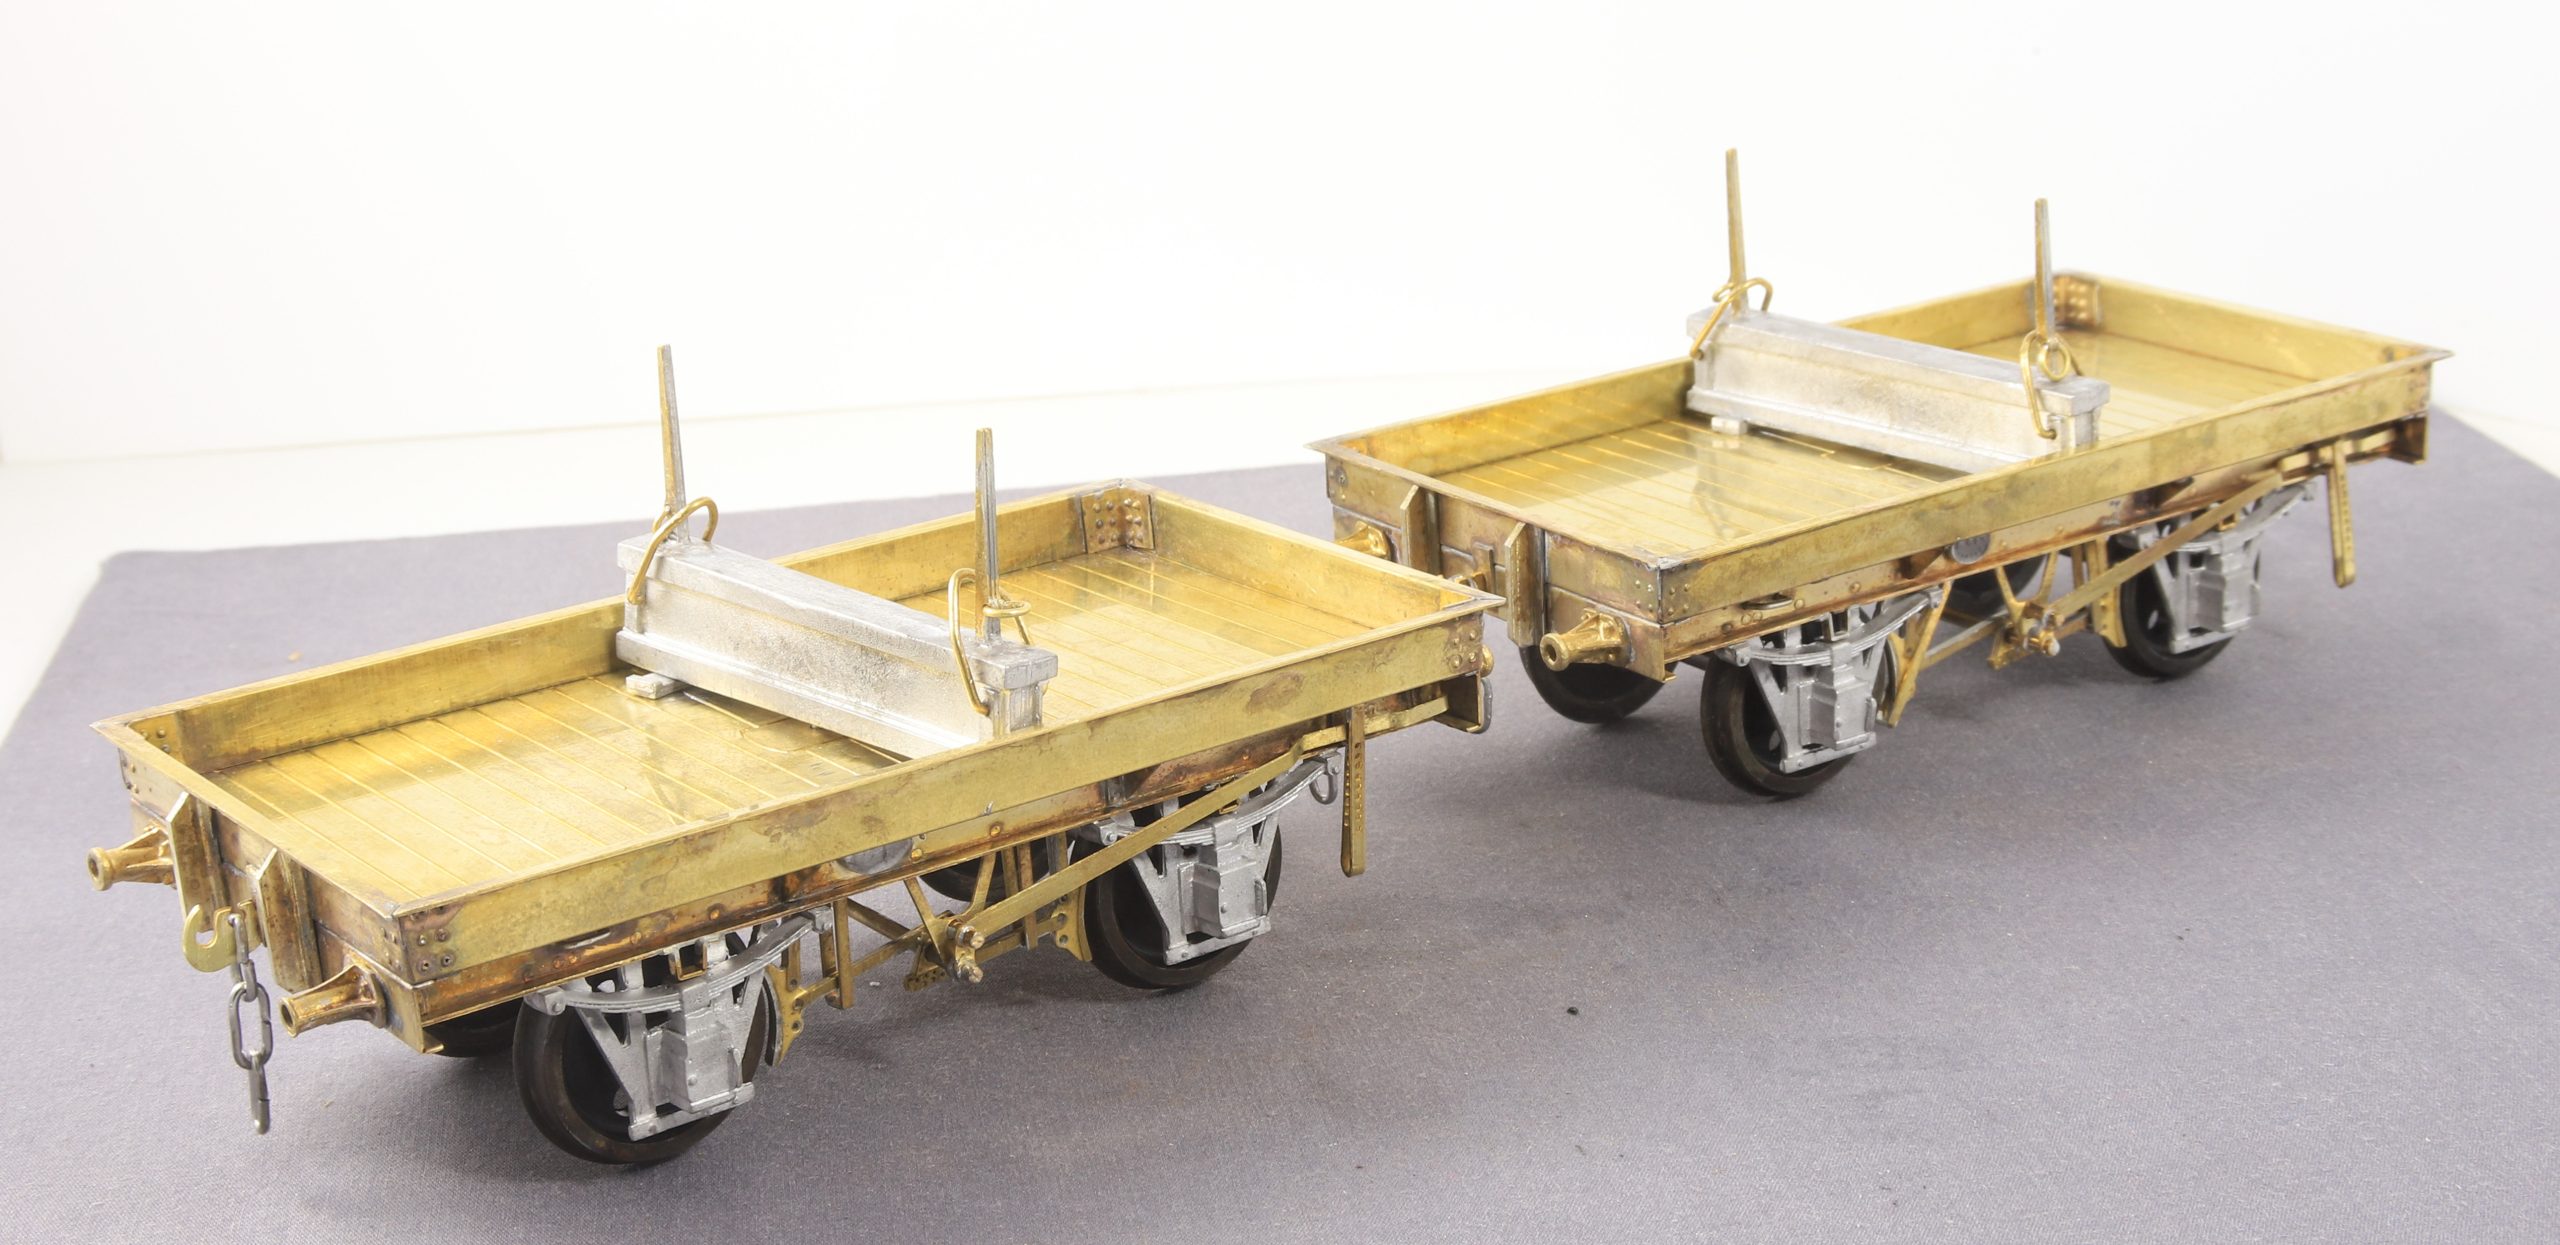
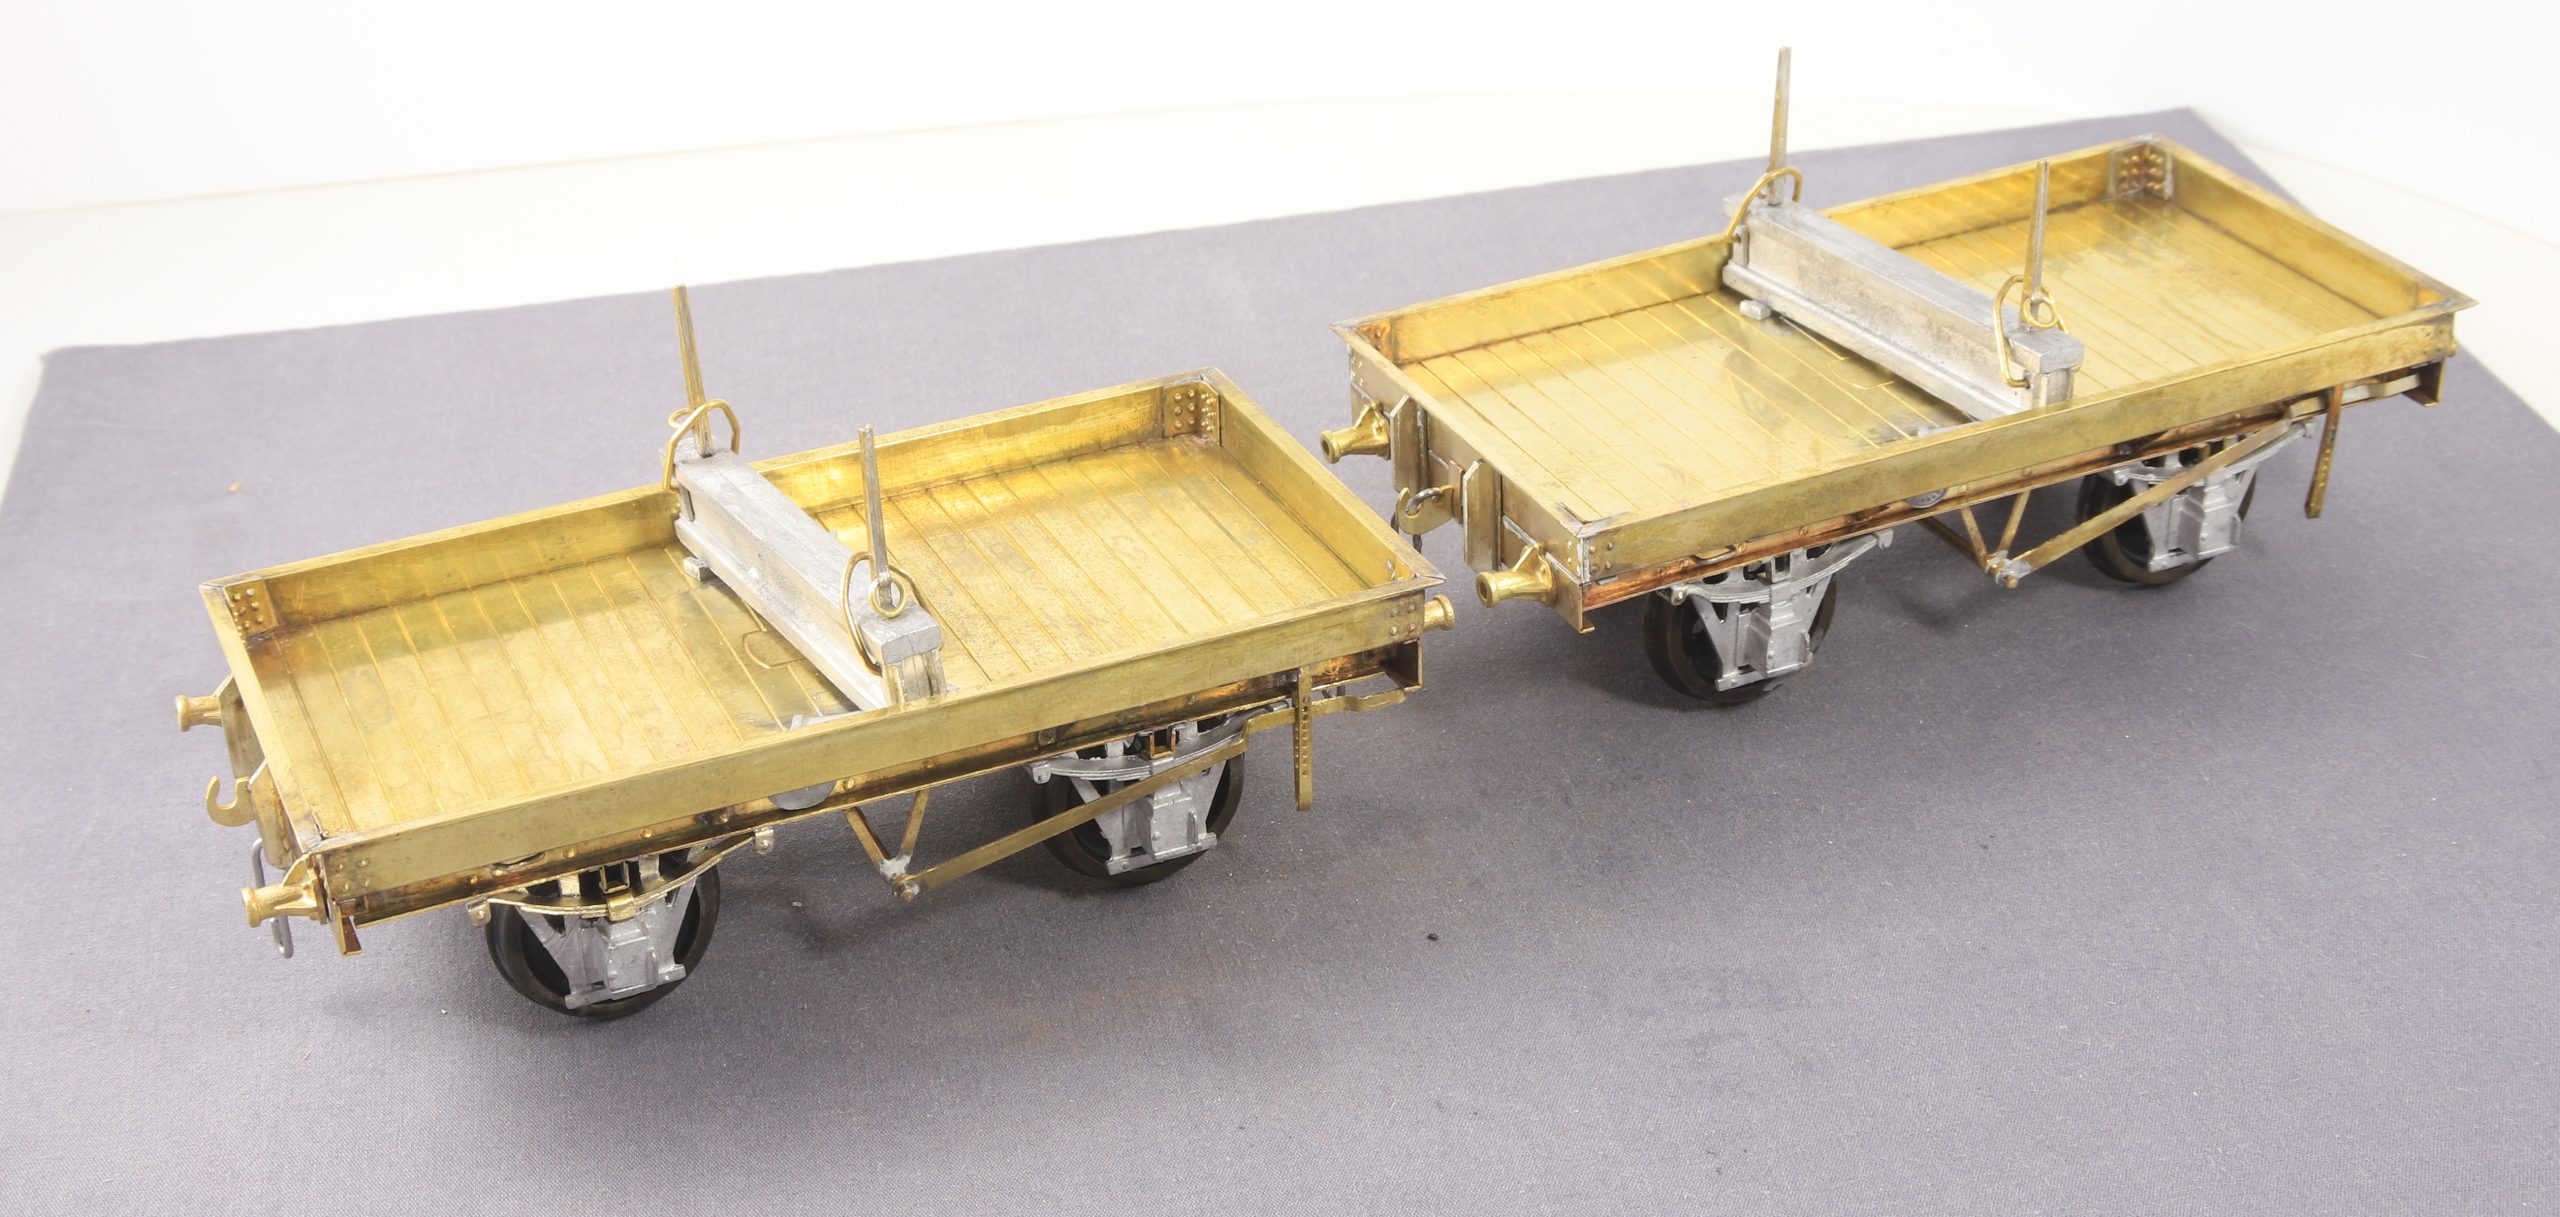
Inspired by a friends recent photos of his Connoisseur Bolster wagons I kicked myself up the backside and finished my pair of jim’s bolster wagons that I have been slowly making as a demo piece at shows last year.
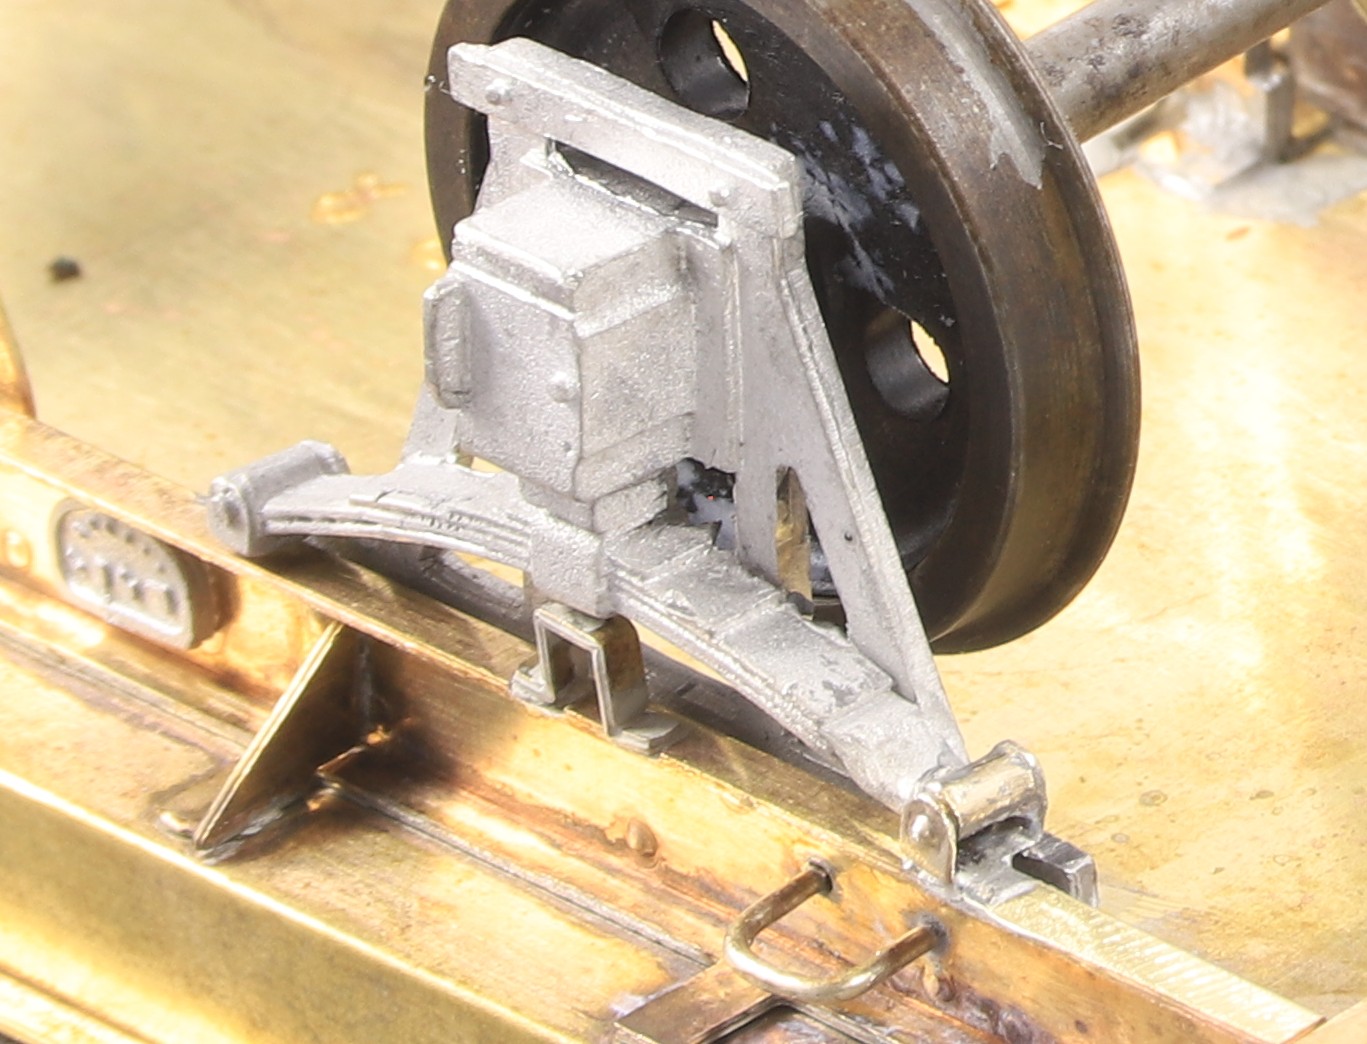
As these things go I took the pretty much completed wagons along to show a friend who has recently finished a lowfit and he noted that my axle guards splayed out slightly, which I confess I hadn’t noticed. But as I said to him, I would rather find these things during the construction phase than after painting so I set to and removed one axle guard from each axle choosing to use the unbraked side as being easier to get at. One of the bearings wasn’t seated properly so I deepened the hole. However they still looked splayed out. so I filed the pin points off both ends of the axle. This fixed the problem.
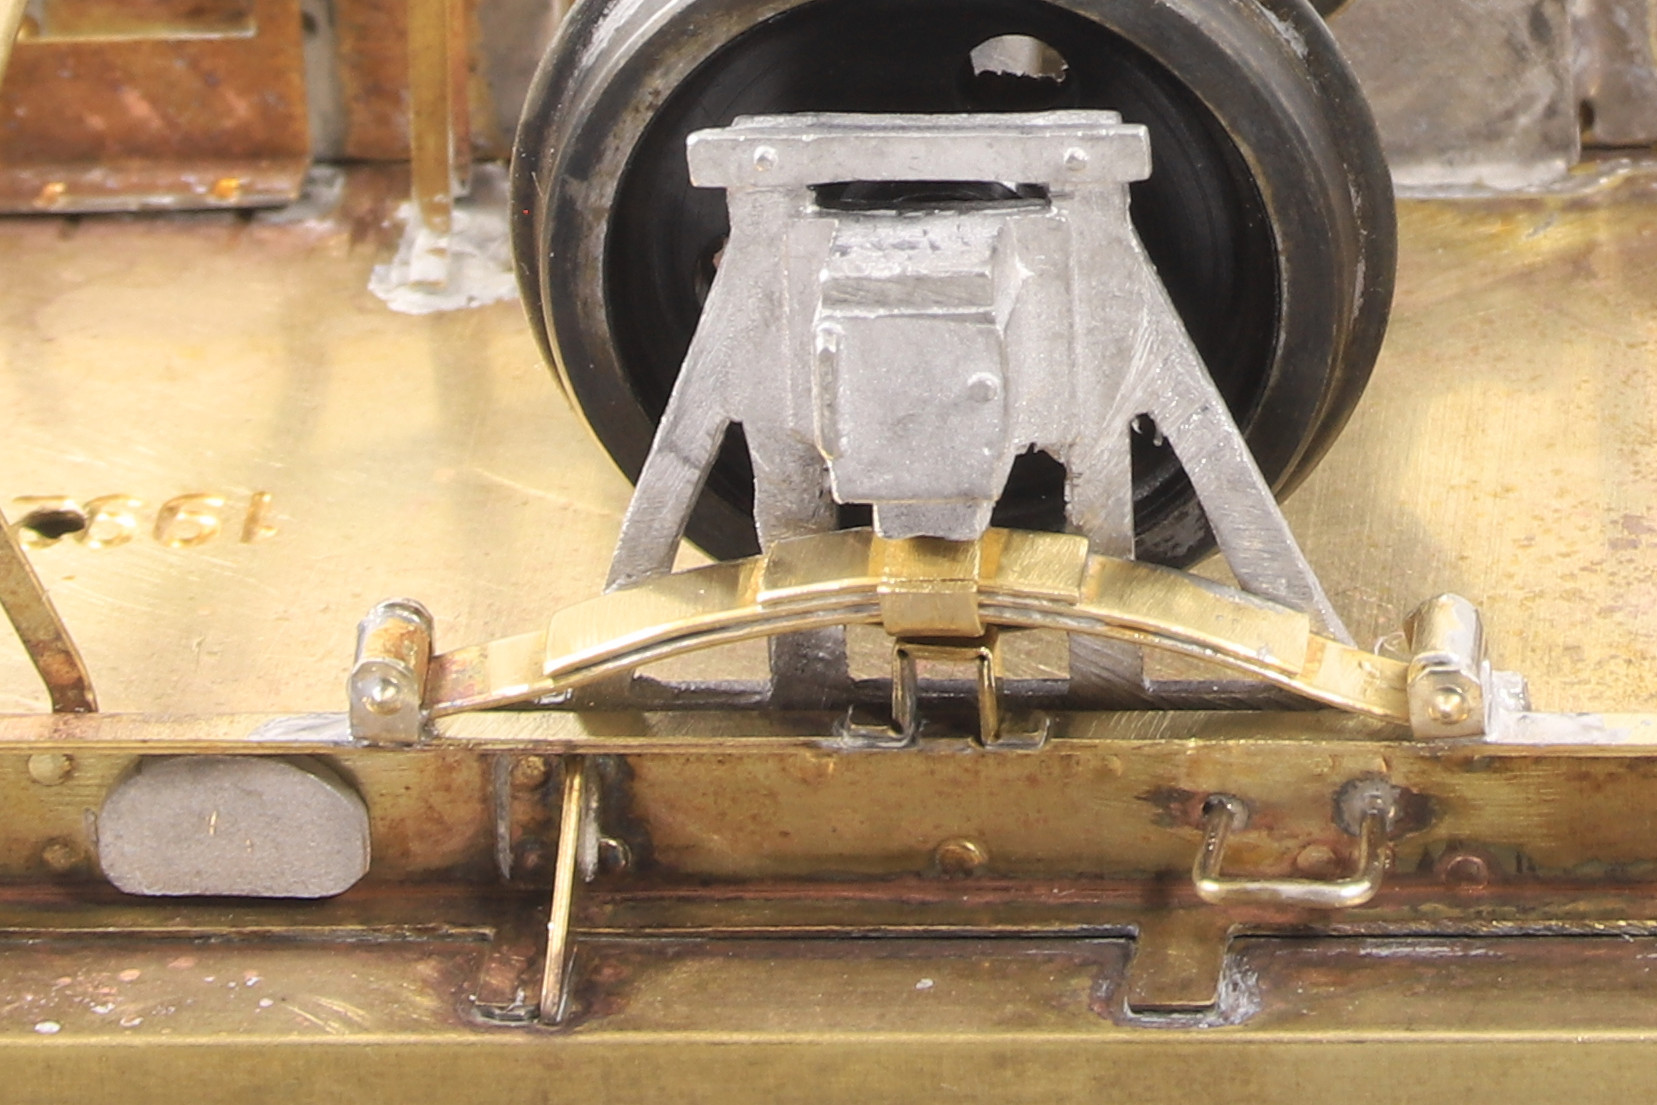
As ever this didn’t go quite as smoothly as I’d hoped as on two of the four axle guards castings that I removed, I did managed to damage them. The first was just one of the spring hangers broke off after I stuck a screw drive under it to prise as I heated up the body to soften the low melt. As luck would have it, when making some different anvils for my Leakey rivet press I had done some test rivet strips and one of those had just the right spacing to make some new hanger brackets from. A short stub of 1.6mm rod in between and we have this.
Sadly on the other one I wasn’t quite so lucky in that in a moment of inattention with the microflame I also melted the spring as well as the hanger. So I set to and made a pair of hangers and the spring to go in between.
On a side note I also fitted the D plates with the microflame. I tinned the backs with 100 degree solder and placed them on the solebar. Then I wafted the flame on it’s lowest setting along the bottom of the sole bar until I noted the D plate starting to settle then I took the heat away.