Late last week I managed to get all the Signs in situ, here’s where we are at.
They look very much like occupied arches to my eyes at least.
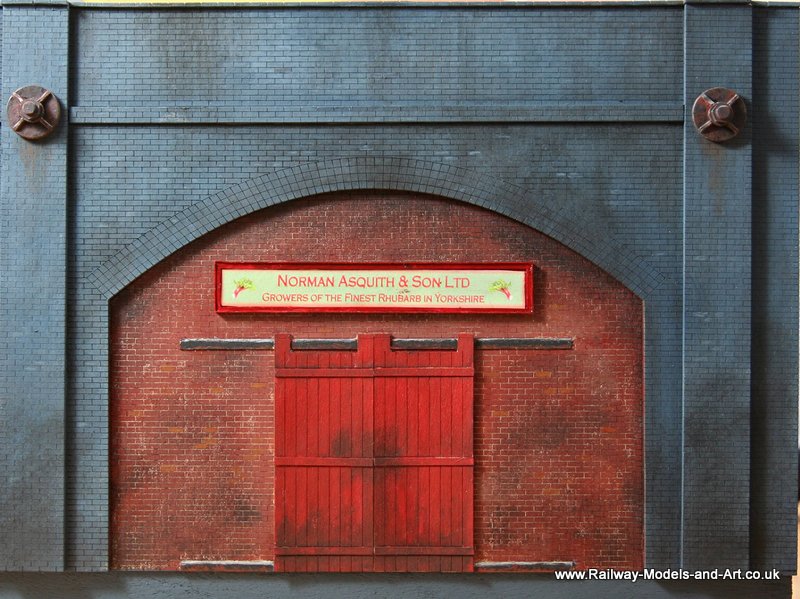
Signs in situ

Signs in situ

Late last week I managed to get all the Signs in situ, here’s where we are at.
They look very much like occupied arches to my eyes at least.
Signs in situ
Signs in situ
The sign bug seems to have bitten….
No business of old is complete without a few enamel signs.

They started as images downloaded from the web, resized and printed on my laserjet.
Then they were cut out and stuck with pva, to some offcuts of 20 thou styrene sheet. I have an old washing up bowl under the table where my Silhouette is into which I place offcuts. Besides being a tight Yorkshireman, such is the ability with Silhouette Studio to place the object on the cutting mat where you like, you can do test cuts on the smallest of pieces.
Once dry, having cut them out and stuck them last night, I then stuck a strip of sellotape over them as being simpler than messing about varnish something so small. I then trimmed the excess sellotape and cut the signs from the strip that I had stuck them to.
Finally I really wanted them to show their age a bit, because one of the signs has a date of 1911 on it so by grouping they would have been around a while.
The aging was done with the aid of a strong light, a magnifier and a very fine brush along with an enlarged online image of a battered enamel sign as a guide. – My eyes still ache…

7mm scale scratch built enamel signs
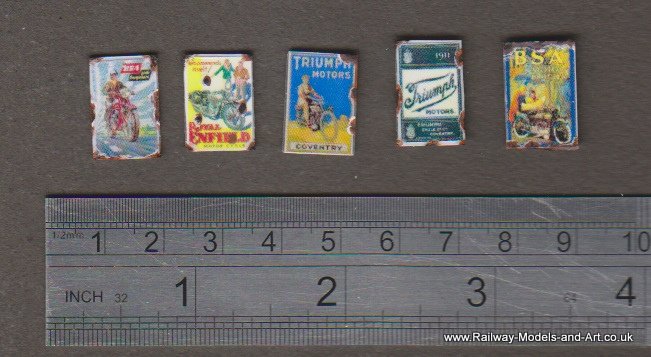
7mm scale scratch built enamel signs with a ruler for scale
I scanned them again including a ruler to show just how small they are.

7mm scale scratch built enamel signs with a ruler for scale
And finally I scanned them a third time at a lower resolution to give an idea of how they will look from normal viewing distances.

Diorama Sign Boards Ready for fitting
I drew up some sign boards in Inkscape then didn’t have time to cut them out so having spent much longer at Hartlepool show than I originally intended, I resorted to good old scratch building for them. – too busy catching up with people.
The biggest shock of all, apart from drinks and sandwiches for lunch I didn’t spend a penny. – Worth noting for the future, the food and drink was excellent quality and value for money. I am not sure what the attendance was like on Sunday but Saturday looked to be very well attended.
Diorama Sign Boards
A particularly busy week at work didn’t leave much energy or enthusiasm for modelling last week. I did get a few bits and pieces done though.
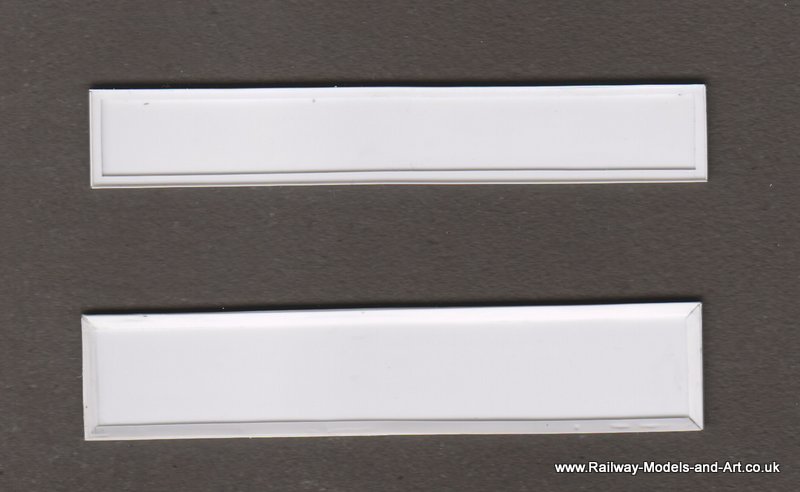
The first relates to my last post on the occupied arches. Chris asked if I could make some Pattress Plates that were used to strengthen buildings and bridges to further enhance the arches. Inkscape to the fore and I soon had some parts draw up and cut out.
They are made up from multi layers of 20thou sheet and sadly I didn’t take photos of the finished articles before sloshing on the paint but here they are before fitting to the arches.
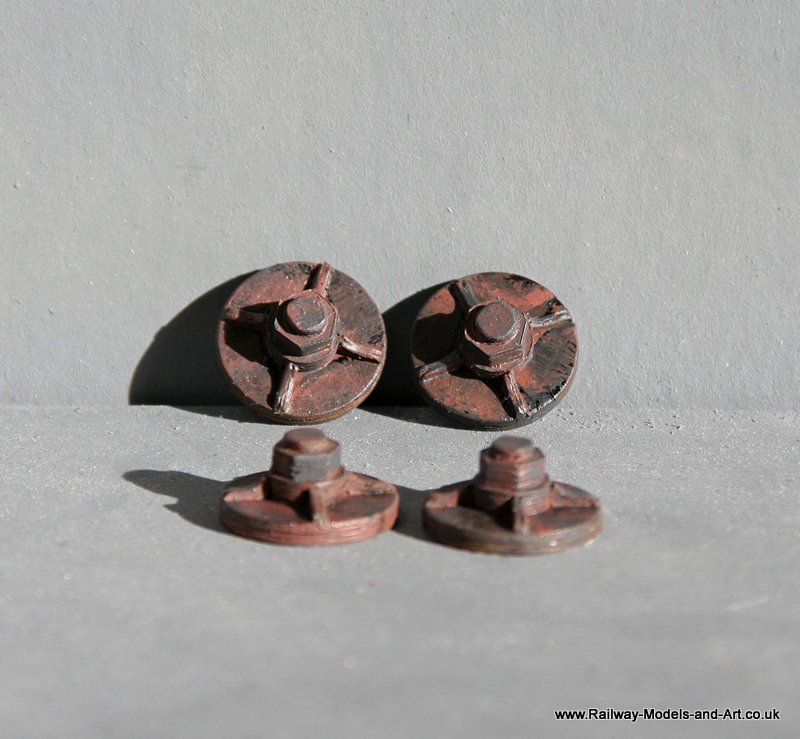
Silhouette Cut Pattress Plates
On my long term “want to try that” list has been Vallejo Crackle medium, which is used to represent peeling cracking or flaking paint. None of the usual haunts that I normally buy my supplies of Vallejo paint from seem to stock it and I am far too tight to pay postage to get some from eBay. Which pretty much doubles the cost.
Having done a search for it on eBay I noticed that Jackson Art supplies stock it and they are one of the places that Chris uses for her art supplies. I asked if she would add some to her order the next time she placed one which she did last week. – She waits until she needs enough supplies to qualify for free postage…. We are from the People’s Republic of Yorkshire after all.
When I knew it was on it’s way I thought what shall I use to test it and I could have used a square of styrene but no… I though perhaps I could could a couple of door sized pieces and cut some grooves to represent planks.
Which I did, then I thought I could add rails and stiles (I think that’s what they call them?) to the back and perhaps a couple of hinges on one to look like a door that’s been taken of for disposal or repair. Then I thought ah yes but the type of doors that I am representing have “Snecks” (or that’s what we call the round ‘ere) which meant that I would need to add a couple of pattress plates (see the theme developing).
Finally I got around to doing some actual painting and testing of the crackle medium. I have read various reviews and it seemed that many people didn’t really get on with it. I suspect that in the main that’s because the instructions are sparse to say the least – paint surface with acrylic paint, don’t shake the bottle, apply to the surface and allow to dry thoroughly (small cracks) over paint with a contrasting colour. For larger cracks overpain while still tacky.
Now peoples biggest issue seems to be that while overpainting you can have a tendency to drag the paint off removing your nicely cracked surface – see the brown door.
Having done the brown door and experienced just that effect albeit that I think that it looks okay bearing in mind how much magnification there is on the images.
On the second (blue) door I watered down the paint quite significantly and did the cover in a single stroke making sure that I didn’t touch it again with the brush once an area had been covered this gave a much better effect that does look like well worn paint work.
I plan to do some more tests but using the airbrush to apply the second coat to see what effect that has.
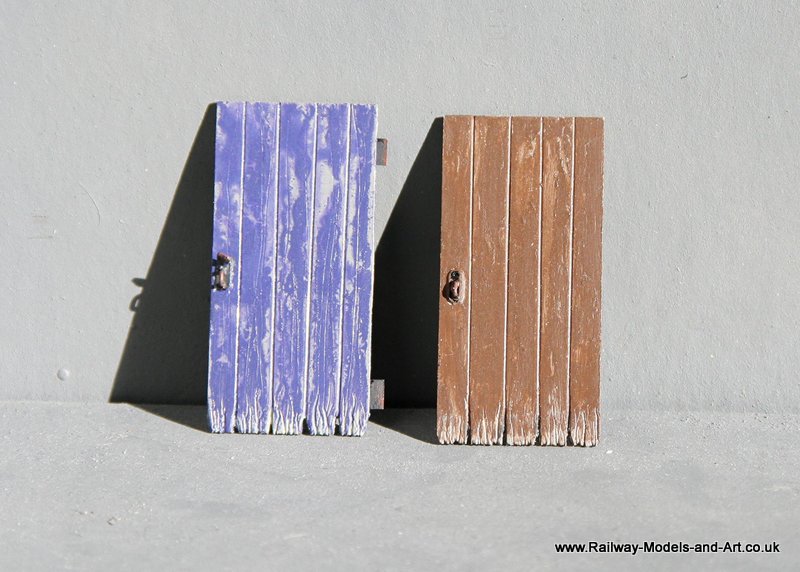
Scratch built 7mm scale doors
Scratch built 7mm scale doors
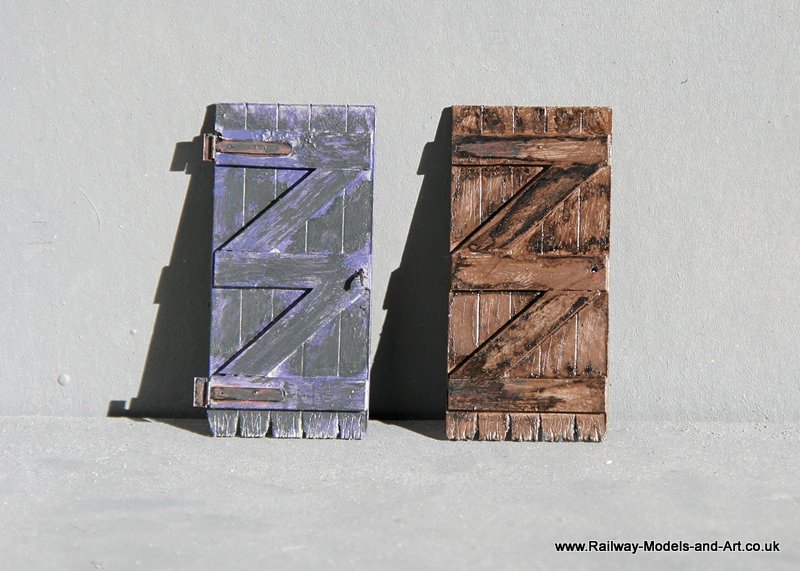
I tried variations of the above techniques on the backs and to be honest I am not that happy with any of them.

Scratch built 7mm scale doors
and finally the “sneck”
I couldn’t resist distressing the bottoms of the doors to look like they have rotted away like so many outside toilet doors of my youth.

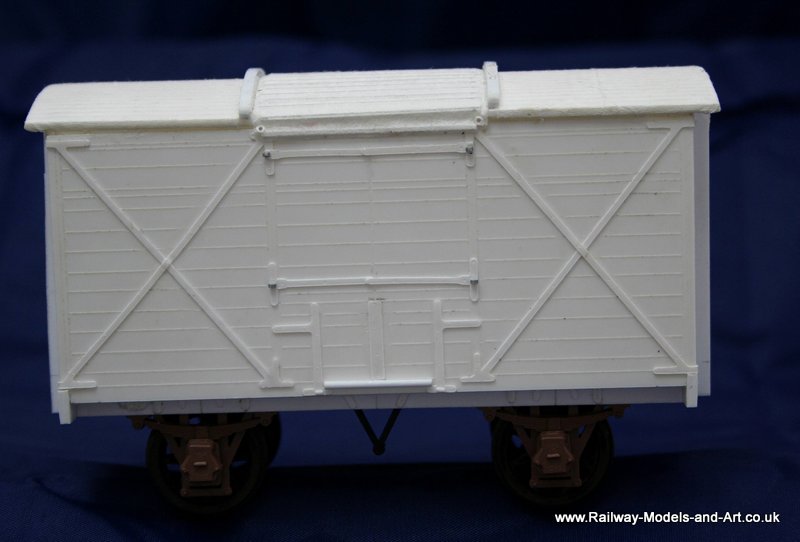
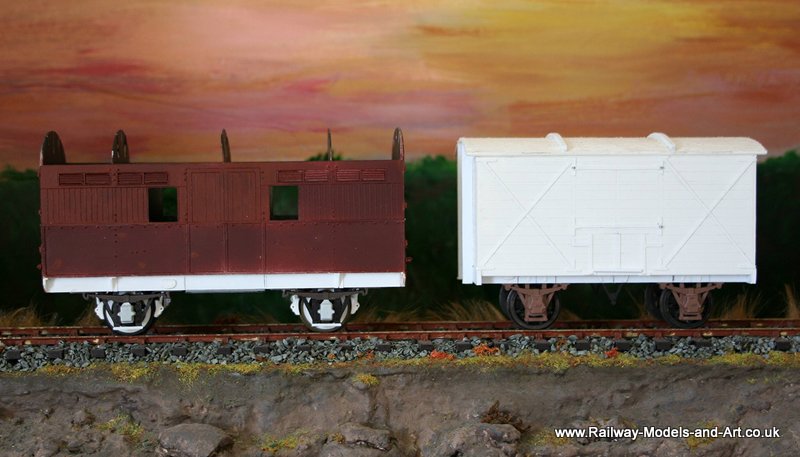
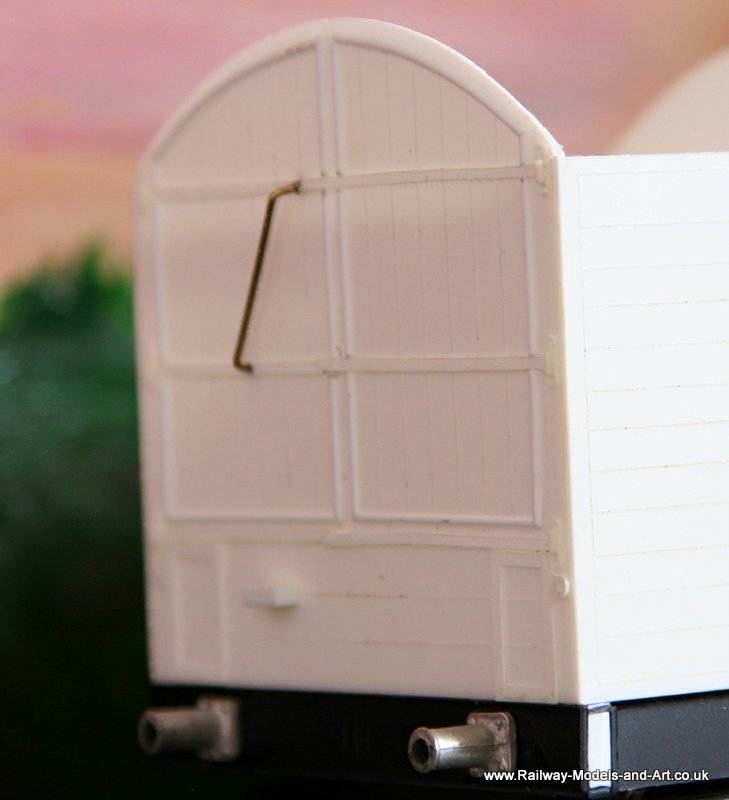
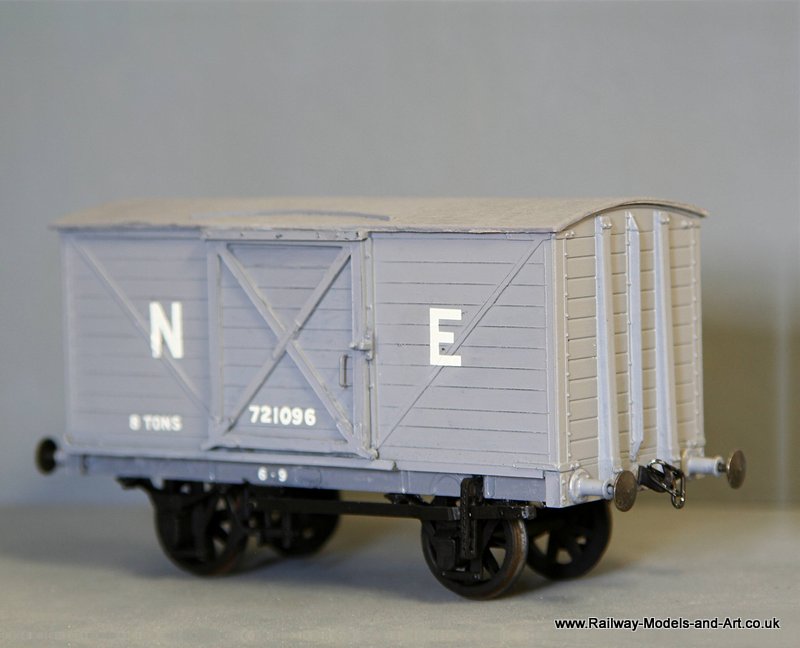
7mm Scale Silhouette Cut NER G1 Van

7mm Scale Silhouette Cut NER G2 Van
7mm Scale Silhouette Cut NER G2 Van
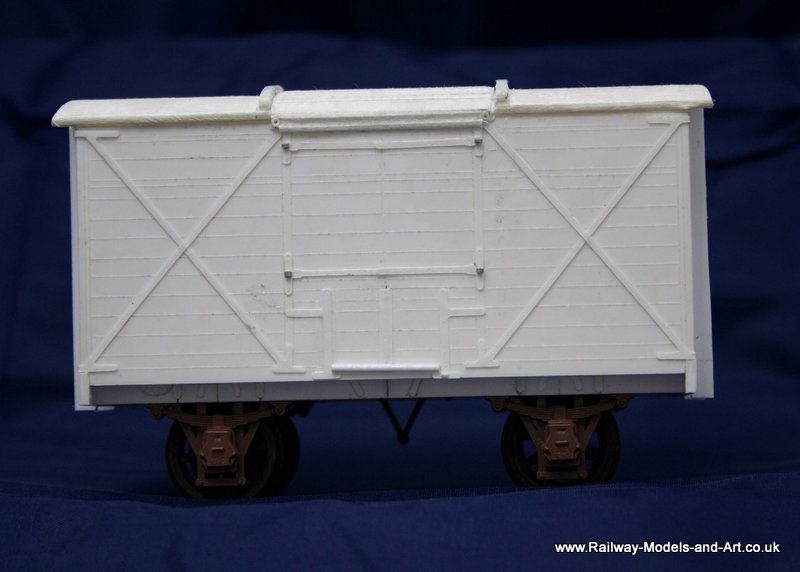
7mm Scale Silhouette Cut NER G2 Van

7mm Scale Silhouette Cut NER G2 Van

7mm Scale Silhouette Cut NER G2 Van
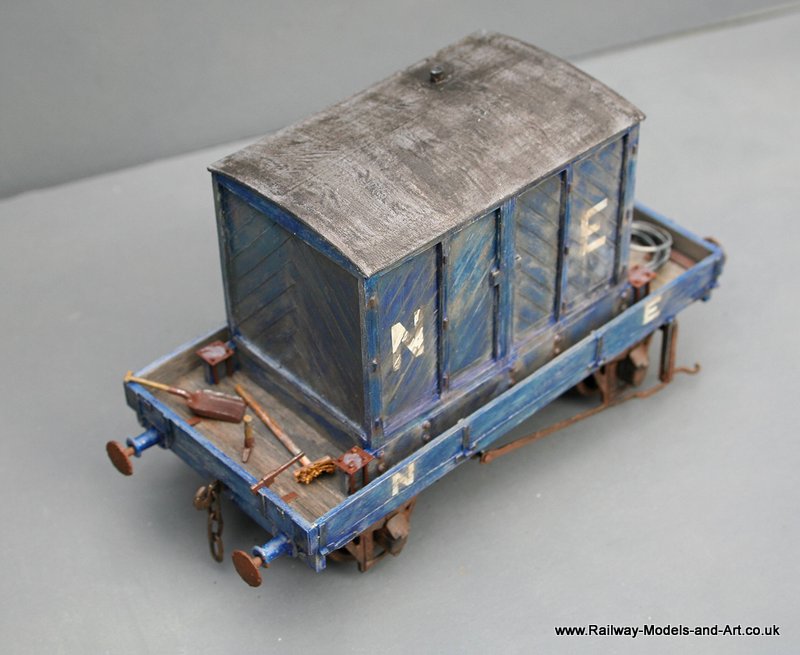
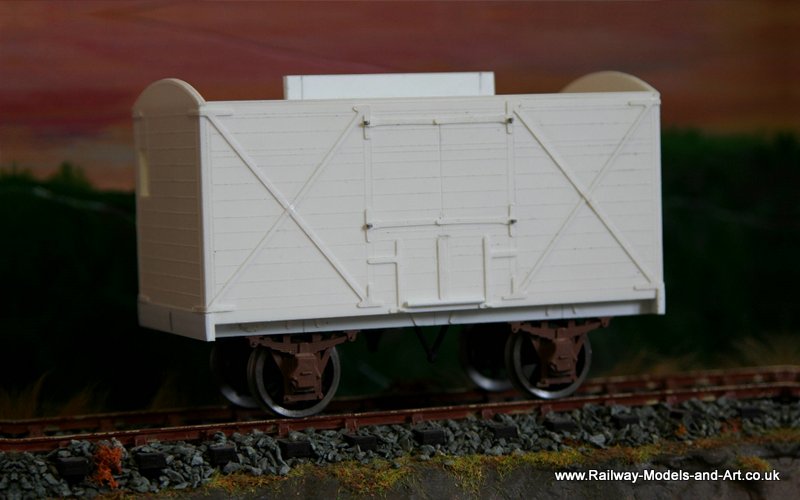
Another item that I finished in time for Telford and entered into the modelling competition is the GNSR vacuum cleaner wagon.
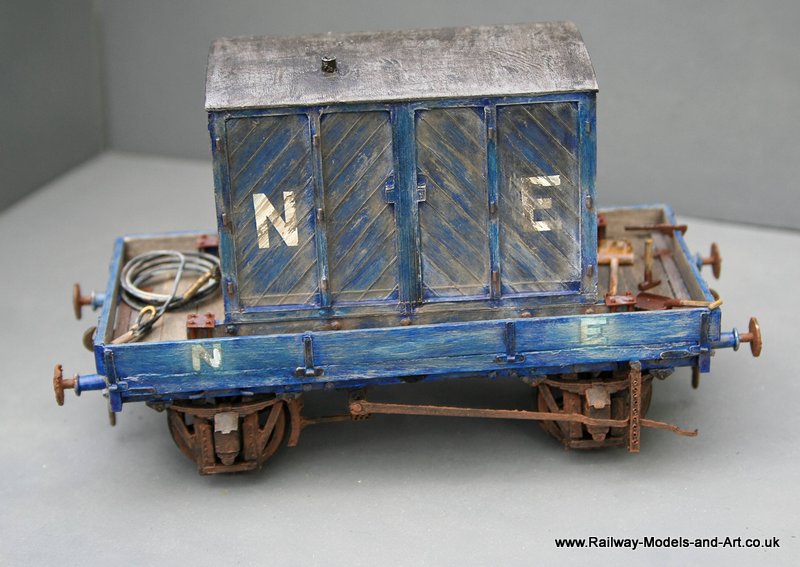
7mm Scale scratch built ex GNSR Vacuum Cleaner Wagon

7mm Scale scratch built ex GNSR Vacuum Cleaner Wagon

Ex GNSR Vacuum Cleaner Wagon
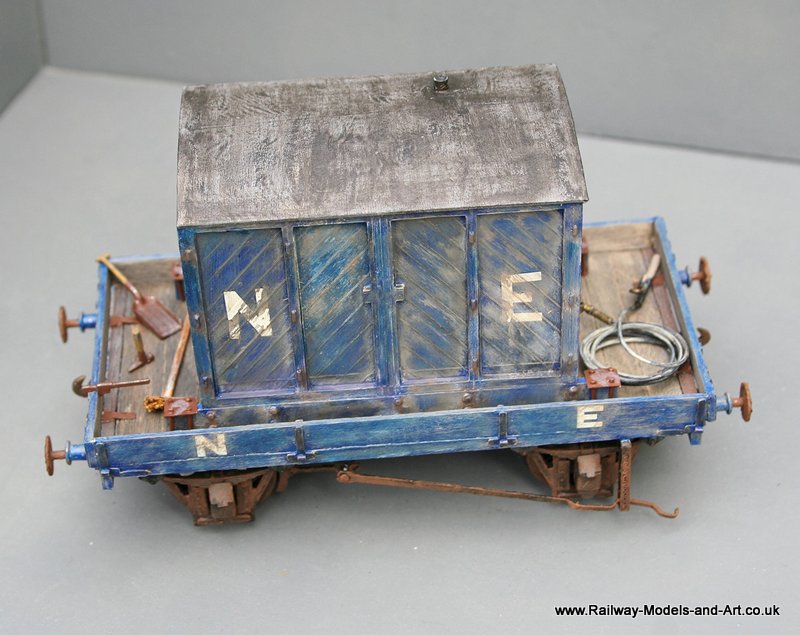
7mm Scale scratch built ex GNSR Vacuum Cleaner Wagon
7mm Scale scratch built ex GNSR Vacuum Cleaner Wagon
7mm Scale scratch built ex GNSR Vacuum Cleaner Wagon

7mm Scale scratch built ex GNSR Vacuum Cleaner Wagon

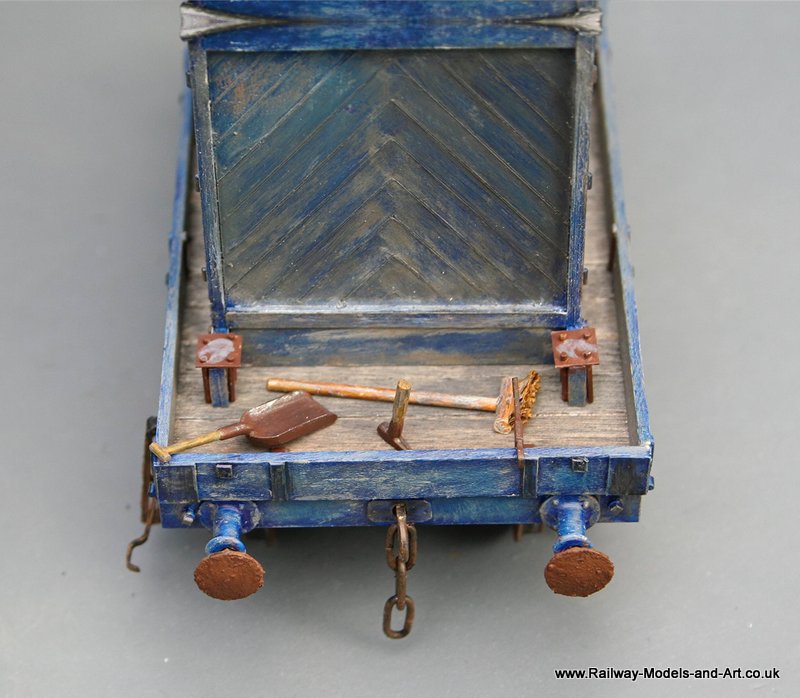
7mm Scale scratch built ex GNSR Vacuum Cleaner Wagon
You will note from the first photo that I added an extra broom since the lower shots were taken – the brooms are scratch built using plastic rod and the ubiquitous lens tissue for the bristles.
Well the end is in sight and this one is almost ready for the small adds.
The only thing that’s left (unless I discover something else) is to glue to roof on.

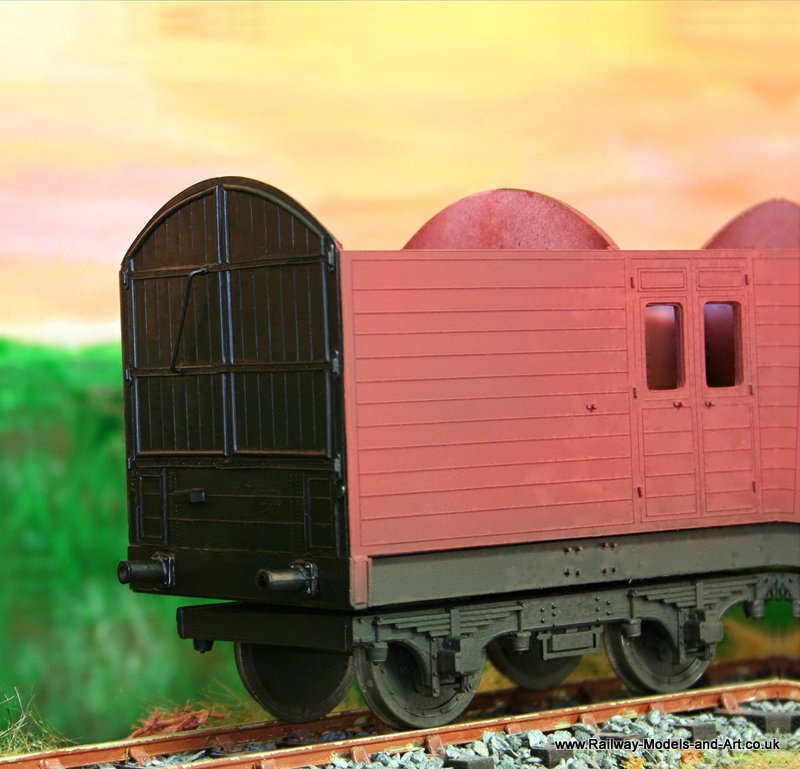
7mm Scale Ex NBR Bogie CCT in BR livery

7mm Scale Ex NBR Bogie CCT in BR livery
And finally a close up of the transfers that I had commissioned from Precision Labels (I took the opportunity to get a second set LNER set at the same time for the one that I plan to build for me.

7mm Scale Ex NBR Bogie CCT in BR livery

ex NBR CCT further detailing

ex NBR CCT further detailing
Modified by CombineZP

Modified by CombineZP

Scratch Built ex NBR CCT
Scratch Built ex NBR CCT
Scratch Built ex NBR CCT

Scratch Built Brake Van side lamps

&mm scale Scratch built NBR Bogies CCT

&mm scale Scratch built NBR Bogies CCT
&mm scale Scratch built NBR Bogies CCT
&mm scale Scratch built NBR Bogies CCT

&mm scale Scratch built NBR Bogies CCT
&mm scale Scratch built NBR Bogies CCT
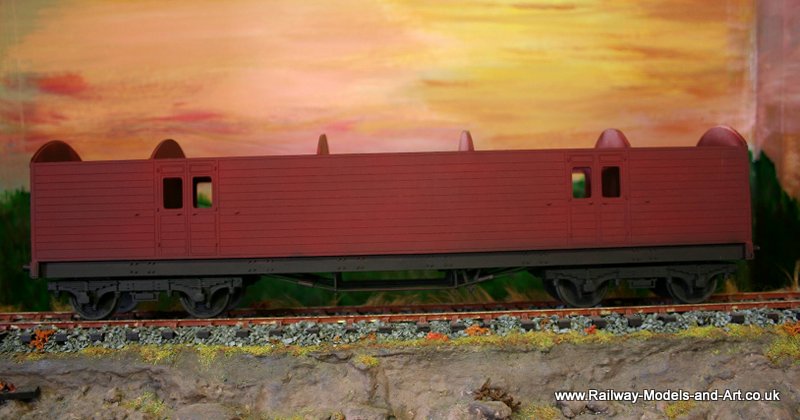
Scrtach built ex NBR D39B Van

Scrtach built ex NBR D39B Van

Scrtach built ex NBR D39B Van

Scrtach built ex NBR D39B Van

Scratch built vans using Slaters and Parkside spares plus a Silhouette Cutter
Scratch built vans using Slaters and Parkside spares plus a Silhouette Cutter
I also managed to move the NBR Diagram 39B van on quite a way to just needing a roof and couplings.
Ex NBR D39B Van

Ex NBR D39B Van

Ex NBR D39B Van
The brake levers proved to be a little challenging, none of my many Parkside or Slaters spares were long enough. The answer was to laminate a piece of 0.25mm either side of a piece of 0.5mm and leave it over night to dry thoroughly. – in the same manner that I did the W Irons earlier.
I then cut a couple of tapered strips and applied limonene to both sides where I wanted the bends to be (one bend at a time) once the limonene had softened the strips I made the bend with some round nosed pliers. I then used some self locking tweezers as clamps to hold the bends in position while the plastic hardened again.
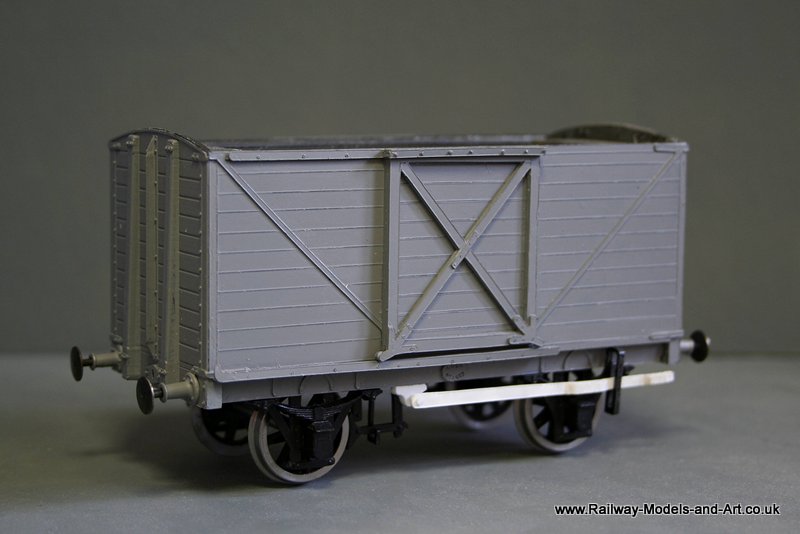
In between distressing wagons I managed to progress a couple of other projects the first one being the ex GNSR Vacuum Cleaner Wagon. This now has buffers, brakes and a coat of paint on the upper works. The buffers have been borrowed from another kit and the brakes were from the spares box

GNSR Vacuum Cleaner Wagon
GNSR Vacuum Cleaner Wagon

NER CCT

NER CCT

GNSR VacuumCleaner Wagon

GNSR VacuumCleaner Wagon

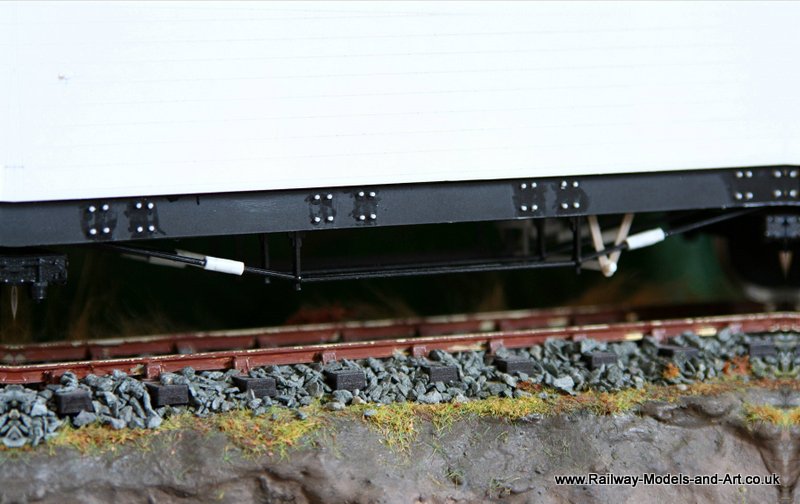
Silhouette Cut Axleguards

Silhouette Cut Axleguards