My obsession with interest in all things ex NBR continues.
Last year I bought a selection of NBR underframe sprues from Parkside for scratch building wagons (this was before the Silhouette Cutter was even on the horizon. At the same time I also got a couple of ends from the 8 ton Jubilee van kit with a view to making one of the later Diagram 40B vans. Unfortunately when I compared the drawings the later vans whilst having the same style of ends were not only taller but wider too.
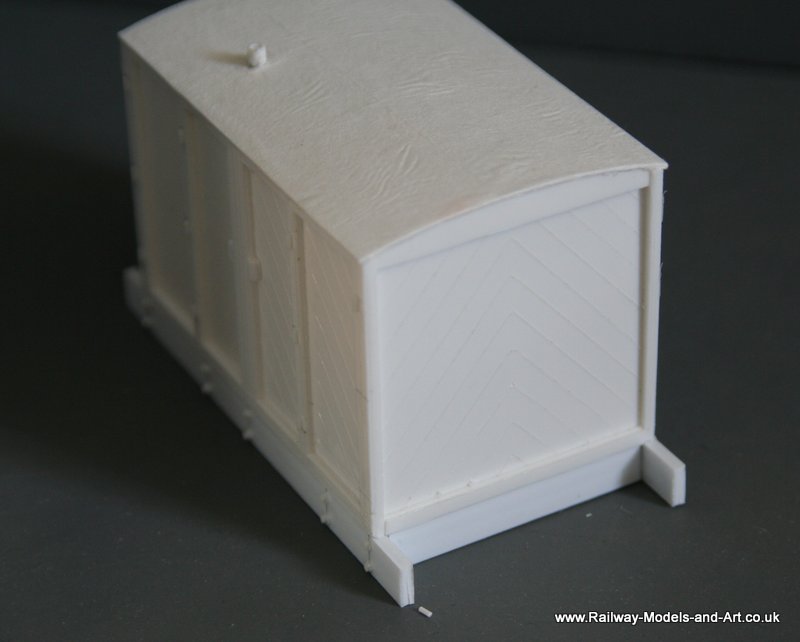
So the ends went in the spares box and were forgotten about. That is, until last weekend when I happened to be reading the chapter in Vol 3 of LNER wagons and realised that the first few vans that the NBR built to D39B were not only low roofed but the same width as the earlier Jubilee vans – Bingo!
The next problem was that although I have a few drawings they are all of the taller vans. Tatlow to the rescue. Although there isn’t a drawing, there is a pretty good square on side view photo, so I scanned and imported it into Inkscape. I resized it using the wheel base as the known dimension and essentially drew over the top of the photo.
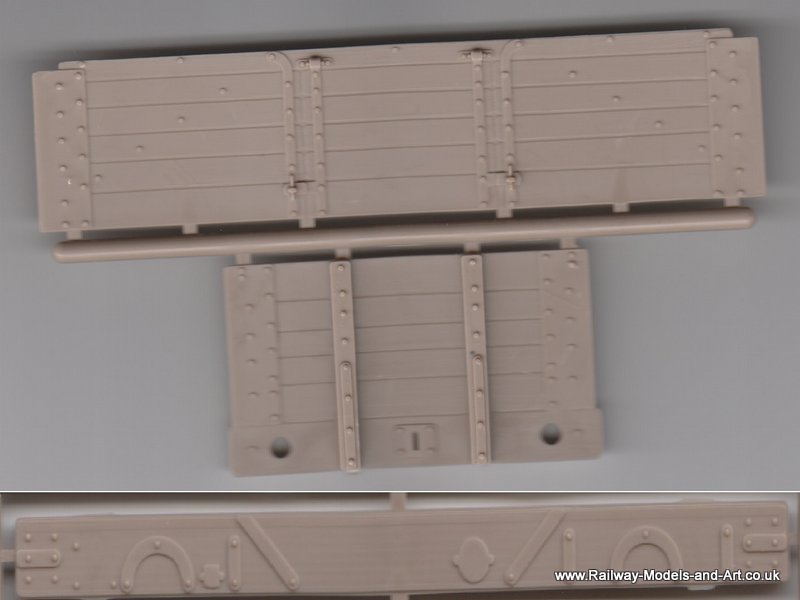
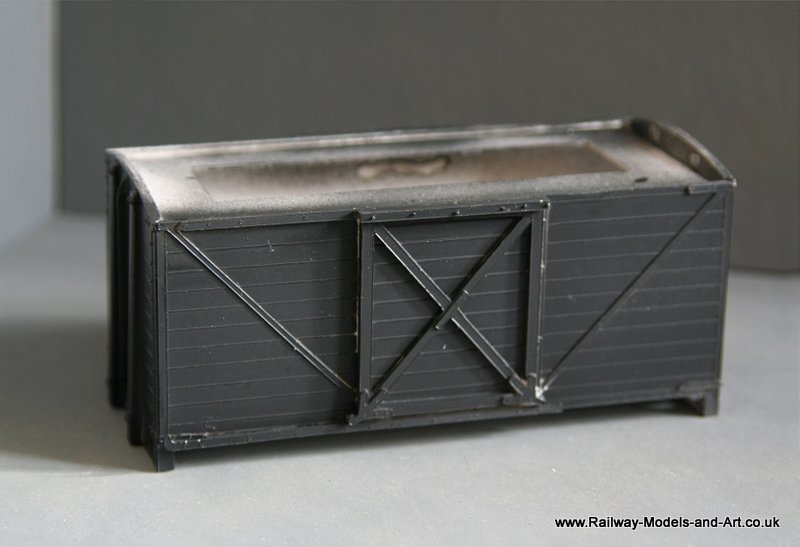
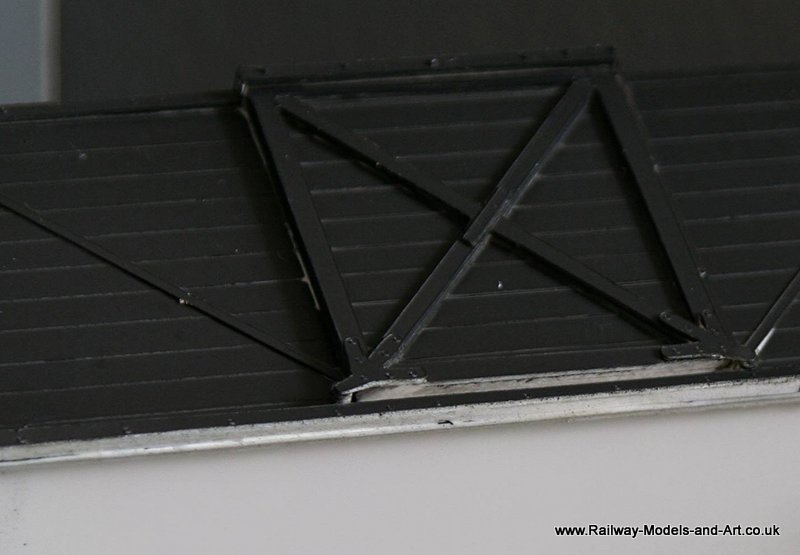
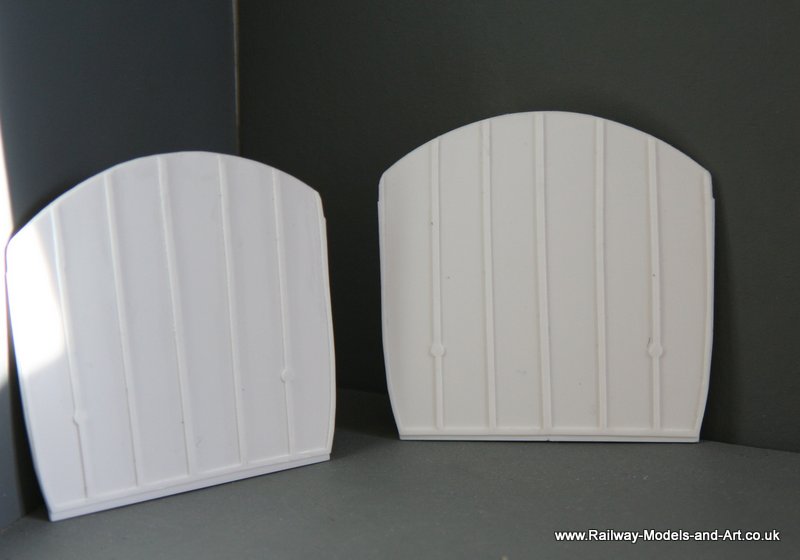
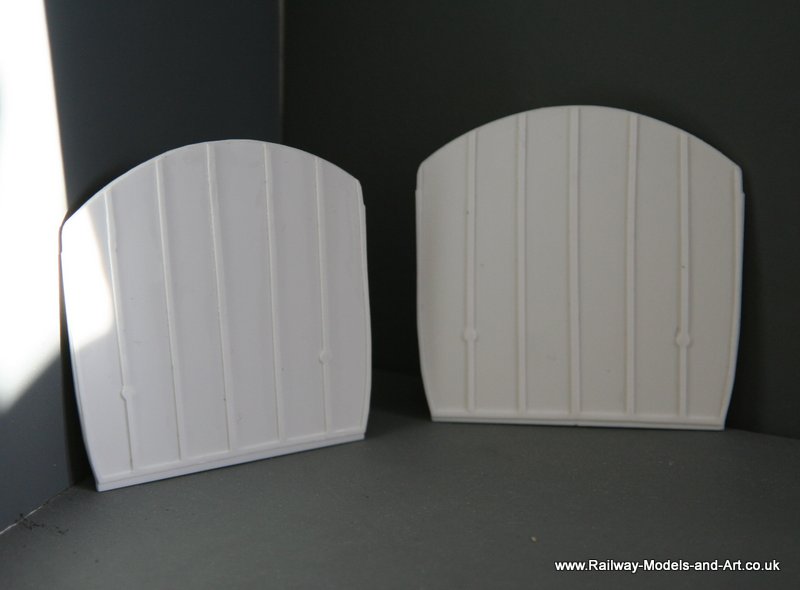
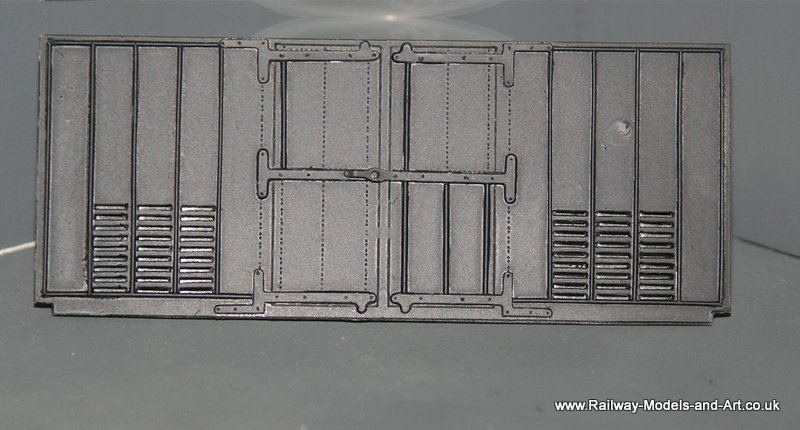
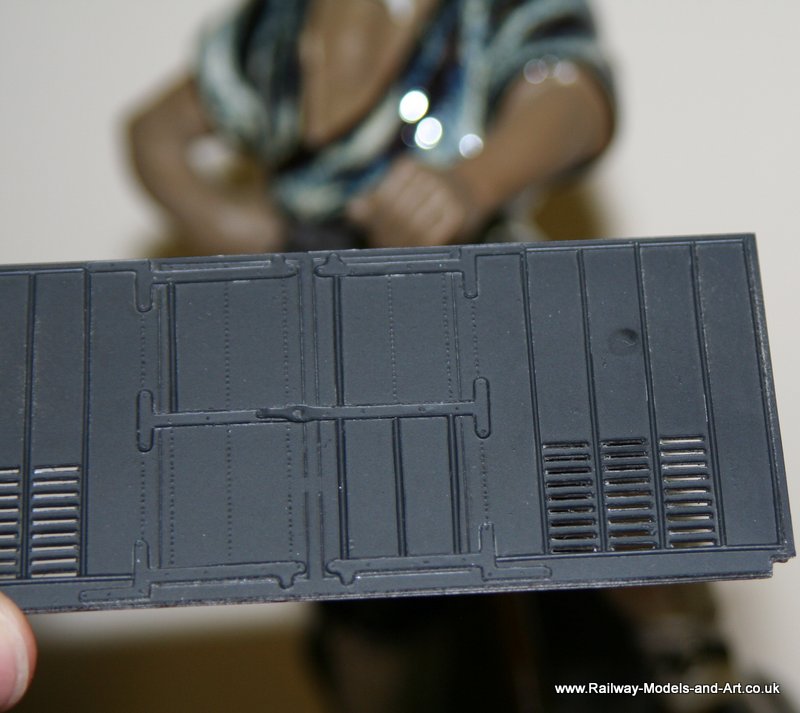
I have in mind to do some outside framed vans starting with and NER G1 van and decided that the external framed door on this one would act as a proving ground for doing them in layers. Initially I drew the doors as 6 layers of 20thou – 2 backing, 1 plank detail and 3 for the framing. Once I had snapped them out and compared them to my existing Parkside 8 ton Jubilee vans I came to the conclusion that 6 layers was too thick. I left out one of the backing layers and one of the framing layers and then proceeded to assemble the doors.
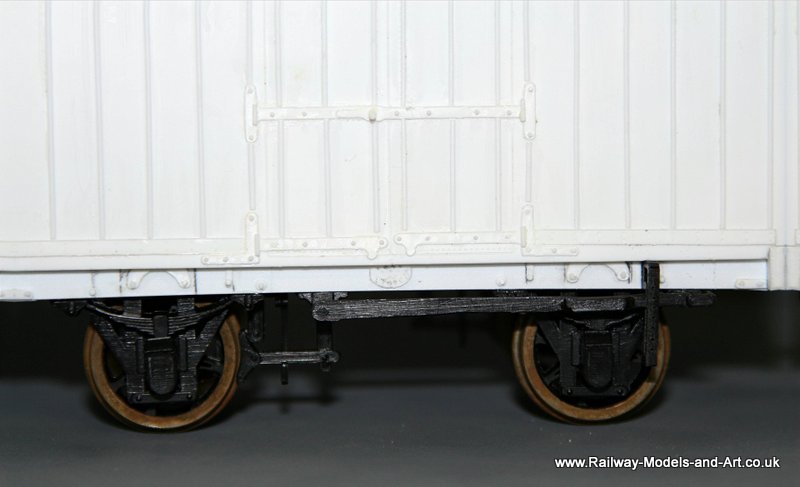
On the other van ‘kits’ that I have done I have done sides and ends in 3 layers and have sized the inner 2 side layers shorter to allow the ends to fit inside the outer layer of the sides. I had to do it a little differently on this one because the Parkside ends are chamfered to a 45 degree angle. To get around it I made the 1st inner layer 0.5mm shorter than the outer side and the next one another 0.5mm shorter than that. It was a great idea but fell down in practice because it was difficult to spread Butanone on the layer and then accurately place the next layer central with a 0.5mm gap at either end so the next ones that I do will have a removable registration tab on them.
I managed to get them together in the end and then using a broad diamond file (from the ladies manicure counter) I filed them to an angle that fitted against the ends. I took care to mark each side and end where they fitted together to make sure that they went back as I had filed them to fit.
In the end I was really pleased with how nicely they fit against the ends bearing in mind that I had drawn the parts from a scaled photo.
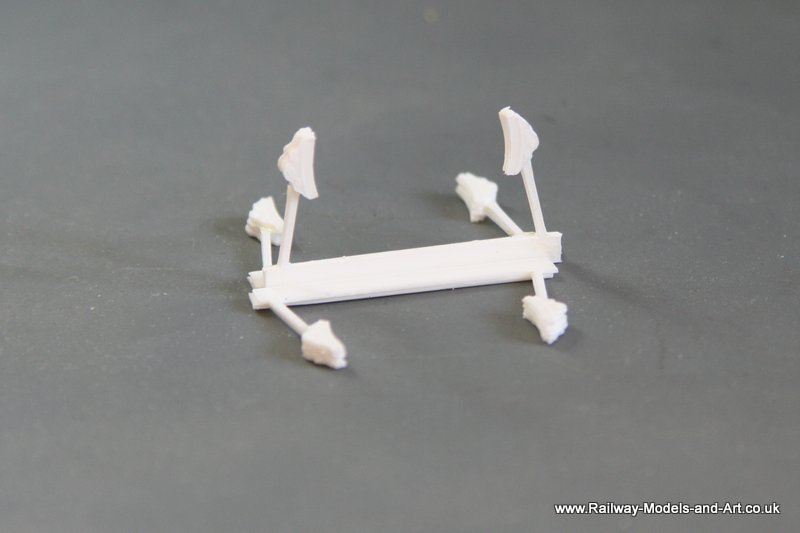
I had drawn the curved ended bottom runner and the plates that look a bit like birds feet in 20 thou to give them a bit more strength (I also cut some from 10 thou just in case). That left the runners themselves which are very much like pulleys. I hit upon the idea of putting a length of 2mm styrene rod in a pin vice and then using the blunt point of a round file to score/pick at it to make a groove around it that would sit on the runner. I then used a scalpel to cut of the runner by rotating the pin vice and I was quite impressed at how cleanly the “pulley” was cut off. Since then I have thought of a refinement – grind a curved cutting edge on a piece of 0.8mm piano wire instead of the rather crude file point.
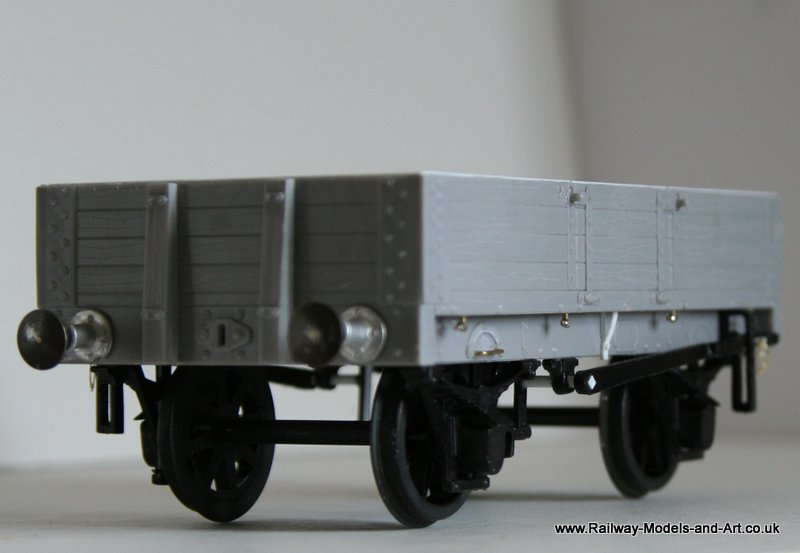
Next I assembled runners and the door stops etc. on one side and glued it to the ends/floor. At this point I thought I was onto a winner when the spares box also revealed a pair of spare Parkside sole bars but sadly they were too long and although I could have cut them down the wheel base was wrong too.
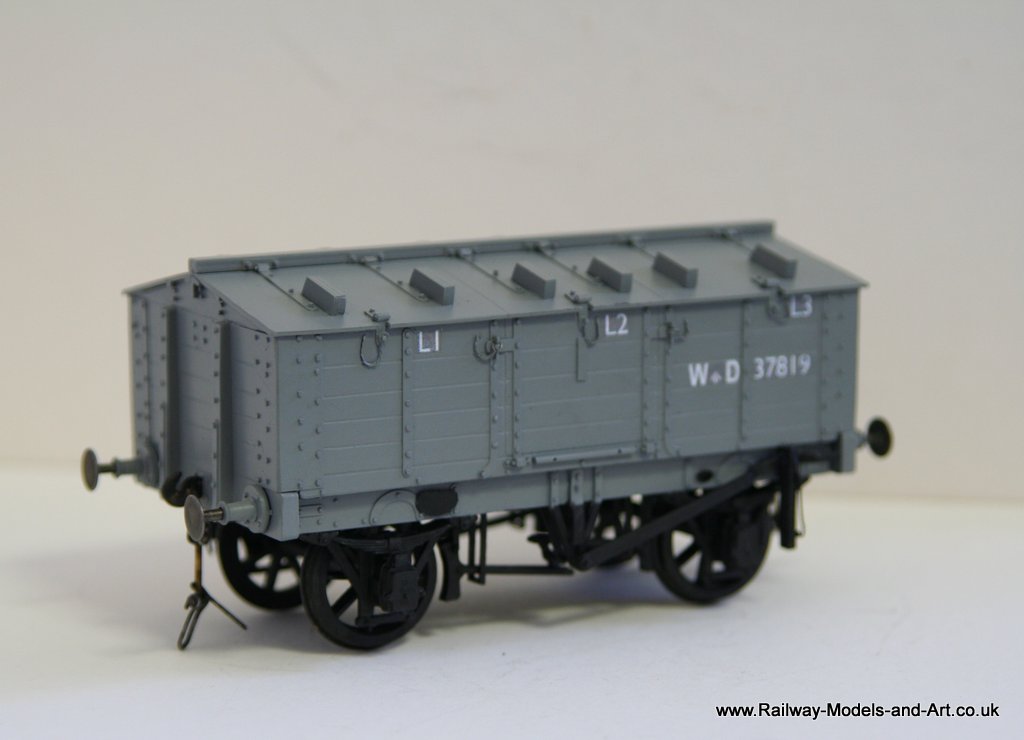
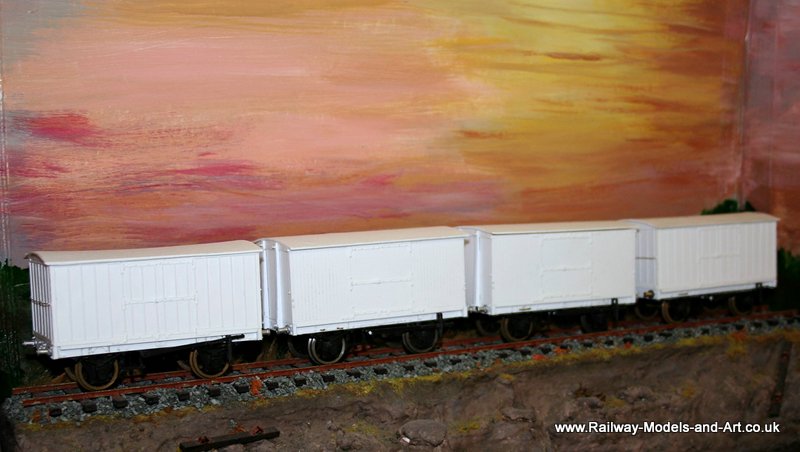
Enough of the talk on to the pictures.

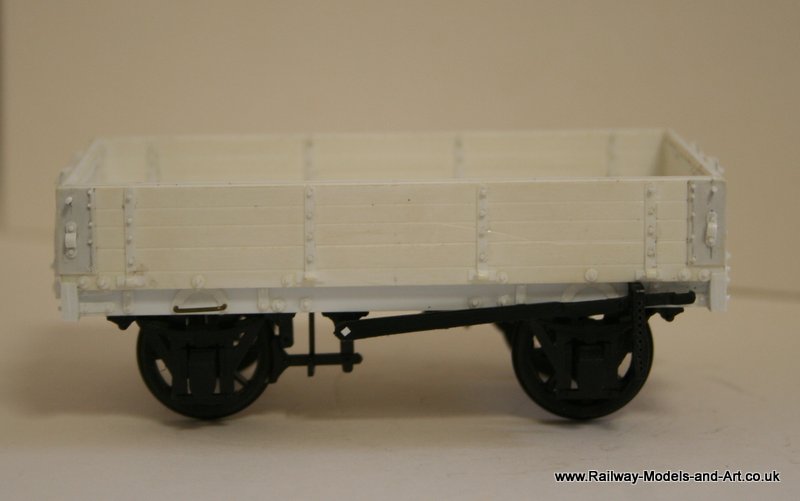
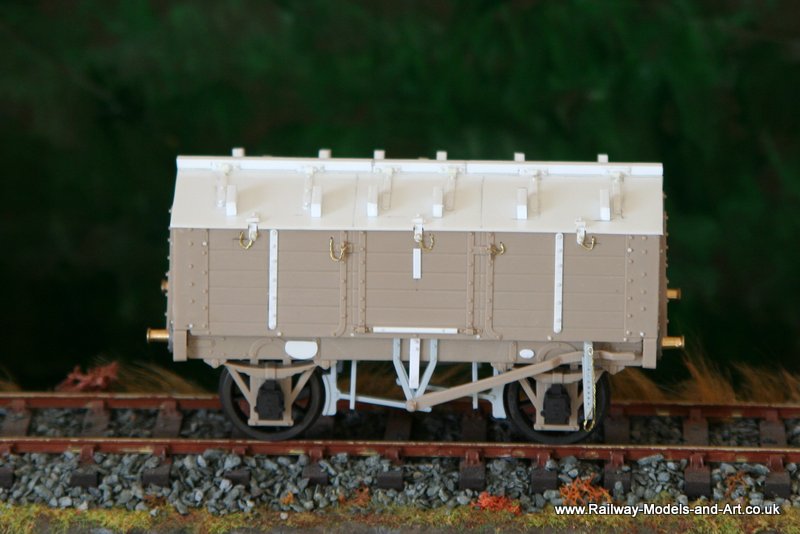
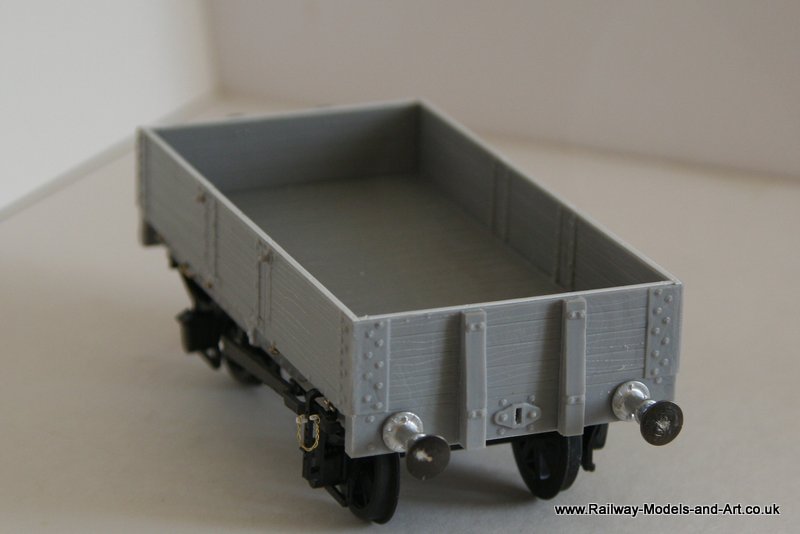
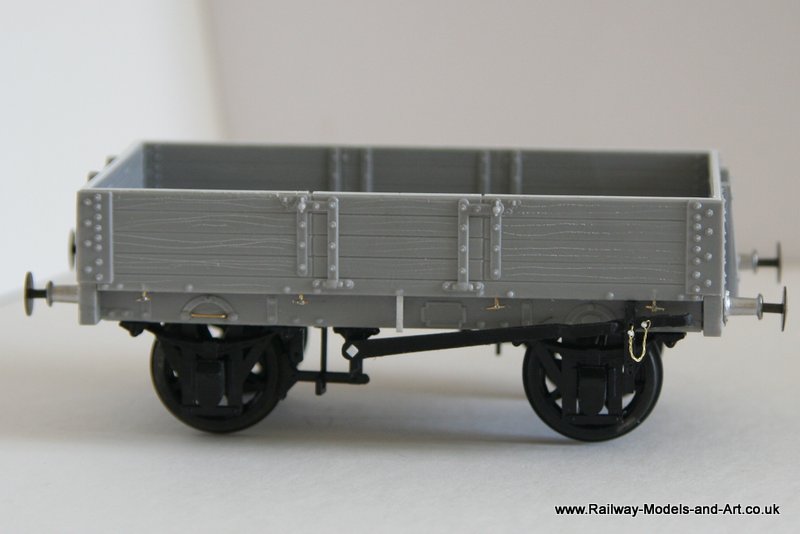
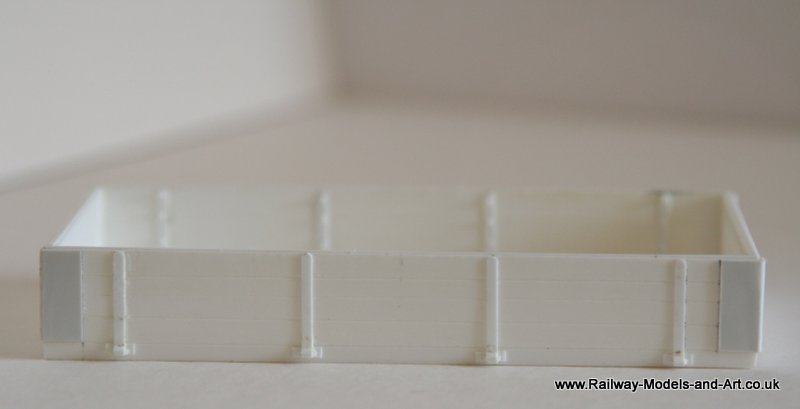
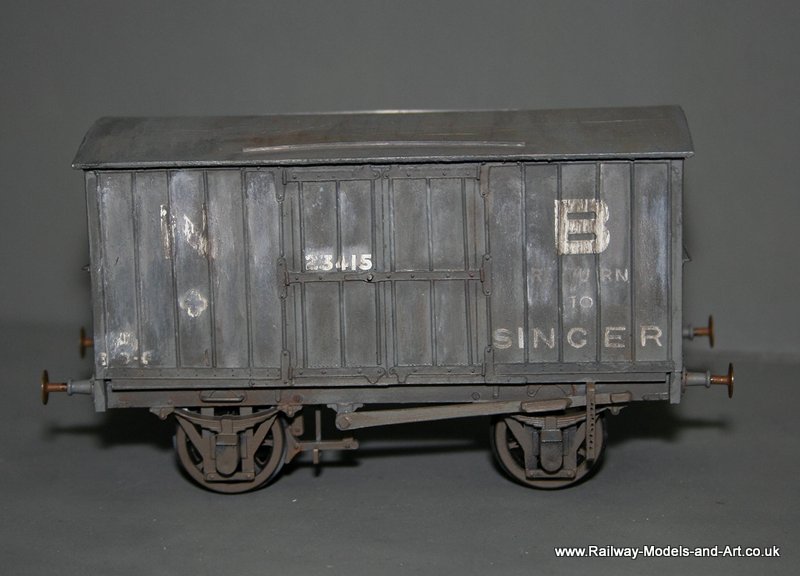
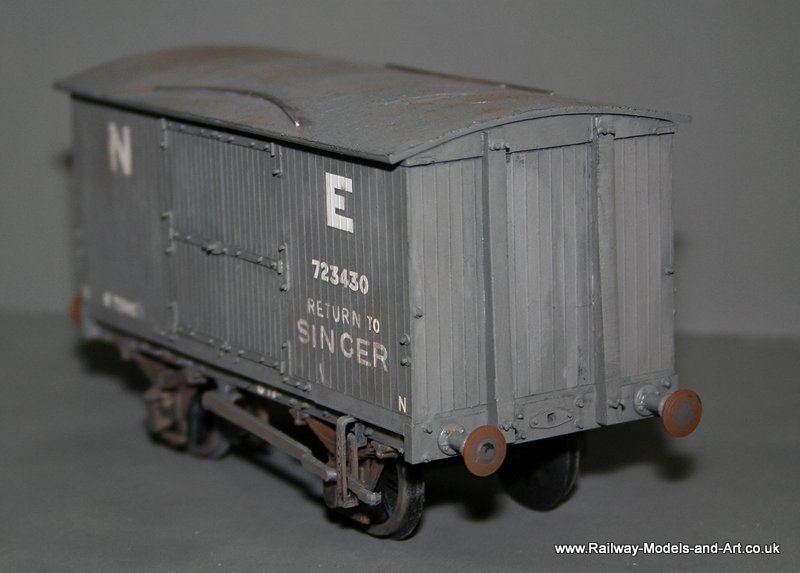
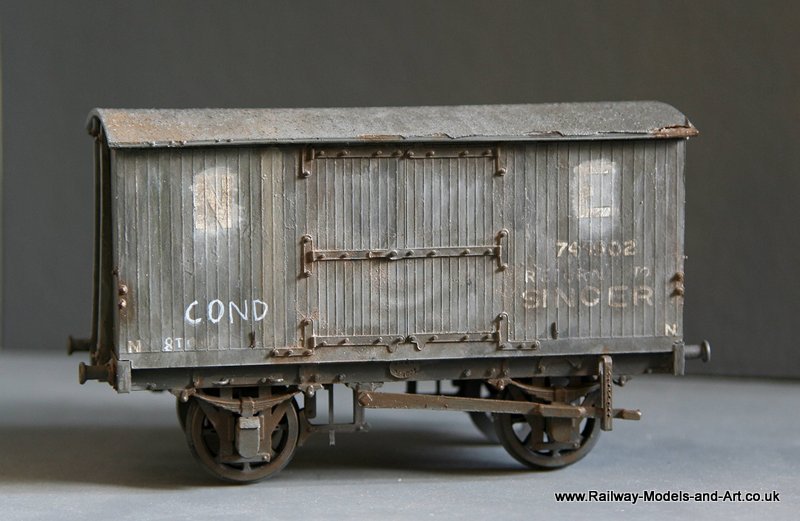
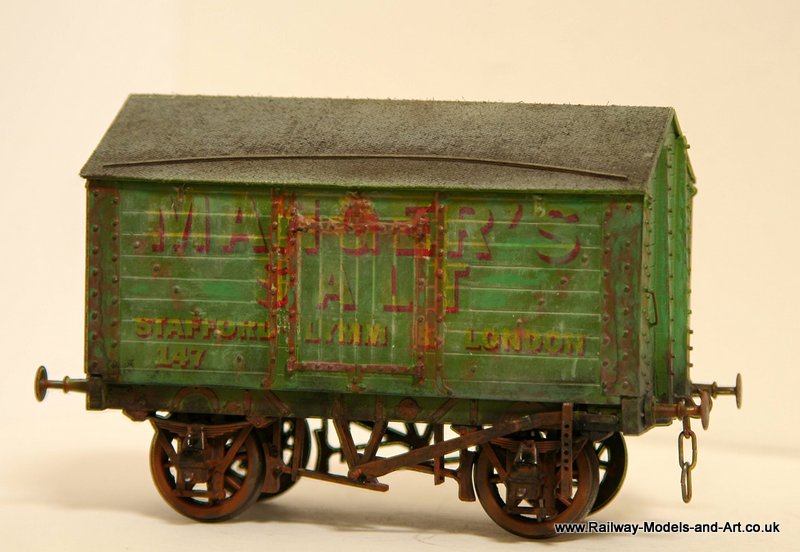
NBR D39B 10 ton van

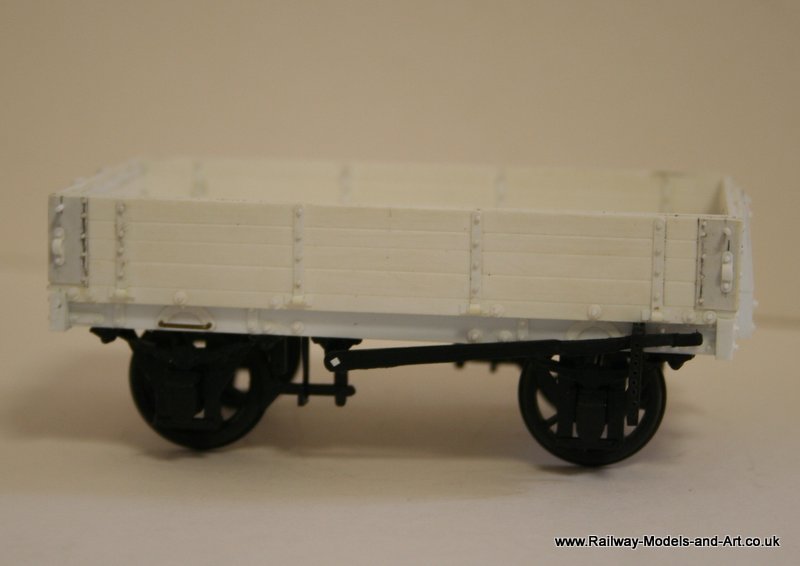
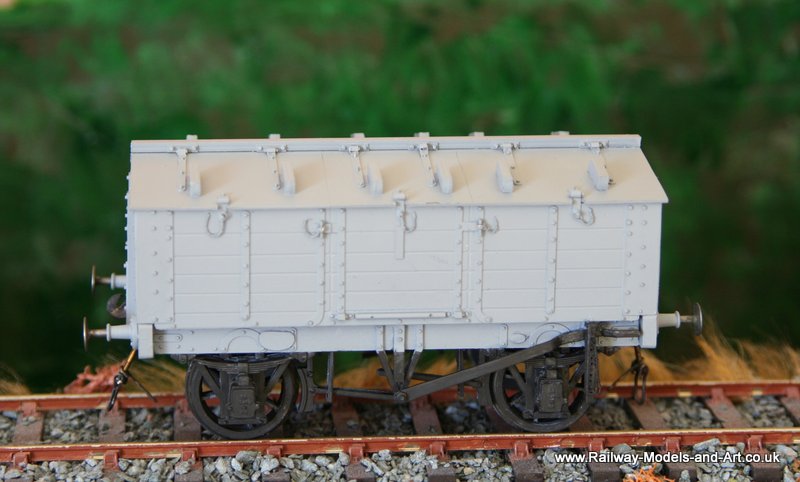
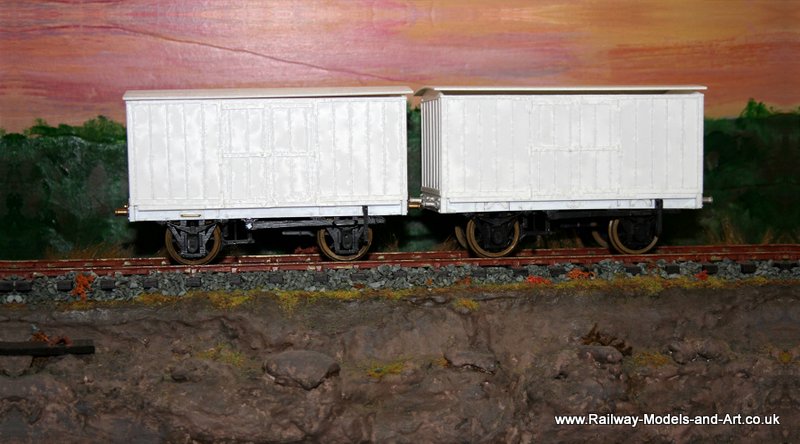
NBR D39B 10 ton van
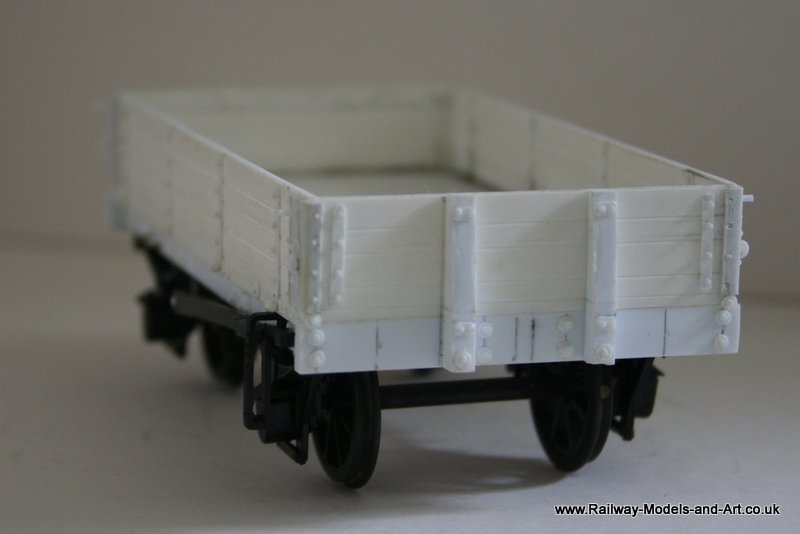
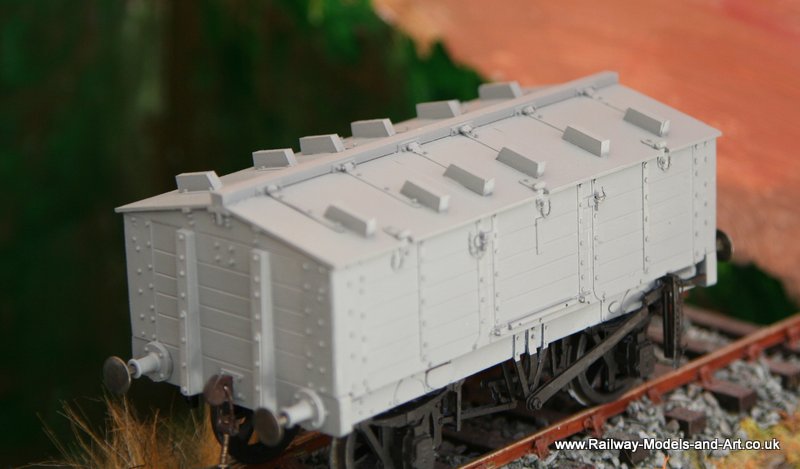
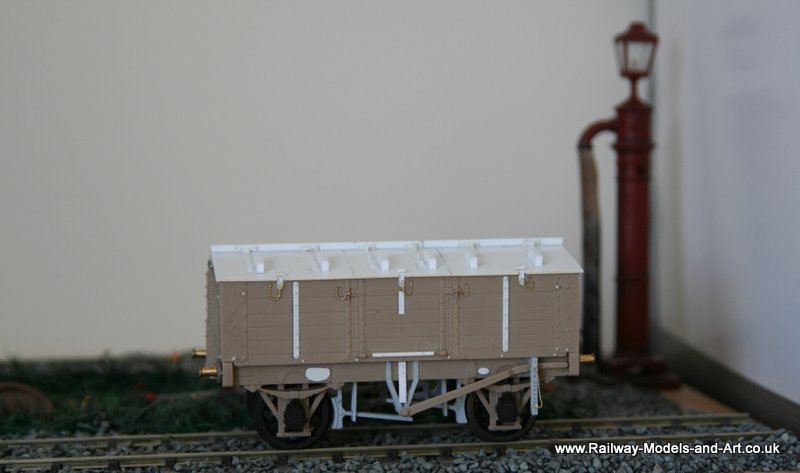
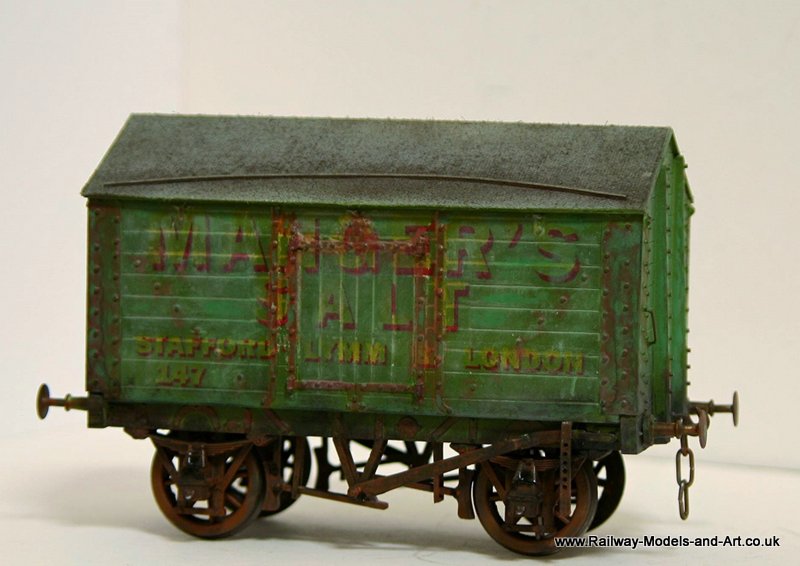
NBR D39B 10 ton van
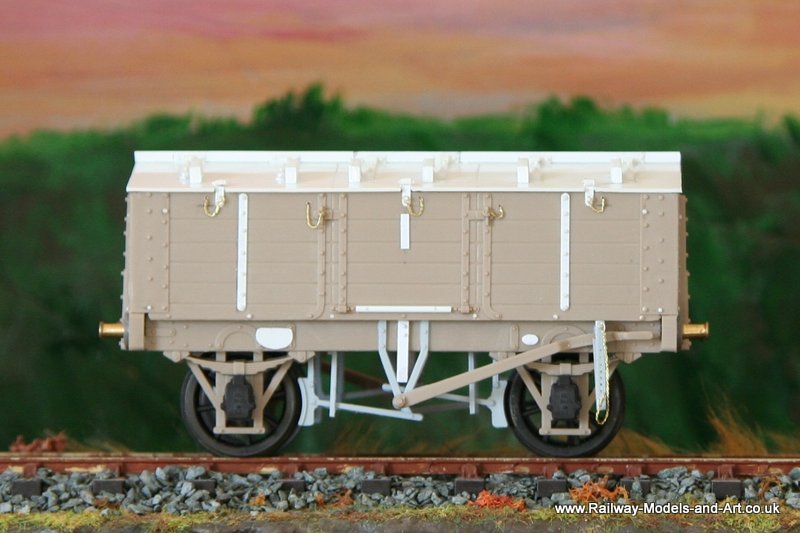
NBR D39B 10 ton van

NBR D39B 10 ton van


 .
.